
Lawn
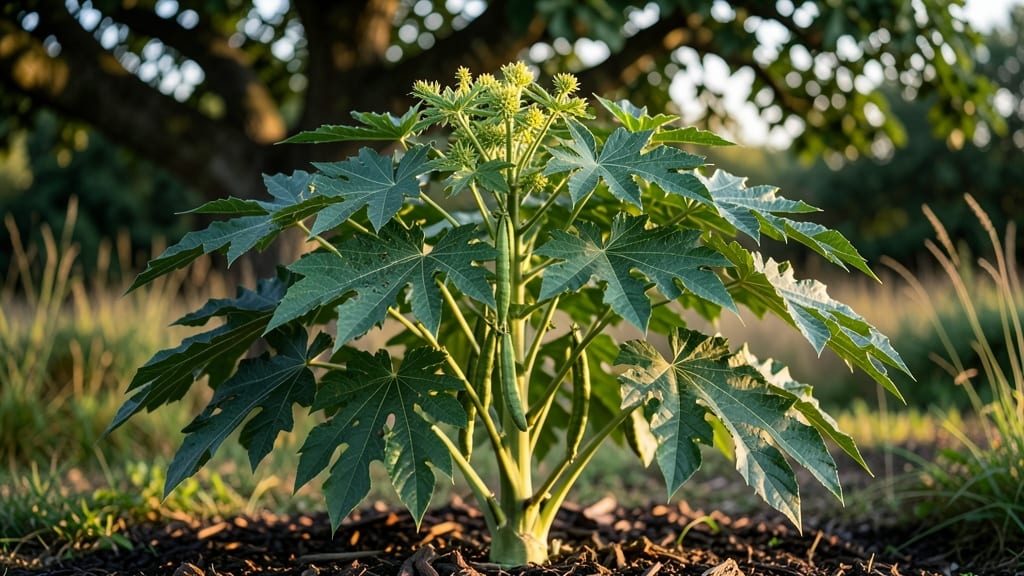
Growing castor beans from seed starts with a cold-stressed viability test—the secret to beating germination challenges. 🌱 I’ve learned that skipping this step means wasting seeds on plants that won’t grow, especially in humid climates where mold thrives.
The test takes just 3 days and saves you from disappointment later. First, gather well-draining soil mix (equal parts sand, peat moss, and compost) and a warm, sunny spot. Castor beans need full sun (6+ hours daily) and consistent moisture—but never soggy soil.
Plant seeds 1 inch deep, spacing them 12 inches apart for their towering growth (some reach 10 feet tall!). Patience is key: germination takes 10-20 days, and seedlings grow fast once they sprout.
By the time they mature, you’ll have striking tropical foliage and potential castor oil production (if you’re in Zones 8-11). The seeds themselves are toxic, so handle them with gloves and keep them away from pets/kids.
Pests like aphids love castor beans, but a strong spray of water usually keeps them at bay. This method works for ornamental gardens or small-scale oil production—just don’t plant them near edibles. Ready to grow? Let’s get those seeds tested and planted!
📚 In This Guide
- What you need
- Instructions
- Tips and common mistakes
- Wrapping up and next steps
What you need
- ● Castor bean seeds: 50–100 seeds (freshly harvested for best results).
- ● Cold storage: A refrigerator (set to 34–38°F (1–3°C)) or a freezer (set to 0°F (-18°C) for extreme testing).
- ● Paper towels or damp cloth: 2–3 sheets (for moisture control).
- ● Plastic bags or airtight containers: 1–2 (to store seeds post-test).
- ● Permanent marker & labels: For tracking seed batches.
- ○ Thermometer (optional but helpful): To monitor temperature consistency.
- ● Timer or stopwatch: To track cold exposure duration (recommended: 24–72 hours).
- ● Notebook or spreadsheet: For recording viability test results.
- ○ Gloves (optional): Castor bean seeds contain ricin—handle with care!
- ● Warm, sunny location: For post-test germination checks (e.g., a windowsill or greenhouse).
- ● Seed germination kit: For precise moisture and warmth control.
- ● Humidity monitor: To ensure optimal conditions during testing.
- ● Second batch of seeds: For comparative testing (e.g., untreated vs. cold-stressed).
Instructions for testing castor bean seed viability through cold stress
Here's how to ensure only the strongest seeds survive before drying and storage.
❄️ Step 1: Select and Prepare Healthy Seeds
Castor beans are hardy but require a viability test before long-term storage. Start by sorting through your harvest—discard any seeds with cracks, mold, or soft spots. Healthy seeds should be firm, smooth, and uniformly colored. I like to spread them on a clean towel to inspect under bright light; this helps spot hidden damage you might miss at a glance.
Once sorted, place the seeds in a single layer on a paper towel. This prevents moisture buildup between seeds, which can encourage rot during the cold test. Label the towel with the date and variety if you're working with multiple batches. Keep them in a dry, shaded area until you're ready to begin the cold treatment.
🧊 Step 2: Apply Cold Stress for 24 Hours
Place the seeds in a sealed plastic bag and store them in your refrigerator at 35-40°F for 24 hours. This cold shock mimics natural winter conditions and helps separate viable seeds from those that won't germinate. The cold stress weakens the seed coats of non-viable seeds, making them easier to identify later.
Don't skip this step—it's the key to filtering out weak seeds before drying. If you're unsure about your fridge's temperature, place a thermometer inside with the seeds to monitor it closely. After 24 hours, remove the bag and let the seeds sit at room temperature for 1-2 hours to equalize their temperature before proceeding.
🌱 Step 3: Test Germination of Cold-Stressed Seeds
Moisten a fresh paper towel with lukewarm water (not hot—just slightly warmer than room temperature) and wring it out until it's damp but not dripping. Place 10-15 seeds from your batch in a single layer on the towel, then roll it up loosely and secure it with a rubber band. This creates a controlled environment for germination testing.
Place the rolled towel in a clear plastic bag and seal it loosely—this traps enough humidity to encourage germination without creating a soggy environment. Store the bag in a warm spot (70-75°F) away from direct sunlight, like on top of your fridge. Check the seeds daily for signs of sprouting, which should appear within 3-5 days for viable seeds.
🌿 Step 4: Separate Viable from Non-Viable Seeds
After 5 days, remove the towel from the bag and examine each seed. Viable seeds will have small white roots or green sprouts emerging. Non-viable seeds will remain unchanged or show signs of mold. Gently separate the viable seeds from the non-viable ones, discarding the latter immediately. This step ensures you only dry and store seeds with the highest chance of successful germination.
If fewer than 50% of your seeds show signs of germination, consider testing another batch. Low viability might indicate poor storage conditions during the initial harvest or issues with seed maturity. For the viable seeds, proceed with drying them properly to maintain their quality for future planting.
⏰ Step 5: Dry and Store Viable Seeds Properly
Spread the viable seeds in a single layer on a clean, dry surface in a well-ventilated area. Keep them out of direct sunlight to prevent overheating, which can damage the seeds. A fan on low speed helps circulate air and speeds up the drying process. Seeds are ready for storage when they feel light and crisp to the touch—this usually takes 3-5 days, depending on humidity levels.
Once dry, store the seeds in an airtight container with a silica gel packet to absorb moisture. Label the container with the date and variety, then place it in a cool, dark location like a pantry or seed storage box. Properly stored castor bean seeds can remain viable for 3-5 years, giving you a reliable supply for future plantings.
Tips & tricks for perfect castor bean seed viability testing
These practical insights will help you maximize your seed viability results with minimal effort.
Selection Precision: During Step 1, use a magnifying glass to inspect seeds more thoroughly. Look for subtle imperfections like tiny cracks or discoloration that might not be visible to the naked eye. I've found that even a single compromised seed can affect the entire batch's viability during cold stress testing. This extra step ensures you're starting with the absolute best seeds possible.
Temperature Consistency: Maintain the 35-40°F range during the 24-hour cold stress in Step 2 by placing your sealed bag on the fridge's coldest shelf, typically the bottom or crisper drawer. Temperature fluctuations can give false results—non-viable seeds might appear viable if exposed to warmer conditions. I recommend using a small refrigerator thermometer for accuracy, especially if your fridge runs hot.
Germination Environment: In Step 3, when setting up your germination test, use a clear plastic container instead of a bag for better visibility. This lets you monitor progress without disturbing the seeds, which is crucial since castor beans are sensitive to handling. The container should have small ventilation holes to prevent condensation buildup that could lead to mold. I've had the best results with containers that have built-in lids with ventilation slots.
Storage Optimization: For Step 5, consider using silica gel packets with color indicators to monitor moisture levels in your storage containers. The color change provides a visual cue when humidity levels rise, allowing you to address potential issues before they compromise seed viability. I store my containers in a dedicated seed storage box with a small digital hygrometer to maintain optimal conditions between 30-40% humidity.
Pro Tips for Seed Castor Bean
- These practical insights will help you maximize your seed viability results with minimal effort.
- Selection Precision: During Step 1, use a magnifying glass to inspect seeds more thoroughly. Look for subtle imperfec...
- Temperature Consistency: Maintain the 35-40°F range during the 24-hour cold stress in Step 2 by placing your sealed b...
Frequently asked questions
Got questions about growing castor bean seeds?
You’re not alone—this fast-growing plant has a few quirks! Below, we tackle the most common concerns to help you grow castor beans like a pro.
Why do castor bean seeds need a cold treatment before planting?
Castor bean seeds often have hard seed coats that prevent water absorption. A cold-stress viability test (like chilling in the fridge) mimics natural winter conditions, breaking dormancy and ensuring faster, more reliable germination. Skip this step, and you might wait weeks—or worse, see no sprouts at all!
How long should I soak castor bean seeds before planting?
Soak seeds for 8–12 hours in warm water to soften the shell and kickstart germination. After soaking, plant them shallowly (½ inch deep) in well-draining soil. Pro tip: Use a paper towel to wrap soaked seeds overnight for even faster results!
Are castor bean seeds toxic? Should I wear gloves when handling them?
Yes, they’re highly toxic if ingested
—every part of the plant contains ricin, a deadly compound. Wear gloves when handling seeds or plants, and keep them away from pets/kids. Even dried seeds can be dangerous! If accidental ingestion occurs, seek emergency medical help immediately.
Can I grow castor beans indoors or only outdoors?
Castor beans thrive outdoors in warm climates (USDA zones 9–11), but you can grow them indoors with bright light (south-facing window or grow lights). Use a deep pot (12+ inches) since they develop long taproots. Just remember: They’re not a houseplant—transplant outdoors once warm weather arrives!
What’s the best alternative if castor beans don’t germinate?
Try these fast-germinating alternatives for similar tropical vibes:
- Sunflower seeds – Quick to sprout (3–7 days) and non-toxic.
- Castor oil plant (Ricinus communis ‘Impala’) – A non-toxic cultivar with ornamental leaves.
- Mexican sunflower (Tithonia) – Drought-tolerant and easy to grow.
How long does it take for castor bean seeds to sprout?
Under ideal conditions (warmth + moisture), seeds sprout in 7–14 days. If using the cold treatment, germination can speed up to 5–10 days. Patience is key—keep soil consistently moist (not soggy) and avoid overwatering, which can cause rot.
Wrapping up and next steps
Growing castor bean seeds can be a rewarding yet delicate process, especially when ensuring their viability after cold stress. By following the steps outlined—from gathering materials to conducting the cold test and proper drying—you’ll maximize your chances of success. Remember, patience and precision are key! 🌱
Ready to take the next step? Once you’ve confirmed your seeds are viable, plant them in well-draining soil and provide them with the warmth and sunlight they crave. Happy growing, and may your garden flourish with these unique and resilient plants! 🌿