
Propagation
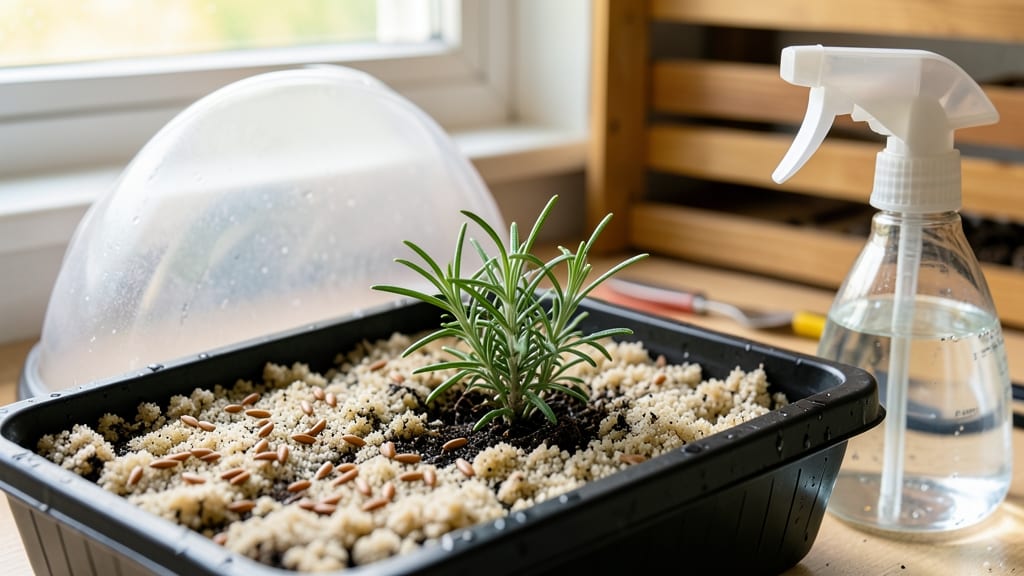
Rosemary seed germination demands cold stratification to break dormancy—otherwise, they’ll sit stubbornly in the soil for months. I’ve struggled with this myself, watching those tiny seeds refuse to cooperate until I learned the trick of mimicking winter’s chill. The key is patience and precision: a cold, moist environment for 6-8 weeks before warmth ever touches them. You’ll need just three simple supplies: a plastic bag, a damp paper towel, and a fridge shelf. No fancy equipment—just a way to replicate winter’s natural conditions. Most seeds sprout within 2-4 weeks after stratification, but some take longer. That’s normal; rosemary isn’t in a hurry. Once they crack open, keep them in bright, indirect light and warm conditions. The seedlings will be tiny and delicate at first, but with consistent moisture and gentle care, they’ll grow into sturdy plants ready for transplanting in 8-12 weeks. The first true leaves are your reward for sticking with it. This method beats cuttings for variety—you can grow rare heirloom rosemary types that aren’t available as cuttings. Just remember: slow and steady wins the race with rosemary seeds. Let’s get those sprouts growing!
📚 In This Guide
- What you need
- Instructions
- Tips and common mistakes
- Wrapping up and next steps
What you need
- ● Rosemary seeds: 10–20 fresh, high-quality seeds (look for organic or non-GMO for best results).
- ● Cold stratification supplies: 1 small plastic bag or container (resealable, 8x5 inches or similar).
- ● 1 cup of damp peat moss or coco coir (moist but not soggy).
- ○ Optional: Vermiculite (1 cup) for better moisture retention.
- ● Growing medium: 1 small seed tray or 4–6 inch pots (with drainage holes).
- ● 1 bag of well-draining potting mix (cactus/succulent mix works well).
- ○ Optional: Perlite or sand (1 part to improve aeration).
- ● Environmental controls: Refrigerator (set to 34–40°F for stratification).
- ● Grow lights or sunny windowsill (6+ hours of light daily after germination).
- ● Spray bottle (for gentle watering).
- ● Miscellaneous: Labels & marker (to track seed batches).
- ● Humidity dome or plastic wrap (to retain moisture during germination).
- ○ Small fan (optional, for airflow once sprouts appear).
- ● Seed scarification tools: Sandpaper (fine-grit) or a knife (to nick seeds if stratification fails).
- ● Fertilizer: Diluted fish emulsion or seaweed extract (for post-germination care).
- ○ Heating mat: (Optional for faster germination in cooler climates).
- ● Growth chart or journal: To track progress and conditions!
Step-by-step guide to germinating rosemary seeds
Here's my foolproof method for breaking rosemary's stubborn germination barrier using cold stratification.
Prepare the Seeds for Cold Treatment
Rosemary seeds have a hard outer coating that requires cold stratification to soften and trigger germination. Place the seeds between two damp paper towels in a sealed plastic bag. I like to fold the towels loosely—just enough to hold the seeds without crushing them. The towels should feel damp but not soaked; excess moisture encourages mold.
Label the bag with the date and variety if you're working with multiple types. Store the sealed bag in your refrigerator's vegetable crisper (typically 34-40°F) for 4-6 weeks. Check the towels weekly—if they dry out, mist them lightly with water. The goal is consistent moisture without sogginess. After 4 weeks, you'll see tiny cracks in the seed coats, signaling they're ready to sprout.
Sow the Stratified Seeds
Fill small 2-3 inch deep seedling trays with a sterile seed-starting mix—never garden soil, as it compacts too easily. I use a mix of 50% peat moss and 50% perlite for rosemary, as it drains well and prevents root rot. Moisten the mix until it holds together when squeezed but doesn’t drip.
Plant the seeds ¼ inch deep—any deeper and they’ll struggle to push through the soil. Space them ½ inch apart in rows, as rosemary seeds germinate slowly and need room to grow without crowding. Press the soil lightly around each seed to ensure good contact. Overwatering now will wash seeds away, so a light misting with a spray bottle is all you need.
Provide Warmth and Humidity for Germination
Rosemary seeds germinate best at 70-75°F, so place the trays on a seedling heat mat set to 75°F. Without one, germination may take 6-8 weeks instead of the 3-4 weeks I’ve seen with consistent warmth. Cover the trays with a clear plastic dome or plastic wrap to retain humidity—rosemary seeds need 80-90% humidity to break dormancy.
Check the trays daily but avoid lifting the dome. Condensation inside is normal, but if you see mold (fuzzy gray spots), remove the dome immediately and let the soil dry slightly before replacing it. Germination is unpredictable—some seeds may sprout in 2 weeks, while others take 6 weeks. Patience is key here; don’t give up if nothing happens in the first 3 weeks.
Transplant Seedlings to Individual Pots
Once seedlings reach 2-3 inches tall and have 2-3 sets of true leaves (not just the initial seed leaves), it’s time to transplant. Use 3-4 inch pots filled with the same peat-perlite mix to prevent shock. Gently remove each seedling, holding it by the leaves (never the stem), and place it in its own pot, burying the stem up to the first set of leaves. This encourages root growth along the buried stem.
Water lightly after transplanting but avoid soggy soil. Place the pots in bright, indirect light for the first week to help them adjust. After that, move them to a south-facing window or under grow lights for 14-16 hours daily. Rosemary is drought-tolerant, but young seedlings need consistent moisture—water when the top inch of soil feels dry.
Harden Off and Prepare for Outdoor Planting
After 4-6 weeks in pots, your rosemary seedlings should be sturdy enough for outdoor life. Begin hardening off by placing them outside in a shaded, sheltered spot for 1-2 hours the first day. Gradually increase their outdoor time over 10-14 days, moving them to direct sunlight for 2-3 hours by the end of the process.
Watch for wilting or leaf drop—this means they’re adjusting too quickly. Once they tolerate full sun and wind without stress, they’re ready for the garden. Plant them in well-draining soil with full sun exposure (at least 6-8 hours daily). Mulch around the base with 1-2 inches of gravel or coarse sand to mimic rosemary’s natural Mediterranean habitat and prevent root rot.
Tips & tricks for perfect rosemary seed germination
Cold stratification might seem intimidating, but these key insights will help you break rosemary's stubborn germination barrier with confidence.
Cold Stratification Precision: The 4-6 week cold treatment is non-negotiable for rosemary seeds, but the refrigerator's vegetable crisper (typically 34-40°F) provides the ideal stable environment. I've found that checking weekly for moisture is critical—damp paper towels should feel like a wrung-out sponge, not a dripping washcloth. This balance prevents mold while maintaining the necessary moisture for seed coat softening. The tiny cracks you'll see at 4 weeks are your signal that stratification worked.
Seedling Trays and Lighting Strategy: Those 2-3 inch deep seedling trays might seem shallow, but they're perfect for rosemary's delicate roots. After sowing at just ¼ inch depth, place trays under a grow light for the 14-16 hours daily recommended—natural light alone often isn't sufficient for consistent germination. I position my lights 6 inches above the trays to prevent overheating, which can stress the emerging seedlings. The bright indirect light during the first week after transplanting is equally crucial for preventing leggy growth.
Transplanting Technique: When transplanting seedlings to 3-4 inch pots, burying the stem up to the first set of true leaves might seem counterintuitive, but this buried stem will develop additional roots. I use a peat-perlite mix because it mimics rosemary's Mediterranean soil conditions while preventing the root rot that garden soil often causes. Watering lightly after transplanting ensures the delicate root systems establish without shock, while the top inch dry test keeps moisture consistent without overwatering.
Pro Tips for Rosemary Seed Germination
- Cold stratification might seem intimidating, but these key insights will help you break rosemary's stubborn germinati...
- Cold Stratification Precision: The 4-6 week cold treatment is non-negotiable for rosemary seeds, but the refrigerator...
- Seedling Trays and Lighting Strategy: Those 2-3 inch deep seedling trays might seem shallow, but they're perfect for ...
Frequently asked questions
Got questions about getting your rosemary seeds to sprout? You’re not alone! Here are answers to the most common concerns—plus a few pro tips to boost your success rate.
How long does rosemary seed germination take?
With cold stratification, expect sprouts in 4–8 weeks—sometimes longer! Patience is key. Keep soil moist (not soggy) and warm (70–75°F) after stratification. If no sprouts appear in 10 weeks, the seeds may need fresh stratification or could be old.
Can I germinate rosemary seeds without cold stratification?
Yes, but success rates drop dramatically. Without stratification, germination may take 3–6 months (or never happen). For best results, always use the cold trick—it mimics winter conditions and breaks dormancy. Skip it at your own risk!
What’s the best soil mix for rosemary seed germination?
Use a light, well-draining mix like:
- 50% peat moss or coco coir (for moisture retention)
- 30% perlite or vermiculite (for aeration)
- 20% sand or horticultural grit (to prevent rot)
Why aren’t my rosemary seeds sprouting?
Common culprits:
- Insufficient stratification: Try 30–60 days in the fridge (not freezer!).
- Too much moisture: Damp soil = rot. Keep it barely moist.
- Old seeds: Rosemary seeds lose viability fast. Use fresh seeds (<1 year old).
- Temperature swings: Keep warm (70–75°F) after stratification.
Should I use rosemary cuttings instead of seeds?
Cuttings are easier and faster
—germination rates for seeds are unpredictable. Snip a 3–4 inch tip, dip in rooting hormone, and plant in damp perlite. Roots form in 2–4 weeks with high success. Save seeds for heirloom varieties or if you’re really patient!
Wrapping up and next steps
Germinating rosemary seeds with cold stratification isn’t just a trick—it’s your secret weapon for reliable, healthy sprouts! 🌱 By mimicking nature’s conditions, you’re giving those tiny seeds the best possible start, whether you’re a seasoned gardener or just beginning your green thumb journey.
Now that you’ve mastered the process, it’s time to put those sprouts to work—transplant them into pots or your garden bed and watch your aromatic rosemary thrive!
🌿 Your Next Step: Planting & Care
Ready to grow? Transplant your seedlings once they’ve developed a few true leaves, keeping soil moist but not soggy. With patience and love, your rosemary will reward you with fragrant foliage—and maybe even a harvest of homegrown seasoning! Happy gardening! 🌟