
Lawn
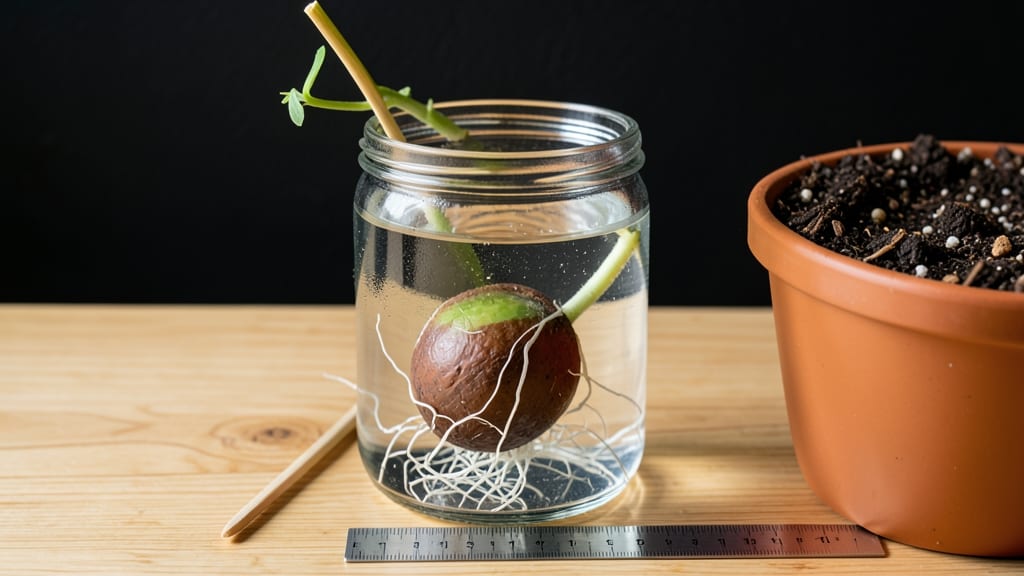
Rooting an avocado seed in water is the easiest gardening experiment you’ll ever try—and it actually works. 🌱 I’ve sprouted dozens this way, and the secret lies in patience, clean water, and a little bit of science you can do with stuff you already have at home.
All you need is a fresh avocado seed, a glass of water, and a toothpick to keep it floating. The process takes about 2-6 weeks for roots to appear, and the best part?
You’ll see progress every few days as those first white tendrils emerge. Most people quit too soon—stick with it, and you’ll have a tiny avocado tree to transplant.
Once roots hit 2-3 inches, it’s time to move to soil. I use a small pot with well-draining mix, and within a month, you’ll spot new leaves—proof your seedling is thriving. The key is keeping the soil moist but not soggy, and giving it bright, indirect light.
Troubleshooting is simple: mold means too much moisture, slow growth means dim light, and yellow leaves usually mean overwatering. With these basics, you’ll avoid the most common pitfalls and end up with a lush little tree that’s ready for its forever home.
📚 In This Guide
- What you need
- Instructions
- Tips and common mistakes
- Wrapping up and next steps
What you need
- ● 1 fresh avocado pit – Choose a seed from a ripe, organic avocado for best results.
- ● 1 glass or jar – A clear container (8–16 oz) with a wide mouth for easy access.
- ● Water – Tap or filtered water is fine; just avoid distilled water.
- ● Toothpicks (2–4) – Wooden or plastic, about 2–3 inches long.
- ● Paper towel or napkin – To keep the pit stable while rooting.
- ● Hydroponic nutrients or seaweed extract – A pinch (¼ tsp) can boost root growth.
- ● Small pebbles or marbles – To weigh down the toothpicks and keep the pit submerged.
- ● Planting soil or coconut coir – For transplanting later (if you’re not keeping it as a water plant!).
- ● Spray bottle – To mist the pit if the water evaporates too quickly.
Step-by-step instructions for rooting avocado seed in water
Here's the simple method I've used to root avocado seeds successfully—no special tools or gardening experience required.
🌱 Step 1: Prepare Your Avocado Seed for Rooting
Start with a fresh avocado pit—one that's still firm and hasn't dried out. Rinse it thoroughly under cool water to remove any remaining fruit flesh. This is where it gets fun: use a clean, sharp knife to carefully slice off the pointed end of the pit. You're aiming to remove about ½ inch of the top, exposing the seed inside.
Here's the thing—don't slice all the way through. You want to create a flat surface where the seed sits, but leave the bottom intact. This top slice will help stabilize the pit when you place it in water. I always soak the exposed seed in warm water for about 10 minutes first—this softens it slightly and makes the next step easier.
💧 Step 2: Set Up the Water Rooters
Fill a clear glass or jar with room-temperature water—just enough to cover about 1 inch of the seed's bottom. I like using a glass with a wide mouth so the pit doesn't tip over easily. Place the prepared pit in the water with the flat side down, making sure the seed stays submerged but the top remains above water.
You'll want to use 4 toothpicks to suspend the pit. Push them gently into the sides of the pit, angling them outward to rest on the rim of the glass. This keeps the pit stable and prevents it from sinking too low. Change the water every 3-4 days—this prevents bacterial growth and keeps the water fresh for root development.
☀️ Step 3: Position for Optimal Root Growth
Place your avocado pit in a spot with bright, indirect light—think east-facing window or under a grow light. Direct sunlight can overheat the water and stress the developing roots. You'll see tiny white roots emerge from the bottom of the pit in about 2-6 weeks, depending on your home's temperature and humidity.
This is the moment that matters: once roots reach about 2-3 inches long, they're ready for the next step. I know it seems weird, but don't rush this part. Patience here ensures strong, healthy roots that will support your plant when you transplant it later. Watch for roots that look firm and white—not brown or mushy.
🌿 Step 4: Transplant the Rooted Seed
When roots reach 2-3 inches, it's time to move your avocado seed to soil. Fill a 6-inch pot with well-draining potting mix—avoid garden soil, as it can compact and suffocate roots. Make a small hole in the center of the pot, about 1-2 inches deep, and gently place the rooted pit in so the seed sits just below the soil surface.
Press the soil lightly around the pit to secure it, but don't pack it down too firmly. Water gently until moisture seeps out the drainage hole, then place the pot in a warm, bright spot. Keep the soil consistently moist but not soggy—you'll know it's right when the top inch feels slightly damp to the touch. This is where most people fail: overwatering leads to root rot, while underwatering stresses the plant.
⏰ Step 5: Care for Your New Avocado Plant
Your avocado plant will need bright light for 6-8 hours daily—a south-facing window or grow light works best. You'll see the first true leaves appear in about 4-8 weeks after transplanting. This is your signal that the plant is thriving. Once leaves reach 3-4 inches, you can fertilize lightly with a balanced, water-soluble fertilizer diluted to half strength.
Real talk: don't expect fruit for years—avocado trees grown from seed can take 5-13 years to bear fruit. But the journey is rewarding. Keep the soil moist, rotate the pot weekly so the plant grows straight, and enjoy watching your kitchen experiment turn into a living plant. If you notice yellow leaves, it's usually a sign of overwatering—let the top inch of soil dry out between waterings.
Tips & tricks for perfect avocado seed sprouting
Here's what nobody tells you about getting those roots to grow strong and healthy—these little details make all the difference.
Seed Preparation: That 10-minute warm water soak in Step 1 is your secret weapon—it softens the seed just enough to make slicing easier without damaging the delicate inner layers. Use a serrated knife for cleaner cuts, and always work on a cutting board (not your countertop) to prevent slipping. Confession: I skipped this step for years and wondered why some seeds rooted faster than others.
Water Quality: Tap water works fine, but if you notice cloudiness or foul smells after 3-4 days, switch to filtered or bottled water. The water should always cover 1 inch of the seed's bottom—any less and roots won't develop properly. I've found that adding a drop of hydrogen peroxide to the water every time you change it (optional) helps prevent bacterial growth and keeps the water cleaner longer.
Light Positioning: That bright, indirect light in Step 3 is non-negotiable—direct sunlight will overheat the water and cook your roots before they even start. Place your glass on a windowsill where you can see sunlight but not feel its heat. A north-facing window works best if you don't have east-facing options. Trust me on this: I've seen roots wither within hours from too much direct sun.
Transplant Timing: Wait until roots reach 2-3 inches before transplanting—this gives you the best chance for survival. The roots should look firm and white, not brown or slimy. When you're ready to transplant, gently rinse the roots to remove any chlorine from the water before placing in soil. This simple step prevents shock to your young plant.
Pro Tips for Rooting An Avocado Seed In Water
- Here's what nobody tells you about getting those roots to grow strong and healthy—these little details make all the d...
- Seed Preparation: That 10-minute warm water soak in Step 1 is your secret weapon—it softens the seed just enough to m...
- Water Quality: Tap water works fine, but if you notice cloudiness or foul smells after 3-4 days, switch to filtered o...
Frequently asked questions
Got questions about growing an avocado seed in water?
You’re not alone—this fun (but finicky) process sparks curiosity! Below, we tackle the most common queries to help you avoid pitfalls and nurture your seedling like a pro.
How long does it take for an avocado seed to root in water?
Patience is key! Most avocado seeds sprout roots in 2–6 weeks, depending on temperature (ideal: 70–85°F) and seed health. Keep the water changed weekly and watch for tiny white roots peeking from the bottom. If nothing happens after 8 weeks, your seed may not be viable—try another!
Why is my avocado seed rotting in water?
Overwatering or poor airflow is the usual culprit. If the seed turns mushy or smells foul, it’s rotting. Fix it: Remove it from water, let it dry for a day, then replant in soil. To prevent this, use only 1–2 inches of water (just enough to cover the roots) and refresh it weekly. A toothpick or mesh can help with drainage!
Can I root an avocado seed without water?
While water is the classic method, you can also plant the seed directly in soil (root-side down, 1–2 inches deep). Keep the soil moist (not soggy) and place it in bright, indirect light. This skips the water phase but may take longer to sprout (4–12 weeks). Some gardeners even use a mix of soil and perlite for better aeration.
How do I know when to move the avocado seedling to soil?
Wait until you see 2–3 inches of healthy roots (usually 4–6 weeks in). Once roots are established, gently transplant the seed into a pot with well-draining soil, burying half of the seed (the part with roots). Water lightly and place in bright, indirect sunlight. Avoid direct sun at first to prevent shock!
Will my avocado tree grow fruit from a seed?
Technically yes, but it’s a marathon, not a sprint! Avocado trees from seeds can take 10–15 years to bear fruit (if they ever do). Plus, the fruit may not be as tasty or predictable as store-bought varieties. For faster results, consider grafting—but that’s an advanced step. Enjoy the journey (and maybe propagate more seeds for fun!)
Wrapping up and next steps
Rooting an avocado seed in water is a simple, rewarding project that brings a touch of green to your home—and yes, it’s easier than you think! 🌱 With patience, consistency, and the right care, you’ll soon be watching roots sprout and growing a thriving plant.
Once your seedling is ready, the next logical step is transplanting it into soil—giving it room to flourish into a full-sized avocado tree!
So grab that seed, follow the steps, and enjoy the journey. Your future avocado tree starts with a single, humble seed! 🌿