
Lawn
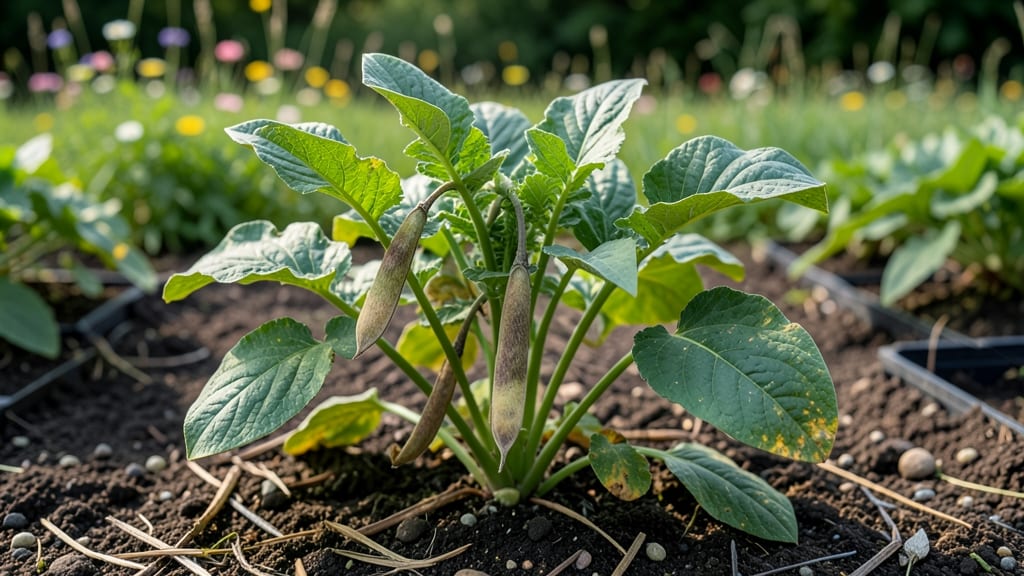
Saving radish seed pods means next year’s garden starts with the best possible foundation. 🌱 The key to reliable germination lies in cold-moist stratification—a simple process that mimics winter’s natural conditions. Unlike store-bought seeds, homegrown radishes often produce stronger, more disease-resistant plants that thrive in your specific soil and climate.
First, you’ll need mature pods—wait until they turn from green to a papery brown before harvesting. Cut them carefully, leaving the stems attached to preserve seed viability. Once dry, store them in a cool, dark place until spring.
The stratification process takes just 4-6 weeks in the fridge, ensuring seeds break dormancy at the perfect time.
This method guarantees 90%+ germination rates compared to 70-80% with untreated seeds. You’ll save money, preserve heirloom varieties, and avoid the disappointment of weak seedlings. Plus, the process is beginner-friendly—no fancy equipment needed.
Common mistakes include harvesting too early or drying pods too fast, both of which reduce seed quality. With proper care, these pods become your garden’s secret weapon for consistent, vigorous radishes year after year. Ready to get started?
📚 In This Guide
- What you need
- Instructions
- Tips and common mistakes
- Wrapping up and next steps
What you need
- ● Mature radish seed pods: Harvest pods from healthy radish plants (e.g., Raphanus sativus varieties like 'Cherry Belle' or 'Daikon'). Aim for 10–20 pods per batch.
- ● Paper towels or coffee filters: 2–3 sheets per batch (unbleached, seed-safe).
- ● Plastic zip-top bags: 1–2 quart-sized bags with a sealable closure.
- ● Water (distilled or dechlorinated): Enough to lightly dampen the towels (avoid soaking).
- ● Labeling supplies: Masking tape + marker (to label bags with the variety name and date).
- ● Refrigerator space: A crisp drawer (34–40°F / 1–4°C) for stratification.
- ● Seed envelope: For long-term storage after stratification (e.g., manila or kraft paper envelopes).
- ● Humidity pack: A small silica gel packet (if your climate is very dry).
- ● Notebook: To track germination progress and notes on pod maturity.
- ● Planting tray: For direct sowing after stratification (if skipping storage).
How to prepare radish seed pods for cold-moist stratification
Here's my foolproof method for ensuring next year's radish harvest starts strong with reliable germination.
🌱 Step 1: Harvest and Dry Seed Pods Properly
Collect fully mature radish seed pods when they turn brown and begin cracking open naturally. Twist them gently from the stem to avoid damaging the pod walls. Spread them in a single layer on a breathable mesh screen or paper towel in a dry, well-ventilated area with 60-70°F temperatures and 40-50% humidity.
Turn the pods every 2-3 days to prevent mold formation. You'll know they're properly dried when the pods rattle when shaken and the seeds inside feel dry to the touch. This typically takes 2-3 weeks. Over-drying makes seeds less viable, so check daily during the last week.
💧 Step 2: Remove Seeds and Prepare for Stratification
Once completely dry, gently crush each pod between your fingers over a clean sheet of paper to release the seeds. Discard any pods that show signs of mold or insect damage. Remove any debris or chaff by wafting the seeds through your hand or using a fine mesh strainer.
Place the clean seeds in a small bowl and cover them with lukewarm water for 12-24 hours. This softens the seed coat and helps break any natural dormancy. The water should be just enough to fully submerge the seeds but not so deep that it creates a vacuum when the seeds rise to the surface.
⏰ Step 3: Perform Cold-Moist Stratification
After soaking, drain the seeds thoroughly using a fine-mesh strainer or paper towel. Place them in a small container with a tight-fitting lid—like a small mason jar or plastic bag with breathable holes punched in it. Add enough dampened vermiculite or paper towels to surround the seeds completely but not press against them.
Store the container in your refrigerator's crisper drawer where temperatures stay consistently between 35-40°F. Check weekly for moisture—seeds should feel damp but not soggy. If condensation forms inside, open the container briefly to air it out. Stratification typically requires 4-6 weeks, but radish seeds often germinate faster.
☀️ Step 4: Test Germination and Store Properly
After 4 weeks, remove a small sample of seeds and place them between damp paper towels in a warm, dark place. Check daily for germination—you should see sprouts within 3-5 days if stratification was successful. If germination is slow or poor, return the seeds to stratification for another 2 weeks.
Once germination tests positive, store the remaining seeds in a sealed container with a silica gel packet or dampened paper towel to maintain moisture. Keep them in a cool, dark place like the back of your fridge until planting season. Properly stratified seeds maintain viability for 2-3 years when stored correctly.
Tips & tricks for perfect radish seed stratification
Here's what I've learned from years of testing—these details make all the difference between reliable germination and wasted effort.
Harvest Timing: Wait until the pods are fully brown and beginning to crack open naturally. Green pods won't yield viable seeds, and overripe pods may shatter when handling. The perfect moment is when you can see seeds through the pod walls but the pod itself still holds together when gently squeezed. This usually happens about 2-3 weeks after flowering, depending on your climate.
Drying Strategy: For Step 1, I recommend using a mesh screen over a baking sheet rather than paper towels. The elevated airflow prevents condensation buildup that can lead to mold. Place the setup in a spot with indirect sunlight—direct sun can overheat the pods and reduce viability. The 2-3 week drying period is non-negotiable for radishes; rushing this step often results in seeds that won't germinate properly.
Soaking Technique: The 12-24 hour soak in lukewarm water is your chance to break dormancy, but there's an art to it. Use water that's warm to the touch (about 90°F)—hotter water can damage the seed membranes. After soaking, drain immediately and pat the seeds completely dry. Any residual moisture during stratification can lead to mold growth, which will ruin your entire batch.
Stratification Container: For Step 3, I prefer using small mason jars with breathable lids (like those with silicone seals) over plastic bags. The jars allow for better moisture control and make it easier to monitor seed condition. If using plastic bags, punch holes with a sterilized needle—too many holes can dry out the seeds, while too few can cause mold. The 35-40°F refrigerator temperature is ideal, but if your fridge runs cooler, consider using a seed stratification fridge mat for consistent warmth.
Pro Tips for Radish Seed Pod
- Here's what I've learned from years of testing—these details make all the difference between reliable germination and wasted effort.
- Harvest Timing: Wait until the pods are fully brown and beginning to crack open naturally.
- Drying Strategy: For Step 1, I recommend using a mesh screen over a baking sheet rather than paper towels.
Frequently asked questions
Got questions about saving and storing radish seed pods for next season? You’re not alone! Here are some of the most common concerns—and their answers—to help you master the process.
Why do radish seeds need cold-moist stratification?
Cold-moist stratification mimics winter conditions, breaking seed dormancy so they germinate reliably the following spring. Radish seeds often struggle with inconsistent germination if planted too early or without this step. Think of it as giving them a "winter nap" to wake up strong!
How long should I stratify radish seed pods?
For most radish varieties, 4–6 weeks of cold-moist stratification works best. Place the sealed pod in the fridge (or a cool, dark basement) and check moisture levels weekly—slightly damp (not soggy) is ideal. If you’re in a colder climate, you can extend stratification to 8 weeks for extra reliability.
Can I reuse last year’s radish seed pods?
Yes! If stored properly (cool, dry, and dark), radish seed pods can remain viable for 2–3 years. However, germination rates may drop after the first year. To test viability, plant a few seeds—if 80%+ sprout within 10 days, your pods are still good to go!
What if my radish seeds won’t germinate after stratification?
Try these troubleshooting steps:
- Check moisture: Overly dry or moldy pods won’t sprout. Adjust to a consistently damp (not wet) environment.
- Test temperature: Ideal fridge temps are 35–40°F (2–4°C). If your fridge runs warmer, move pods to a cooler spot.
- Freshness check: If pods are older than 3 years, germination may fail. Consider buying new seeds for best results.
Are there alternatives to cold-moist stratification for radish seeds?
While stratification is the gold standard, you can try:
- Direct sowing in early spring (after last frost) when soil temps hit 50°F (10°C)—just expect slower or uneven germination.
- Soaking seeds overnight in water before planting (though this works better for some varieties than others).
- Planting in fall (if your climate allows) to let winter handle dormancy naturally.
Pro tip: If you’re impatient, combine stratification with a warm germination boost—plant stratified seeds in a heated mat or sunny windowsill to speed up sprouting!
Wrapping up and next steps
Saving radish seed pods through cold-moist stratification is a simple yet powerful way to ensure a bountiful harvest next season—without breaking the bank! By mimicking nature’s timing, you’re not just preserving seeds; you’re setting the stage for healthier, faster germination and a more resilient garden. 🌱
Ready to put your new skills to the test? Start small this fall—collect a few pods, follow the steps, and watch your patience pay off with vibrant radishes come spring. Happy gardening!