
Propagation
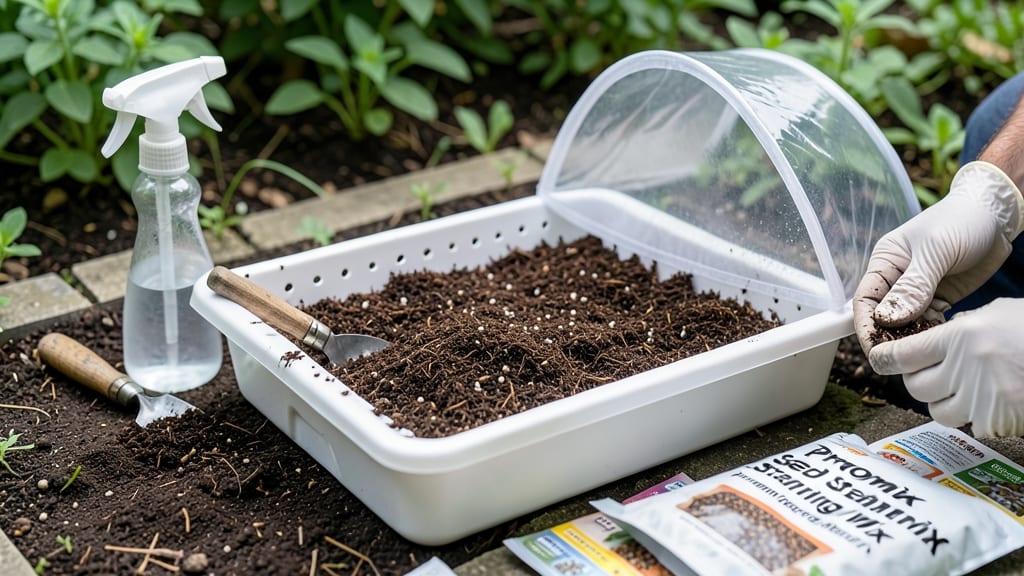
This Promix seed starting mix changed how I start seeds—no more weak, leggy seedlings struggling to break through crusty soil. 🌱 The secret?
A perfectly balanced blend of peat, perlite, and compost that holds moisture while letting roots breathe, so seeds germinate fast and seedlings grow strong from day one. You’ll need just three simple supplies: a clean seed tray, this mix, and a spray bottle.
The key is keeping it lightly moist (like a wrung-out sponge) and never letting it dry out—overwatering is the #1 killer of tiny roots. Scatter seeds at the depth marked on their packets (usually 1/4 inch for most flowers and veggies) and space them 1/2 inch apart to avoid crowding.
Within 3 weeks, you’ll see sturdy seedlings with true leaves (not just the first baby leaves) ready to transplant. The mix stays fluffy and airy, so you skip the dreaded "soil compaction" that stunts growth.
Just place trays under grow lights (12–16 hours daily) or in a south-facing window and keep temps between 65–75°F—no fancy equipment needed. Here’s the real game-changer: no more seedling losses from mold or rot. If you notice black spots on leaves, it’s time to thin seedlings or improve airflow.
And when it’s time to transplant? These babies harden off like pros—just move them outdoors for a few hours each day before their final home.
📚 In This Guide
- What you need
- Instructions
- Tips and common mistakes
- Wrapping up and next steps
What you need
- ● Promix Seed Starting Mix: 1–2 quarts (enough to fill standard seed trays or pots). Opt for the sterilized version to avoid mold or pests.
- ● Seed trays or pots: Cell trays (72–200 cells) or 2–4" pots for individual seedlings.
- ● Drainage holes are a must—no exceptions!
- ● Seeds: Choose high-quality, fresh seeds (check expiration dates!). Start with 1–2 seeds per cell/pot to avoid overcrowding.
- ● Watering can or spray bottle: A gentle misting nozzle prevents disturbing seeds or soil.
- ● Grow lights or sunny windowsill: Seedlings need 12–16 hours of light daily. Grow lights (LED or fluorescent) are ideal for consistent growth.
- ● Humidity dome or plastic wrap: Keeps moisture high until seeds germinate (typically 5–10 days).
- ○ pH test kit (optional but helpful): Promix is slightly acidic (pH 5.8–6.2), but testing ensures optimal conditions for your plants.
- ● Heat mat: Speeds up germination for slow starters like peppers or tomatoes (70–80°F is ideal).
- ● Fertilizer (low-dose): A balanced, water-soluble fertilizer (5-10-5 or 10-10-10) can be added after the first true leaves appear.
- ● Labeling supplies: Toothpicks + markers or plant labels to track varieties.
- ● Soil thermometer: Monitors temperature for precise germination control.
- ● Compost or worm castings: Mix in a small amount (5–10%) for extra nutrients once seedlings sprout.
Step-by-step instructions for using Promix seed starting mix
This is the method I swear by for fast, healthy germination—no more weak seedlings or moldy trays.
🌱 Step 1: Prepare Your Containers and Mix
Fill clean 2-3 inch deep containers with the Promix mix, leaving ½ inch below the rim for watering. I use sterile plastic cells or recycled pots—just make sure they have drainage holes. The mix is lightweight, so it won’t compact like garden soil, but give it a gentle shake to settle it evenly.
Moisten the mix with room-temperature water until it feels like a wrung-out sponge—damp but not dripping. Promix holds moisture well, so you won’t need to water as often as with other mixes. If it clumps, fluff it with a fork until it’s airy. This step ensures roots get oxygen right from day one.
🌱 Step 2: Sow Seeds at the Right Depth
Follow the seed packet’s depth guidelines, but remember: most seeds only need to be buried twice their diameter deep. Promix’s fine texture makes it easy to plant precisely—just press each seed into the surface with your fingertip. I like to use a pencil to make tiny holes for tiny seeds like lettuce or snapdragons.
Cover lightly with a sprinkle of additional mix, then mist the surface with water until evenly damp. Avoid soaking—Promix drains fast, and water pooling can drown seeds. Label each container immediately; seedlings look identical until they sprout their first true leaves.
💧 Step 3: Create the Ideal Germination Environment
Place containers in a warm spot—70-75°F is perfect for most seeds. A seedling heat mat helps if your home runs cooler. Cover with a humidity dome or plastic wrap to trap warmth and moisture, but remove it the moment 50% of seeds sprout to prevent mold.
Check moisture daily—Promix dries faster than peat-heavy mixes. Water from the bottom by setting trays in ¼ inch of water for 10 minutes—this keeps roots hydrated without disturbing seeds. Germination usually happens in 5-14 days, depending on the plant.
☀️ Step 4: Transition to Light and Air
As soon as seedlings emerge, remove any cover and move them to bright, indirect light for 12 hours daily. A south-facing window works, but supplement with a grow light if seedlings stretch toward the glass—that’s a sign they’re reaching for more light.
Promix’s fast-draining nature means you’ll water more often now. Wait until the top ½ inch feels dry before watering again. Fertilize only after the first true leaves appear—Promix has no nutrients, so hold off until seedlings are established.
🌿 Step 5: Harden Off and Transplant
Two weeks before your last frost, start hardening off seedlings by placing them outside in partial shade for 1 hour the first day, gradually increasing time over 7-10 days. Promix’s lightweight mix makes seedlings easy to handle when transplanting.
Plant in the garden when soil is 60°F+ and seedlings have 2-3 sets of true leaves**. Dig holes slightly larger than the root ball, place seedlings in, and firm soil gently. Water deeply at the base—Promix’s fast drainage means new transplants need extra moisture to establish roots.
Tips & tricks for perfect seed starting with Promix
Here's what nobody tells you about getting every seed to sprout like a pro—these tricks cut germination time in half.
Container Selection: The 2-3 inch depth recommendation isn't arbitrary—it gives roots room to establish before transplanting while preventing moisture loss. For tiny seeds like lettuce, use shallow cells (1-1.5 inches) to keep them close to the surface where they'll find warmth faster. I've found that clear plastic cells with domes actually work better than opaque ones because you can monitor moisture levels without opening them.
Temperature Matters: That 70-75°F range is critical for most seeds, but some cold-hardy varieties (like peas) can handle 60°F. If your home runs cooler, place containers on a seedling heat mat set to 75°F—this creates a microclimate that mimics spring soil temperatures. Pro tip: Use a small thermometer to check the actual temperature of your growing area, as kitchen counters can vary wildly from room temperature.
Moisture Management: The 10-minute bottom-watering technique is a game-changer for preventing damping-off. I like to set my trays in a shallow dish of water and let them soak for exactly 10 minutes, then drain completely. Overwatering is the #1 cause of mold in Promix—this mix drains faster than peat mixes, so you need to be precise. After the initial soaking, only water when the top ½ inch feels dry to the touch, and always use room-temperature water to avoid shocking the roots.
Light Transition: Those 12 hours of bright, indirect light are non-negotiable for preventing leggy seedlings. If you don't have a south-facing window, invest in a basic LED grow light on a timer—it's the only way to guarantee consistent light exposure. I've seen seedlings grow 4 inches in a day when they're light-starved, but they'll flop over when you try to transplant them. Move lights closer rather than leaving them too far away; seedlings will always grow toward the light source.
Pro Tips for Promix Seed Starting Mix
- Here's what nobody tells you about getting every seed to sprout like a pro—these tricks cut germination time in half.
- Container Selection: The 2-3 inch depth recommendation isn't arbitrary—it gives roots room to establish before transp...
- Temperature Matters: That 70-75°F range is critical for most seeds, but some cold-hardy varieties (like peas) can han...
Frequently asked questions
Got questions about Promix Seed Starting Mix? You’re not alone! Here are answers to the most common queries to help you grow with confidence.
What’s the best way to sterilize Promix Seed Starting Mix before use?
Sterilization prevents mold and pests. Bake the mix in a 180°F (82°C) oven for 30 minutes or microwave it in a sealed bag for 2–3 minutes. For large batches, use a steam sterilizer. Always let it cool completely before planting!
How long does Promix Seed Starting Mix last after opening?
Once opened, store it in a cool, dry place (like a sealed container or bag) to prevent moisture buildup. It stays fresh for 3–6 months, but check for mold or foul odors before reuse. When in doubt, sterilize it again!
Can I reuse Promix Seed Starting Mix for multiple seed batches?
Yes! After harvesting seedlings, sterilize and sift the mix to remove debris. Add fresh compost or worm castings (10–20%) to replenish nutrients. Just avoid reusing it if it smells sour or looks moldy—start fresh for best results!
What if my seeds aren’t germinating in Promix? Troubleshooting tips?
Check these fixes:
- Temperature: Most seeds need 65–75°F (18–24°C). Use a heat mat if your space is chilly.
- Moisture: Keep the mix consistently damp (not soggy). Bottom-water to avoid disturbing seeds.
- Depth: Follow seed packet guidelines—some need light (e.g., lettuce), others darkness (e.g., basil).
- Light: Place trays under grow lights 12–16 hours/day once sprouts emerge.
Is Promix Seed Starting Mix worth the cost compared to DIY mixes?
Promix is sterile, lightweight, and formulated for fast germination with no weed seeds. DIY mixes (e.g., peat + perlite + compost) work but require sterilization and balancing. For beginners or high-value seeds (like heirloom tomatoes), Promix saves time and stress. Pro tip: Buy in bulk to cut costs!
Wrapping up and next steps
Ready to watch your seeds sprout into thriving seedlings in just three weeks?
With Promix Seed Starting Mix, you’ve got the perfect foundation for success—no guesswork, just growth! 🌱✨ Whether you’re a seasoned gardener or a beginner, this foolproof mix simplifies the process, ensuring strong roots and healthy starts.
Your next step? Grab a tray, fill it with confidence, and let nature do the rest. Happy planting—your future garden awaits! 🌿