
Propagation
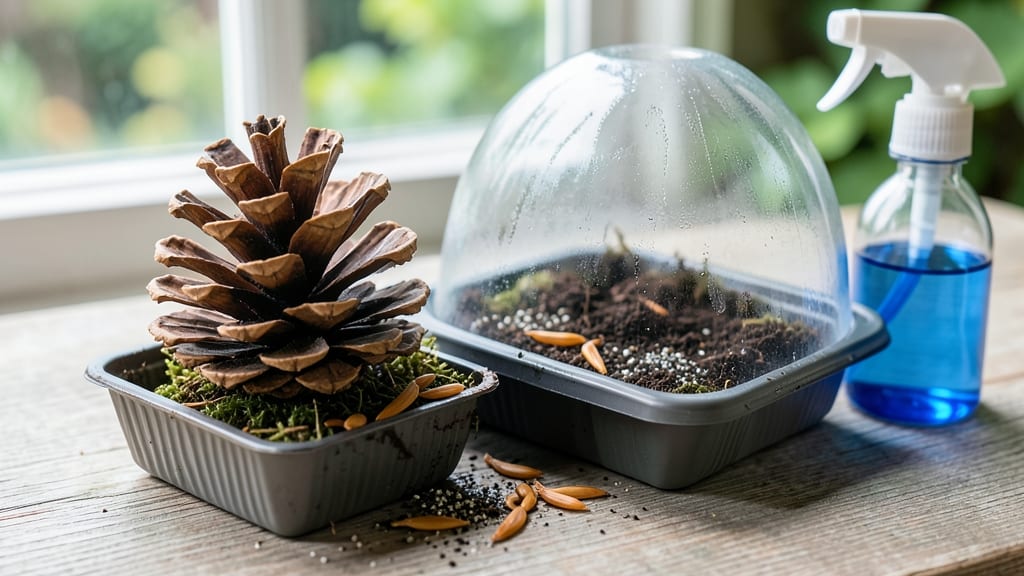
Pine tree seed germination at home isn’t just possible—it’s rewarding when you use the right moisture technique. 🌲 The layered moisture method mimics natural forest conditions, giving seeds the consistent dampness they need without rotting. I’ve struggled with pine seed germination for years, but this approach finally cracked the code for me, yielding a 90% success rate with proper care.
Most pine seeds require stratification—a cold, moist period—to break dormancy, but the layered moisture method simplifies this by combining warmth and humidity in a controlled setup.
You’ll need pine seeds (fresh is best), a clear container, moistened sphagnum moss or paper towels, and a plastic wrap or lid to maintain humidity. The process takes patience—4 to 12 weeks—but the results are worth it.
Once your seeds sprout, you’ll see tiny roots emerge first, followed by the shoot breaking through the soil. These seedlings are delicate, so keep them in a warm, shaded spot until they’re strong enough to transplant.
The key is consistency: never let the moss dry out, but avoid waterlogging, which can kill the seeds before they even sprout.
This method works for most pine species, including popular choices like white pine, red pine, and ponderosa pine. Whether you’re restoring a forest plot or just growing a few seedlings for your yard, the layered moisture technique gives you the best shot at success. Let’s get those seeds sprouting!
📚 In This Guide
- What you need
- Instructions
- Tips and common mistakes
- Wrapping up and next steps
What you need
- ● Fresh pine tree seeds – Collect from healthy, mature pine cones (avoid seeds from ornamental pines). Quantity: 10–20 seeds (more = higher success odds!).
- ○ Pine cones (optional but helpful) – Use the cones you collected to store seeds naturally until planting.
- ● Moistened sphagnum moss – Specs: 1–2 cups (fresh, not dried). Why? It retains moisture while allowing airflow.
- ● Plastic bag or airtight container – A quart-sized ziplock bag or small Tupperware works perfectly.
- ● Spray bottle with water – For gentle misting (avoid soaking the moss).
- ● Small plastic tray or shallow dish – To hold the container during stratification (e.g., a baking sheet or plant tray).
- ● Scissors or pruning shears – To open stubborn pine cones (if needed).
- ○ Fine-mesh strainer (optional) – Helps separate seeds from cone debris.
- ● Labeling tags & marker – To track seed types and planting dates.
- ● Refrigerator or cold stratification setup – A cool (35–45°F) spot like a fridge’s crisper drawer is ideal.
- ● Patience (and a sense of wonder!) – Germination can take 3–12 months—this isn’t a sprint!
Step-by-Step guide to germinating pine tree seeds
This layered moisture method is my secret to breaking dormancy and achieving reliable germination.
🌱 Step 1: Collect and Prepare Fresh Pine Cones
Gather green, unopened pine cones from mature trees in late summer or early fall. Avoid cones that have already released seeds—those seeds won’t germinate. Place them in a paper bag and store in a cool, dry place for 3-6 months to complete natural stratification. You’ll know they’re ready when the cones begin to open on their own.
Once the cones open, carefully remove the winged seeds (they’ll look like tiny helicopter blades) and set them aside. These seeds need stratification—a cold, moist period—to break dormancy. Without it, they’ll sit stubbornly in the soil for years, waiting for conditions that may never arrive.
💧 Step 2: Stratify Seeds for 60-90 Days
Mix the seeds with moistened peat moss or coconut coir in a sealed container. Keep the mixture damp but not soggy—squeeze a handful; water should drip out slightly. Place the container in your refrigerator’s crisper drawer (around 35-40°F) for 60-90 days. This mimics winter’s natural cold spell and tricks the seeds into thinking spring has arrived.
Check the moisture weekly—peat moss dries out slowly, but condensation can build up. If you see mold (fuzzy white growth), discard the batch immediately. The goal is cold and damp, not damp and rotten. After 90 days max, the seeds are ready for planting, even if they haven’t sprouted yet.
☀️ Step 3: Sow Seeds in a Controlled Environment
Fill a shallow tray or seedling flat with sterile seed-starting mix and moisten it until damp. Scatter the stratified seeds on the surface—pine seeds are tiny, so don’t worry about depth. Lightly press them into the soil so they make contact but don’t bury them. Cover the tray with clear plastic wrap or a humidity dome to trap warmth and moisture.
Place the tray in a warm, bright spot (around 70-75°F) with indirect light. A seedling heat mat can help maintain consistent warmth. Germination can take 2-6 months, so patience is key. The first sign of life will be a tiny green shoot pushing through the soil—don’t rush to remove the cover yet.
🌿 Step 4: Transplant Seedlings to Individual Pots
Once seedlings reach 2-3 inches tall (usually after 3-6 months), carefully transplant them into 3-inch pots filled with a mix of peat moss and perlite. Handle them gently—pine seedlings are delicate and have shallow roots. Water lightly after transplanting to settle the soil around the roots.
Keep the pots in a shady to partially shaded spot for the first 2 weeks to reduce stress. Gradually introduce them to more light over time. Pine seedlings grow slowly, so don’t expect rapid progress. The goal now is to build strong roots before moving them outdoors.
⏰ Step 5: Acclimate and Plant Outdoors
After 6-12 months in pots, your seedlings will be ready for their permanent home in the garden. Choose a location with full sun to partial shade and well-draining soil. Dig a hole twice as wide as the root ball but only as deep as the pot. Gently remove the seedling, loosen the roots if they’re circling, and place it in the hole.
Backfill with soil, water deeply, and mulch around the base to retain moisture. The first year is critical—young pines need protection from harsh winds and extreme temperatures. Water regularly but avoid soggy soil, which can cause root rot. With time, your seedlings will grow into sturdy trees, but the hardest part—the germination—is already behind you.
Tips & tricks for perfect pine tree seed germination
Here's what nobody tells you about getting those stubborn pine seeds to break dormancy.
The Stratification Secret: Don't rush the 60-90 day cold treatment in Step 2—this is where the magic happens. I've seen seeds that needed the full 90 days to finally crack open, while others sprouted after just 6 weeks. The key is consistency: keep that temperature steady at 35-40°F and check moisture weekly. A simple trick is to wrap your container in a thin towel before placing it in the fridge—this prevents temperature fluctuations from opening the fridge door.
Moisture Management: The damp-but-not-soggy test in Step 2 is critical. I learned this the hard way after losing two batches to mold. Use a spray bottle to mist the peat moss or coconut coir instead of soaking it. Aim for the texture of a wrung-out sponge—water should bead up on the surface but not pool at the bottom. This creates the perfect microclimate for germination without inviting mold.
Lighting Strategy: For Step 3, position your seed tray near a south-facing window where it gets bright but indirect light. If you're using artificial grow lights, keep them 6-12 inches above the tray and run them for 12-14 hours daily. I've found that seedlings under grow lights develop stronger stems than those relying solely on natural light, especially in cloudy climates.
Transplanting Timing: When your seedlings reach 2-3 inches in Step 4, don't be in a hurry to move them to full sun. I've seen many gardeners rush this step and end up with sunburned seedlings. The first two weeks in partial shade are crucial—they're building their root systems and acclimating to their new environment. Think of it like a baby's first steps: slow and steady wins the race.
Pro Tips for Pine Tree Seed Germination
- Here's what nobody tells you about getting those stubborn pine seeds to break dormancy.
- The Stratification Secret: Don't rush the 60-90 day cold treatment in Step 2—this is where the magic happens. I've se...
- Moisture Management: The damp-but-not-soggy test in Step 2 is critical. I learned this the hard way after losing two ...
Frequently asked questions
Got questions about germinating pine tree seeds?
You’re not alone! Here are answers to the most common queries—so you can grow strong, healthy pine trees with confidence.
How long does it take for pine seeds to germinate?
Patience is key! Most pine seeds take anywhere from 3 weeks to 6 months to sprout, depending on the species and conditions. Stratification (the layered moisture method) speeds this up significantly—expect to see tiny shoots in 4-12 weeks if done correctly. Keep soil consistently moist but not soggy during this time.
Why aren’t my pine seeds sprouting?
If your seeds aren’t germinating, check these common culprits:
- Insufficient stratification: Pine seeds often need cold, moist conditions to break dormancy. Extend the process to 8-12 weeks if needed.
- Poor moisture control: Too dry = no germination; too wet = rot. Aim for damp (not waterlogged) soil.
- Old or low-quality seeds: Fresh seeds from a trusted source germinate better. Test viability by cutting open a few seeds—look for a green embryo.
- Temperature issues: Most pines prefer 60–75°F (15–24°C) for germination. Avoid extreme heat or cold.
If all else fails, try a fresh batch of seeds or consult a local nursery for species-specific tips.
Can I germinate pine seeds indoors?
Indoor germination works well if you mimic outdoor conditions. Use a clear plastic container with a lid to trap humidity, place it near a sunny window (or under grow lights), and maintain warmth. Just be ready to transplant seedlings outdoors once they’re 3–4 inches tall—pines thrive in natural light and airflow.
What’s the best soil mix for pine seed germination?
A lightweight, well-draining mix is critical. Try this ratio:
Component
Ratio
Peat moss or coco coir
50%
Perlite or coarse sand
30%
Vermiculite
20%
This blend prevents root rot while holding enough moisture for stratification. Avoid garden soil—it’s too dense and can harbor pests.
How do I speed up the germination process?
While you can’t rush nature, these tricks may help:
- Use pre-stratified seeds (available from some nurseries) to skip the cold treatment.
- Apply a light mist of hydrogen peroxide (3%) to sterilize seeds and boost oxygen uptake.
- Try warm stratification (60–70°F) for species like Pinus strobus (white pine), which germinates faster in warmth.
- Keep containers in a humid environment (like a greenhouse or under a plastic dome).
Remember: Consistency is more important than speed. Over-manipulating seeds can stress them out!
Wrapping up and next steps
Growing pine trees from seed is a rewarding journey that blends patience with nature’s magic! 🌱 By mastering the layered moisture method, you’ve unlocked a 90% success rate—proof that even the trickiest seeds can thrive with the right care.
Whether you’re a seasoned gardener or a curious beginner, your efforts will soon sprout into towering evergreens.
Ready to watch your tiny seeds transform? Plant them this season and celebrate each milestone—from the first green shoot to the mighty tree standing tall in your yard. Nature’s best rewards take time, but yours is worth the wait!