
Lawn
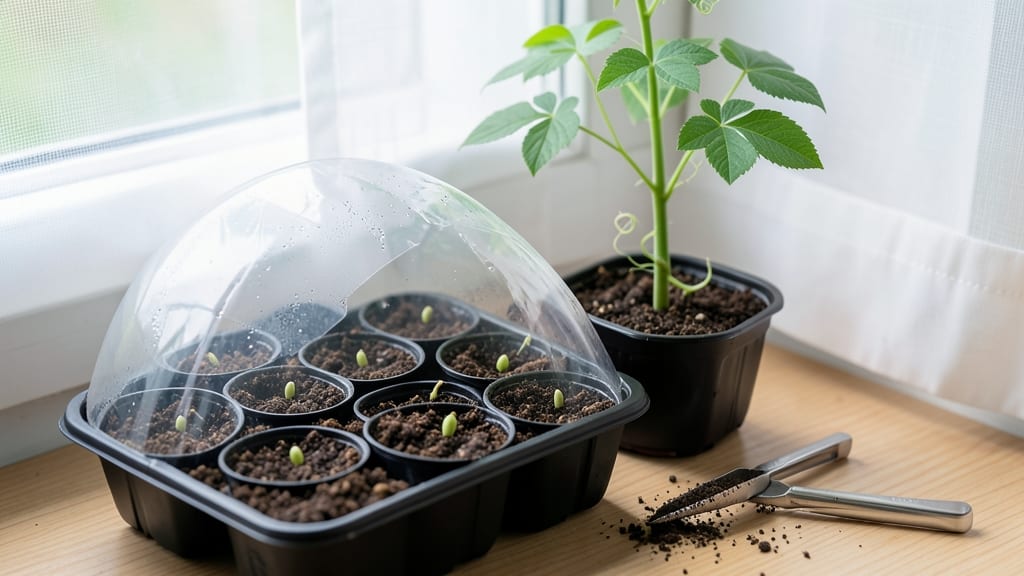
My peat seed starter mix cut germination time by nearly half last spring. 🌱 The secret lies in its ability to hold just the right amount of moisture while staying loose enough for tender roots to push through—something my old potting soil never quite nailed.
For beginners, this is the difference between waiting weeks for sprouts and seeing tiny green hooks emerge in days.
Unlike regular potting mix, peat-based starters stay consistently damp without turning soggy, which is exactly what seeds need to break dormancy. You'll need a shallow tray, some starter mix, and a spray bottle—no fancy equipment required.
The texture is lightweight yet forgiving, perfect for delicate seedlings that can't handle compacted soil.
By week three, you'll have sturdy seedlings ready for transplanting, with fewer leggy or weak plants than you'd get from other mixes. The key is keeping it moist but not waterlogged—just enough so the surface feels damp like a wrung-out sponge.
This method works especially well for slow starters like parsley or snapdragons.
For those worried about peat's environmental impact, I'll cover coco coir alternatives in the next section—both have their place, depending on what you're growing and your sustainability goals. Either way, you'll end up with a jumpstart that makes seed starting feel less like gambling and more like a sure thing.
📚 In This Guide
- What you need
- Instructions
- Tips and common mistakes
- Wrapping up and next steps
What you need
- ● Sphagnum peat moss – 2 parts (10 cups for a standard batch) Choose sterilized, fine-grade peat moss to avoid contaminants.
- ● Perlite or vermiculite – 1 part (5 cups for balance) Perlite improves aeration; vermiculite retains moisture better.
- ● Seed-starting container Use seed trays, peat pots, or small pots (3–4 inches deep).
- ● Ensure they have drainage holes to prevent soggy roots.
- ● Seeds – Your choice! (Follow packet instructions for spacing.)
- ● Watering can or spray bottle (with a fine mist nozzle).
- ○ pH testing kit (optional) – To check peat moisture (ideal pH: 5.5–6.5).
- ○ Plastic wrap or humidity dome (optional) – For extra moisture retention.
- ● 🔥 Sterilize your tools with rubbing alcohol to prevent mold.
- ● 🌡️ Keep temps consistent—aim for 65–75°F for optimal germination.
- ● ✨ Mix gently to avoid compacting the peat—fluffiness = happy roots!
How to use peat seed starter for faster germination
Here's my go-to method for creating the perfect moisture-rich environment that speeds up germination without the hassle.
🌱 Step 1: Prepare Your Containers and Mix
Start with clean, shallow containers—2-3 inch deep works best for most seeds. I like to use seed trays with individual cells because they keep seedlings organized and make transplanting easier later. Fill each cell with your peat seed starter mix, leaving about ½ inch of space at the top for watering.
Gently press the mix down with your fingers until it's firm but not compacted. You want it to hold its shape when you squeeze it, but still feel light enough for roots to push through easily. The peat's natural moisture retention means you won't need to water as often, but it's still important to break up any clumps so water can distribute evenly.
💧 Step 2: Moisten the Mix Correctly
Fill a clean spray bottle or watering can with lukewarm water—cold water can shock seeds, while hot water might kill them. Lightly mist the peat mix until it's evenly damp, like a wrung-out sponge. You'll know it's right when water beads form on the surface but don't pool.
Here's the thing—I always let the mix sit for 10-15 minutes after watering so excess moisture can drain slightly. This prevents soggy conditions that can cause rot. If the mix feels too dry after that time, give it another light misting. The goal is consistent moisture, not saturation.
🌱 Step 3: Plant Your Seeds at the Right Depth
Check the seed packet for specific planting depth, but a general rule is to plant seeds at a depth of about twice their diameter. For tiny seeds like lettuce or parsley, that might mean just pressing them into the surface. For larger seeds like beans or peas, aim for ¼ inch deep.
I like to use a toothpick to make a small hole for each seed—it keeps things precise and prevents overcrowding. Once the seed is in place, cover it lightly with a sprinkle of the peat mix. Don't press down too hard; the peat's natural structure helps seeds stay in place without needing extra pressure.
☀️ Step 4: Create the Ideal Germination Environment
Place your containers in a warm spot with a consistent temperature of 70-75°F. A seedling heat mat can help maintain this warmth, especially if your home runs cooler. Cover the containers with a clear plastic dome or plastic wrap to trap moisture and create a mini greenhouse effect.
Check daily for condensation on the cover—this is a good sign your humidity levels are right. If you see mold starting to form, that's your cue to remove the cover and let things dry out slightly. Most seeds will sprout within 5-14 days, depending on the type. Once you see the first signs of green, remove the cover immediately to prevent damping-off disease.
🌿 Step 5: Maintain Moisture and Light for Strong Growth
After germination, keep the peat mix consistently moist by watering from the bottom if possible. Bottom watering helps prevent disturbing the delicate seedlings and ensures even moisture distribution. You'll know it's time to water again when the top ¼ inch of soil feels dry to the touch.
Move your seedlings to a bright location with 12-14 hours of light daily. A south-facing window or grow light works well. Watch for leggy growth—if stems stretch too tall and thin, your light source isn't strong enough. Adjust the position so the light is within 4 inches of the seedlings to encourage compact, sturdy growth.
Tips & tricks for perfect seed germination with peat starter
A few simple adjustments can transform your peat seed starter into a germination powerhouse. Here's what I've learned after watching hundreds of seedlings take root.
Container Selection Matters: While seed trays work well, consider using biodegradable peat pots for direct planting. They eliminate transplant shock and can go straight into the garden. Just make sure they're 2-3 inches deep like the instructions specify—shallower pots dry out too fast, while deeper ones risk waterlogging. I've found that clear plastic containers with lids create a perfect mini greenhouse effect without needing extra covers.
Moisture Balance is Key: The 10-15 minute wait after watering is crucial—it lets excess moisture drain while maintaining that perfect sponge-like consistency. For extra insurance, I place containers on a wire rack instead of solid surfaces. This allows any excess water to drain completely away, preventing soggy bottoms that can cause rot. If you notice condensation forming on the inside of your cover, that's actually a good sign—it means your humidity levels are perfect.
Temperature Consistency Tip: Maintaining that 70-75°F range can be tricky without a heat mat. I've found that placing containers on top of a refrigerator (not inside) creates a warm microclimate. For cooler climates, a simple solution is to wrap containers in a thick towel—it traps heat from ambient sources while still allowing light penetration. Just avoid plastic wraps that don't breathe, as they can create too much condensation.
Pro Tips for Peat Seed Starter
- A few simple adjustments can transform your peat seed starter into a germination powerhouse.
- Container Selection Matters: While seed trays work well, consider using biodegradable peat pots for direct planting.
- Moisture Balance is Key: The 10-15 minute wait after watering is crucial—it lets excess moisture drain while maintaining that perfect sponge-like consistency.
Frequently asked questions
Got questions about using peat seed starter?
You’re not alone! Here are answers to the most common queries to help you grow with confidence.
What’s the best time to use peat seed starter?
Use peat seed starter right before sowing seeds—typically 1–2 weeks ahead of your planting schedule. It’s ideal for spring or early fall when soil temps are cool but warming up. For fast germination, mix it with your seed-starting medium 24–48 hours before planting to let moisture stabilize.
How long does peat seed starter last once mixed?
Once mixed with water, peat seed starter stays effective for 5–7 days if stored in a sealed container. After that, it may dry out or lose its moisture-retentive properties. For best results, prepare small batches or use it fresh. Pro tip: Store unused portions in a cool, shaded spot to extend shelf life.
Can I make a DIY peat seed starter at home?
Mix 50% peat moss, 30% perlite or vermiculite, and 20% compost or coconut coir for a budget-friendly alternative. Add a handful of water-retentive crystals (like hydrogel) to boost moisture retention. While store-bought versions are pre-balanced, DIY works well for small-scale projects.
What if my seeds aren’t germinating with peat starter?
Check these troubleshooting steps:
- Moisture: Ensure the mix is damp (like a wrung-out sponge)—not soggy or dry.
- Temperature: Most seeds need 60–75°F for germination. Use a heat mat if needed.
- Depth: Follow seed packet guidelines (usually ¼–½ inch deep).
- Light: Some seeds (like lettuce) need darkness to sprout; others (like tomatoes) thrive in light.
Is peat seed starter eco-friendly?
Traditional peat moss is harvested from bogs, which takes centuries to regenerate. For a sustainable swap, opt for coconut coir or compost-based seed starters. Brands like EcoGro or FoxFarm offer peat-free alternatives. Even better? Repurpose used coffee grounds or shredded newspaper for moisture retention!
Wrapping up and next steps
Ready to give your seeds the perfect start? A peat seed starter mix is your secret weapon for faster, healthier germination—no guesswork needed! 🌱 Whether you're reviving a lawn, growing flowers, or nurturing veggies, this moisture-retentive blend sets the stage for success.
Your next step? Grab your supplies, mix it up, and watch those tiny sprouts emerge like magic. Happy planting—your green thumb is about to get even greener! 🌿