
Lawn
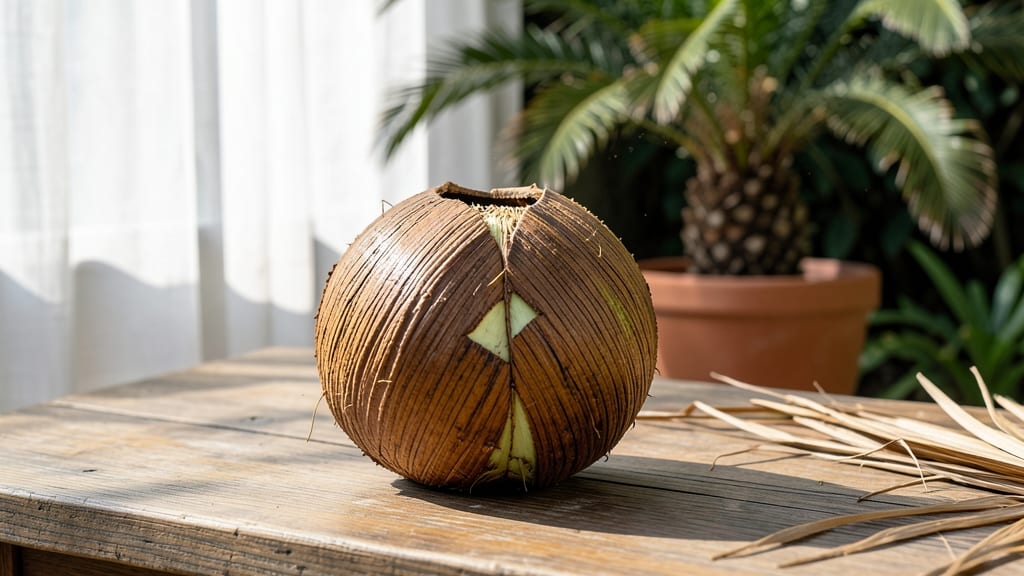
Your palm tree seed pods don’t have to end up in the trash—they can become stunning, zero-waste garden art that adds texture and warmth to your outdoor space. ✨ I’ve turned dozens of these natural treasures into everything from rustic wind chimes to sculptural planters, and the best part?
No twisting, no mess, just pure creative potential waiting to be unlocked.
Start with just a handful of pods—cleaned, dried, and ready to transform. You’ll need basic craft supplies like glue, string, or wire, plus a little patience to arrange them into something uniquely yours.
The possibilities are endless: organic sculptures, hanging decorations, or even functional pieces like seed pod birdhouses that double as art.
What you’ll end up with is a collection of pieces that feel like they belong in your garden—earthy, organic, and full of character. Each project takes less than an hour, and the results will make your space feel more intentional and connected to nature.
Plus, it’s a great way to repurpose what would otherwise be yard waste.
Whether you’re crafting for your own backyard or gifting handmade decor, these ideas work in any outdoor setting—balconies, patios, or even indoor spaces with natural light. Let’s get started with a few simple but stunning projects that turn trash into treasure.
📚 In This Guide
- What you need
- Instructions
- Tips and common mistakes
- Wrapping up and next steps
What you need
- ● Palm tree seed pods: Collect clean, dry pods (no mold or pests). Aim for 5–10 pods depending on your project size.
- ● Sandpaper (medium/fine grit, 120–220): 1 sheet to smooth rough edges and surfaces.
- ○ Acrylic paint or natural dyes: 2–3 colors (optional for coloring pods). Water-based options are eco-friendly!
- ● Sealing varnish (matte or glossy): 1 small bottle (waterproof for outdoor pieces).
- ● Twine, jute, or hemp cord: 1–2 yards (for hanging or weaving).
- ● Pliers (needle-nose for fine details): 1 pair to pry open pods gently.
- ● Drill with small bits (1/16"–1/8"): 1 set for making holes (if not using natural openings).
- ● Paintbrushes (fine detail + wide): 2–3 brushes for precision.
- ● Hot glue gun + glue sticks: 1 gun + 2 sticks for securing lightweight elements.
- ○ Optional: Beads or charms (5–10 pieces) for added flair.
- ● Wooden dowels (1–2 pieces) for 3D displays.
- ● Stencils (1–2 designs) for paint patterns.
- ● Basic crafting skills (no experience needed—just patience!).
- ● Outdoor work area (pods can be dusty!).
- ● Ventilation (if using paint or varnish).
- ● Permission to harvest pods (if collecting from public property).
Step-by-Step instructions for harvesting palm tree seed pods for crafting
Here's how to collect and prepare palm seed pods without damaging the tree or creating a mess.
🌿 Step 1: Identify and Locate Mature Seed Pods
Palm seed pods are ready for harvest when they turn tan or brown and begin to split open naturally. Look for pods that have fallen to the ground or are hanging loosely from the tree—these are the easiest to collect without harming the plant. Avoid green pods, as they're not yet mature and won't open properly for crafting.
Use a small ladder or step stool to reach higher pods safely. Wear gloves to protect your hands from the rough texture and any potential sap. I always check for insects or mold before handling—discard any pods that look damaged or infested. The goal is to work with clean, healthy materials for your zero-waste projects.
🪴 Step 2: Gently Remove Pods Without Twisting
The key to twist-free harvesting is patience. Instead of forcing the pod off the tree, gently twist it back and forth with a slow, steady motion. You'll feel a slight give as the pod separates from the stem. If it resists, let it go—don't pull hard, as this can damage the tree or leave behind jagged edges on the pod.
For pods that have already fallen, simply pick them up and brush off any debris. If the pod is still attached but loose, use a small knife or pruning shears to snip the stem cleanly. Always cut at a 45-degree angle to prevent water from pooling and causing rot. Store your collected pods in a dry, well-ventilated area until you're ready to clean and prepare them.
💧 Step 3: Clean and Prepare Pods for Crafting
Rinse your harvested pods under lukewarm water to remove dirt, sap, or any remaining debris. Use a soft brush to gently scrub away stubborn grime, focusing on the crevices and edges. Avoid soaking the pods, as excess moisture can cause them to warp or develop mold. Pat them dry with a clean towel or let them air-dry in a shaded area for 24-48 hours.
Once dry, inspect each pod for any remaining bits of stem or damaged sections. Use a small knife or sandpaper to smooth rough edges, and trim off any uneven areas. This step ensures your pods are safe to handle and ready for crafting. I like to organize them by size and shape, grouping similar ones together for consistency in my projects.
✂️ Step 4: Open and Extract Seeds (Optional)
If you plan to use the seeds for planting or as part of your art, carefully open the pods by splitting them along their natural seams. Use a craft knife or small saw to gently pry them apart—start at the widest point and work your way inward. This method preserves the seed's integrity and prevents unnecessary damage to the pod itself.
Remove the seeds and set them aside in a dry container. The empty pod halves can be used for a variety of crafts, from decorative bowls to wall hangings. If you're not using the seeds immediately, store them in a cool, dry place until you're ready. I often keep a small jar of seeds labeled by palm type for future projects or planting.
🌱 Step 5: Store or Use Your Harvested Pods
For long-term storage, place your cleaned and dried pods in a breathable container, such as a cardboard box or mesh bag. Avoid plastic containers, as they can trap moisture and lead to mold. Store the container in a cool, dry place away from direct sunlight to preserve the pods' natural color and texture.
If you're ready to start crafting right away, organize your pods by size and shape for easy access. I like to keep a small bin of prepped pods on hand for quick projects like wreaths, centerpieces, or even jewelry. The beauty of palm seed pod art is its versatility—let your creativity guide you while keeping sustainability at the forefront.
Tips & tricks for perfect palm tree seed pod art
Here's what I've learned after harvesting and crafting with palm seed pods for years—these tricks make all the difference for zero-waste, sustainable projects.
Seasonal Timing: Harvest pods during the dry season when they're naturally drying out and splitting open. I've found that pods collected between late spring and early fall have thicker walls and are less likely to warp during drying. The 24-48 hour drying period in Step 3 works best when you harvest during these months—the natural moisture content is already lower, so you won't need the full range of drying time.
Tool Selection: A small pruning saw with a fine-tooth blade works better than shears for cutting stems in Step 2. The saw gives you more control when making that 45-degree angle cut, and the fine teeth prevent crushing the pod. I keep a dedicated pair of pruning shears just for palm harvesting—they stay cleaner and last longer when used only for this purpose.
Organizing for Creativity: After drying, sort your pods by size and shape into separate containers. I use small wooden boxes with dividers for this—it keeps them organized and makes it easy to visualize different project possibilities. Label each container with the palm type if you're working with multiple species, as their textures and colors can vary significantly even within the same tree family.
Safety First: Always wear gloves when handling fresh pods, even if they don't have visible sap. Some palm species produce irritating oils that can cause skin sensitivity. I keep a small first-aid kit handy when harvesting—just in case—and always wash my hands thoroughly after handling any new type of pod. This simple precaution has saved me from several uncomfortable reactions over the years.
Pro Tips for Palm Tree Seed Pod Art
- Here's what I've learned after harvesting and crafting with palm seed pods for years—these tricks make all the differ...
- Seasonal Timing: Harvest pods during the dry season when they're naturally drying out and splitting open. I've found ...
- Tool Selection: A small pruning saw with a fine-tooth blade works better than shears for cutting stems in Step 2. The...
Frequently asked questions
Got questions about turning palm tree seed pods into stunning art? We’ve got answers! Here’s what you need to know before diving into your zero-waste crafting project.
How do I safely remove seed pods from a palm tree without hurting the tree?
Always harvest pods from the ground after they’ve naturally fallen—never climb or prune live trees. Look for mature pods (brown/dry) near the base of the tree. Use sterilized pruning shears if you must trim low-hanging pods, but avoid removing more than 10-15% of a tree’s fruit to protect its health.
What’s the best time of year to collect palm tree seed pods for crafting?
Timing depends on your climate! In tropical regions, pods ripen year-round, but peak harvest is often late summer to early fall. In cooler zones, collect after the first frost when pods turn brown. Store dried pods in a paper bag to prevent mold until you’re ready to craft.
Can I use seed pods from any palm tree, or are some toxic?
Most common ornamental palms (like Washingtonia or Cocos nucifera) are safe, but never use pods from sago palms (toxic seeds) or black palm (mildly irritating). When in doubt, research the species or consult a local arborist. Always wear gloves to avoid skin irritation from sap or fibers.
What are some creative alternatives if I can’t find palm seed pods?
No palm pods? Try these eco-friendly swaps:
- Pinecones (sand them for texture)
- Dried citrus shells (great for small sculptures)
- Seed pods from native plants (e.g., lotus or hibiscus)
- Recycled paper mache (mix with glue for lightweight art)
Why do my seed pods keep cracking or splitting while drying?
Cracking happens when pods dry too quickly or unevenly. Fix it:
- Spread pods in a single layer on a mesh screen
- Avoid direct sunlight (use shade or indirect light)
- Turn pods weekly for even drying (2–4 weeks total)
- Store in a breathable container with silica gel to prevent moisture buildup.
Wrapping up and next steps
Transforming palm tree seed pods into stunning art isn’t just creative—it’s a zero-waste superpower! 🌿 With just a few simple steps, you can turn nature’s discarded treasures into functional decor, gifts, or even eco-friendly jewelry. The best part? No twisting, no mess, just pure, sustainable crafting magic.
Ready to level up your DIY game? Start small—gather a few pods, pick a project, and let your imagination run wild. Who knows? Your next masterpiece might just inspire others to see the beauty in upcycling too. Happy crafting! ✨