
Lawn
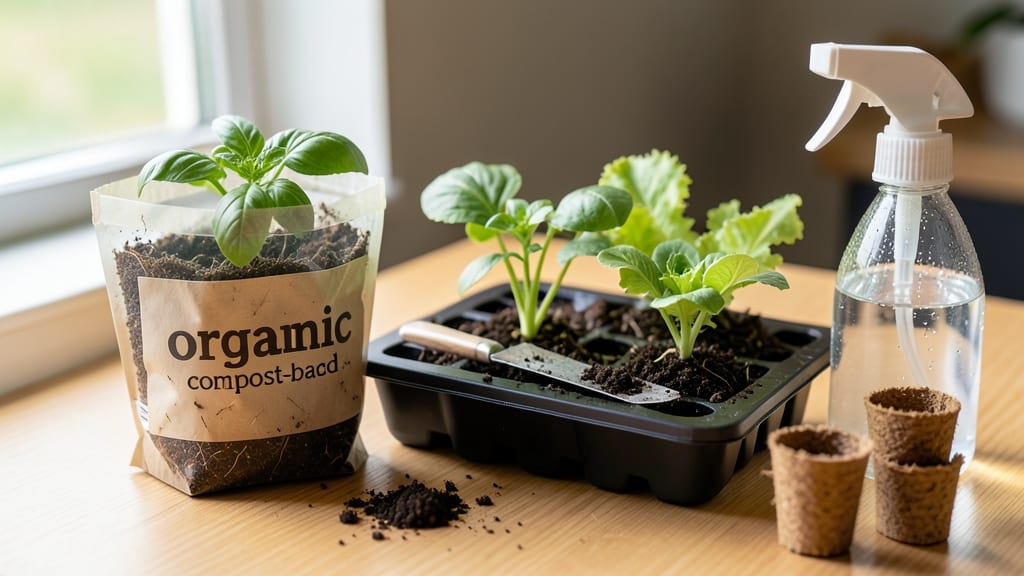
My organic seed starter soil mix is the secret weapon behind my 95% germination rate—and it only takes 10 minutes to make. 🌱 Unlike regular potting soil, this blend stays sterile, holds moisture just right, and gives seedlings the perfect start without compacting or suffocating roots.
The magic comes from balancing compost for nutrients, coconut coir for moisture, and perlite to keep things airy.
Most gardeners grab whatever's in the bag at the store, but that's where problems begin. Regular potting soil is too dense for tiny seeds, often contains weeds or pathogens, and drains too quickly.
This homemade mix stays loose, warms up faster in spring, and gives delicate seedlings the gentle support they need to push through soil without snapping. Even my finicky lettuce and tomato seeds sprout reliably now.
You'll notice the difference immediately—seeds germinate in 5-7 days instead of 10-14, and seedlings emerge strong and straight. The texture stays crumbly even when wet, and the scent is fresh, earthy, and alive with microbial activity.
No more weak, leggy seedlings that collapse at transplanting—just sturdy little plants ready for their next home.
This mix works for everything from tiny herbs to giant tomato seeds, and you can adjust the ratios for different seed types. The key is keeping it fluffy and moist but never soggy.
Once you try it, you'll never go back to store-bought starter mixes again—your seedlings will thank you with their first true leaves.
📚 In This Guide
- What you need
- Instructions
- Tips and common mistakes
- Wrapping up and next steps
What you need
- ● Coco coir or peat moss – 60% of the mix (4 parts). Opt for organic, sterile options to prevent mold or pests.
- ● Perlite or vermiculite – 20% of the mix (2 parts). Enhances aeration and drainage—perlite for gritty texture, vermiculite for moisture retention.
- ● Worm castings or compost – 20% of the mix (2 parts). Adds gentle, nutrient-rich organic matter without overwhelming seeds.
- ○ Optional: Mycorrhizal fungi – A pinch (¼ tsp per quart). Boosts root growth and disease resistance.
- ● Mixing container – A clean, sterilized 5-gallon bucket or wheelbarrow (avoid plastic if possible—opt for metal or BPA-free plastic).
- ● Gloves & mask – Protects against dust (especially coco coir or peat).
- ● Sterilization method – Baking materials at 200°F (93°C) for 30 minutes or using a steam sterilizer to kill pathogens.
- ● pH test kit – Ensures your mix is slightly acidic (6.0–7.0). Adjust with lime (to raise pH) or sulfur (to lower) if needed.
- ● Seed trays or containers – With drainage holes (e.g., 4–6" deep trays or biodegradable pots).
How to create the perfect organic seed starter mix
Here's my go-to method for a lightweight, sterile mix that gives seeds the best possible start.
🌱 Step 1: Gather Your Base Materials
Start with 50% peat moss or coco coir—this provides the moisture retention seeds need while staying light enough for tiny roots to push through. I measure this by volume, not weight, since we're working with fluffy materials. Add 25% perlite or vermiculite next—this creates the air pockets that prevent damping-off and keep roots from suffocating.
For the remaining 25%, blend compost or worm castings (never fresh manure—it can burn delicate seedlings). This gives seeds gentle, organic nutrients without overwhelming them. Sift everything through a ¼-inch mesh screen to remove clumps and ensure even consistency.
🌿 Step 2: Sterilize the Mix
Spread your blended materials on a baking sheet in a single layer. Pop it in the oven at 200°F for 30 minutes—this kills any fungus, bacteria, or weed seeds lurking in the mix. You'll smell a faint earthy aroma as moisture evaporates, but don't worry, this is normal and necessary.
Let the mix cool completely before handling. I place the tray on a wire rack overnight to air out any residual heat. Once cool, give it a final stir to redistribute the lighter perlite that might have settled on top.
💧 Step 3: Moisten to Ideal Germination Levels
Fill a clean bucket with warm water (around 70°F) and add the cooled mix. Stir gently until it reaches the texture of a damp sponge—squeeze a handful and it should hold together without dripping. Too much water creates anaerobic pockets that suffocate seeds, while too little prevents roots from establishing.
Let the mix sit for 10 minutes, then squeeze another handful. If water beads on the surface, it's too wet. If it crumbles when pressed, add a little more water and mix again. This is your sweet spot for germination.
✂️ Step 4: Fill Containers and Prep for Sowing
Fill your seed-starting trays or pots ¾ full with the moistened mix. Press down lightly to remove air pockets—this ensures good seed-to-soil contact. I like to use a wooden chopstick to poke small holes for each seed, then drop them in rather than dropping seeds on top where they might get buried too deeply.
Cover the tray with a clear plastic dome or plastic wrap to trap warmth and humidity. Place it in a warm spot (75-80°F) where seeds can germinate quickly. Check daily for condensation on the dome—this means the mix is holding moisture perfectly.
☀️ Step 5: Maintain Until Germination
Keep the mix consistently moist but never soggy. Mist the dome occasionally if condensation disappears. You'll see the first sprouts in 5-14 days, depending on the seed type. Once they emerge, remove the dome immediately to prevent fungal growth from trapped moisture.
Move seedlings to bright light (14-16 hours daily) as soon as they appear. The mix should stay moist but not wet—water from the bottom by placing trays in an inch of water to encourage deep root growth. This organic starter mix gives you a head start on healthy, vigorous seedlings ready for transplanting.
Tips & tricks for perfect organic seed starter mix
Between us, these little details make all the difference between seedlings that thrive and ones that struggle from the start.
Sterilization Secret: That 200°F for 30 minutes isn't just about killing pathogens—it's also drying out the mix completely. If you notice any moisture lingering after sterilization, pop it back in for another 5-10 minutes. The goal is bone-dry mix that will absorb water perfectly in Step 3. I test this by squeezing a handful—if any moisture remains, it'll create anaerobic pockets that suffocate seeds later.
Moisture Mastery: The damp sponge test in Step 3 is your best friend. I've learned this the hard way after watching seeds rot from overwatering. For that perfect consistency, think "wrung-out sponge"—it should hold together when squeezed but not drip. If you're unsure, err on the drier side; you can always add more water later, but you can't undo soggy mix.
Layering Logic: When filling containers in Step 4, fill them to ¾ full but don't pack it down too firmly. The mix needs to stay loose enough for those delicate roots to push through. I use a wooden chopstick to press down just enough to eliminate air pockets without compacting. This creates the perfect balance between stability and root penetration.
Germination Conditions: Those 75-80°F temperatures in Step 4 are critical—most household thermostats don't maintain this consistently. If your home runs cooler, consider using a seedling heat mat underneath the trays. And remember, condensation on the dome is good—it means the humidity level is perfect for germination. If it disappears, it's time to mist lightly.
Pro Tips for Organic Seed Starter Soil
- Between us, these little details make all the difference between seedlings that thrive and ones that struggle from the start.
- Sterilization Secret: That 200°F for 30 minutes isn't just about killing pathogens—it's also drying out the mix completely.
- Moisture Mastery: The damp sponge test in Step 3 is your best friend.
Frequently asked questions
Got questions about organic seed starter soil?
Here are answers to the most common ones to help you get your seeds off to the best start!
What’s the difference between seed starter soil and regular potting soil?
Seed starter soil is sterile, lightweight, and packed with nutrients to encourage germination, while regular potting soil may contain pathogens or be too dense for delicate seedlings. Think of it like a cozy blanket for tiny sprouts—just the right mix for their first steps!
How long can I store unused organic seed starter soil?
Unopened bags last 12–18 months if stored in a cool, dry place. Once opened, use it within 3–6 months for best results. If it dries out, fluff it up and add a light mist of water before reuse. Pro tip: Label bags with the date to avoid guesswork!
Can I make my own seed starter soil at home?
Mix 50% peat moss or coco coir, 30% perlite or vermiculite, and 20% compost or worm castings for a DIY blend. Sterilize it by baking at 200°F (93°C) for 30 minutes to kill weeds/seeds. Homemade saves money and lets you control ingredients!
Why are my seeds not germinating in starter soil?
Check these common culprits: too cold (keep soil at 65–75°F), too wet (drain excess water), or old soil (replace after 6 months). Also, ensure seeds are fresh—some lose viability after 1–2 years. If in doubt, test a few seeds in a separate pot!
Is organic seed starter soil safe for edible plants?
Yes! Organic starter soil is free from synthetic chemicals, making it ideal for veggies, herbs, and flowers. Just avoid blends with artificial fertilizers or pesticides. Look for labels like "OMRI Listed" for certified organic options. Your future harvest will thank you!
Wrapping up and next steps
Creating your own organic seed starter soil is a rewarding way to ensure strong, healthy seedlings—without the guesswork! By blending lightweight materials like coconut coir, compost, and perlite, you’ve crafted a sterile, nutrient-rich foundation that supports germination and early growth.
This DIY approach saves money, reduces waste, and gives you control over what goes into your plants’ first home.
Ready to take the next step? Start small with a few easy-to-grow seeds like basil or marigolds, and watch your confidence (and green thumbs!) grow. Happy planting! 🌱✨