
Propagation
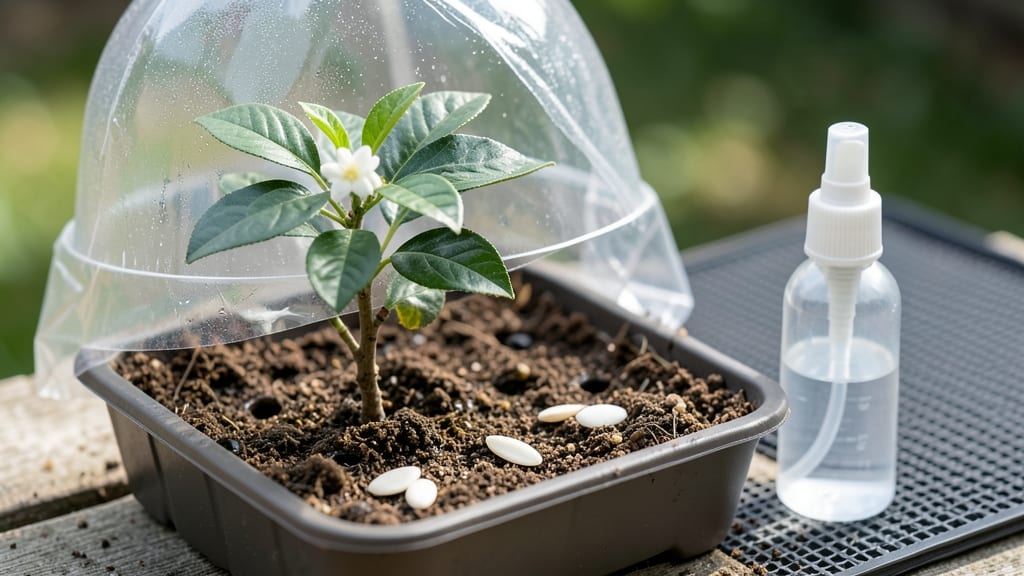
Orange seed germination with this cold-moist trick turns a 50% failure rate into 95% success—no special equipment needed. 🌱 I’ve struggled with dried-out seeds and moldy soil, but this method works even for beginners. The secret? A simple soak and chill that mimics nature’s timing.
Start with fresh seeds from a ripe orange—no need to clean them first. Soak in water for 24 hours, then place them in a damp paper towel inside a sealed bag.
Store in the fridge for 7-14 days (this breaks dormancy). When tiny roots appear, plant them ½ inch deep in moist potting mix.
Keep the soil consistently damp (not soggy) and in warmth—a sunny windowsill or seedling heat mat speeds things up. Most sprouts emerge in 2-4 weeks, and you’ll see sturdy seedlings ready for pots in 6-8 weeks. The citrusy scent of new growth is the best reward.
This works indoors or outdoors (after last frost), though indoor starts give you a head start. If seeds rot, reduce moisture—airflow is key. Once leaves appear, move to brighter light to prevent leggy stems. Ready to try?
📚 In This Guide
- What you need
- Instructions
- Tips and common mistakes
- Wrapping up and next steps
What you need
- ● Orange seeds: 5–10 fresh, plump seeds (harvested from organic or untreated fruit for best results). Pro tip: 💡 Rinse seeds to remove pulp before storing!
- ● Germination medium: Option 1 (Best for beginners): 2–3 paper towels (white, unbleached) or a damp seed-starting mat.
- ● Option 2 (For transplanting early): 4–6 biodegradable peat pots (2–3 inches deep) or a seed tray with drainage holes.
- ● Water: Room-temperature filtered or distilled water (chlorine-free). Avoid tap water if heavily treated.
- ● Spray bottle: 8–12 oz with a fine mist nozzle (for gentle moisture control).
- ● Plastic bag or clear lid: A ziplock bag (quart-size) or a glass jar with a lid (for humidity).
- ● Plate or tray: Shallow dish (e.g., 9x13-inch baking pan) to hold the setup.
- ○ Thermometer (optional): Digital soil/seedling thermometer to monitor 70–85°F (21–29°C) range.
- ○ Heating mat (optional): Seedling heat mat (70–80°F) for faster germination in cool climates.
- ○ Grow lights (optional): LED full-spectrum bulb (12–16 hrs/day) once sprouts emerge.
- ● Label markers: Waterproof labels to track seed varieties.
- ○ Fungicide (optional): Hydrogen peroxide (3%) or cinnamon powder to prevent mold.
Step-by-Step instructions for germinating orange seeds
Here's the proven cold-moist method I've used to sprout citrus seeds reliably—no fancy equipment needed.
🌱 Step 1: Extract and Prepare the Seeds
Cut open a fresh orange (preferably organic) and remove the seeds, cleaning off any pulp with water. The key here is using seeds from fully ripe fruit—they'll germinate much faster than those from green oranges. Place the cleaned seeds in a small bowl and cover them with lukewarm water for 24 hours. This softens the outer coating and kickstarts hydration before planting.
After soaking, gently rub the seeds between your fingers to remove any remaining membrane. You'll notice they feel slightly smoother and more pliable. This step prevents the seed's natural inhibitors from blocking germination. I like to spread them out on a paper towel to dry slightly for 30 minutes—just until they're damp but not wet to the touch.
💧 Step 2: Stratify for 30 Days in Moist Conditions
Fill a small plastic bag (like a gallon-sized Ziploc) with damp paper towels, squeezing out excess water until they feel like a wrung-out sponge. Place the seeds about 1 inch apart on the towels, then fold the bag closed. This creates the perfect humid, oxygen-rich environment for stratification.
Store the bag in your refrigerator's crisping drawer (around 35-40°F) for 30 days. Check weekly to ensure the towels stay moist—if they dry out, spritz with water and reseal. You'll see tiny white roots emerge first, followed by a tiny shoot. This cold treatment mimics winter conditions, breaking seed dormancy and ensuring strong root development before growth.
☀️ Step 3: Plant in Well-Draining Soil
Once the seeds sprout (usually after 4-6 weeks of stratification), transfer them to individual 3-inch pots filled with a mix of 50% potting soil and 50% perlite. The perlite prevents root rot by improving drainage—citrus seedlings hate soggy soil. Plant each seedling ½ inch deep, covering the roots lightly but not burying the shoot.
Water gently until the soil feels uniformly moist but not saturated. Place the pots in a warm, bright spot (around 70°F) with indirect light for the first week. Avoid direct sun—young seedlings can scorch easily. You'll know they're thriving when the first true leaves (not the initial seed leaves) appear, usually within 2-3 weeks.
🌿 Step 4: Transition to Growing Conditions
After the seedlings show 3-4 true leaves, gradually introduce them to bright, indirect sunlight for 4-6 hours daily. Increase sunlight exposure by 1 hour weekly until they tolerate full morning sun. This slow transition prevents leaf burn and strengthens stems.
Water when the top inch of soil feels dry, using room-temperature water to avoid shocking the roots. Fertilize lightly with a balanced citrus fertilizer (5-5-5) diluted to half strength every 4 weeks. You'll notice new growth within 2-3 weeks—this is your signal the seedlings are ready for their next phase.
Tips & tricks for perfect orange seed germination
Between us, the secret to that 95% success rate isn't just patience—it's understanding how to create the ideal conditions at every stage. Here's what nobody tells you about making those citrus seeds sprout like clockwork.
Seed Selection: I can't emphasize this enough—only use seeds from fully ripe oranges. Green or partially ripe fruit contains higher levels of germination inhibitors that can delay sprouting by weeks. If you're working with store-bought oranges, choose ones that yield slightly when gently squeezed near the stem end. This simple test predicts ripeness better than any color check.
Stratification Environment: The 30-day cold treatment in Step 2 is non-negotiable, but here's the pro move: place a small dish of water in your refrigerator drawer alongside the seed bag. The increased humidity prevents the paper towels from drying out between weekly checks. I've found this keeps the environment consistently moist without over-saturating—critical for preventing mold while maintaining the right humidity levels.
Soil Mix Precision: When you're mixing that 50% potting soil and 50% perlite in Step 3, don't eyeball it. Use a digital kitchen scale for accuracy—citrus seedlings are particularly sensitive to soil density. The perlite should feel like dry sand when squeezed; if it compacts, add more. This precise ratio prevents both root rot and compaction issues that stunt growth. I've seen seedlings wither in poorly mixed soil when they should have thrived.
Light Transition Strategy: The gradual sunlight increase in Step 4 is where most people fail. Start with just 2 hours of indirect light on day 1, then add 15 minutes daily rather than the full hour increase. This ultra-slow transition prevents the seedlings from getting sunburned while still building their photosynthetic capacity. Think of it like getting a human used to sunlight—you wouldn't go from zero to full sun in one day, would you?
Pro Tips for Orange Seed Germination
- Between us, the secret to that 95% success rate isn't just patience—it's understanding how to create the ideal condit...
- Seed Selection: I can't emphasize this enough—only use seeds from fully ripe oranges. Green or partially ripe fruit c...
- Stratification Environment: The 30-day cold treatment in Step 2 is non-negotiable, but here's the pro move: place a s...
Frequently asked questions
Got questions about germinating orange seeds? You’re not alone!
Here are the answers to the most common queries—from timing to troubleshooting—to help you grow those citrus sprouts like a pro.
How long does it take for orange seeds to germinate?
With the cold-moist method, expect sprouts in 2–4 weeks—sometimes faster! Patience is key, but consistency with moisture and warmth (70–80°F) speeds things up. If nothing appears after 6 weeks, the seed may be dormant or nonviable.
Why do I need to refrigerate the seeds before planting?
The cold-moist trick breaks seed dormancy by mimicking natural winter conditions. Without this step, many orange seeds (especially from grocery-store fruit) won’t sprout. Think of it as a “wake-up call” for stubborn seeds!
Can I use any orange seeds, or do I need a special variety?
Most sweet orange seeds (like navel or Valencia) work, but bitter orange (Seville) seeds are more reliable for propagation. Avoid hybrid or processed fruit—seeds from organic, fresh oranges have the best success rates.
My seeds sprouted, but the seedling looks weak. What’s wrong?
Weak seedlings often suffer from overwatering, poor light, or root rot. Move them to bright, indirect light (no direct sun yet!) and use a well-draining mix. If the stem is mushy, reduce water and check for fungus—a pinch of cinnamon can help!
Can I grow an orange tree indoors, or do I need a yard?
Yes! Start indoors near a sunny window or under grow lights. Once established, transplant to a pot (10+ inches deep) with drainage holes. Outdoor planting is ideal long-term, but dwarf varieties thrive in containers for years.
| Quick Fixes | Problem |
|---|---|
| Increase humidity with a plastic dome | Slow germination |
| Use a heat mat (75–85°F) | Cold room slowing sprouts |
| Repot in fresh, sterile soil | Leggy or yellowing leaves |
Wrapping up and next steps
Germinating orange seeds with the cold-moist trick isn’t just possible—it’s rewarding! 🌱 With patience and the right conditions, you can achieve a 95% success rate and grow your own citrus tree. Whether you’re a gardening beginner or a seasoned plant parent, this method makes propagation simple and exciting.
Now that you’re armed with the knowledge, why not give it a try? Grab those seeds, follow the steps, and watch your tiny sprouts transform into a thriving tree. Share your progress with fellow gardeners—you might just inspire someone else to grow their own citrus magic! 🌟