
Lawn
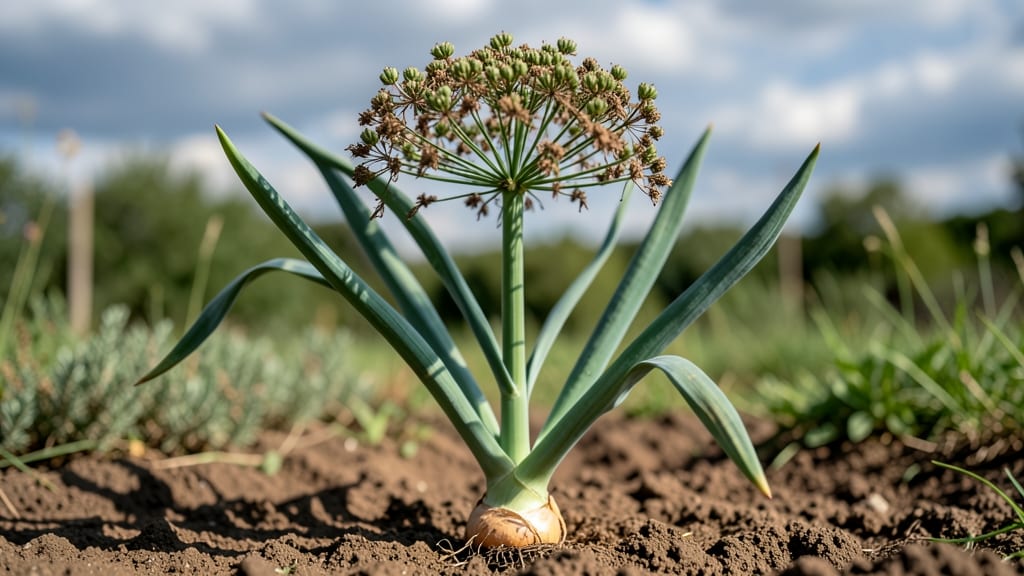
Harvesting onion seed pods transforms last year’s scraps into next season’s harvest—no fancy equipment needed. 🌱 The pods turn from green to papery brown when ready, signaling it’s time to collect them before they burst open.
I’ve saved seeds from store-bought onions this way for years, and the resulting plants grow just as strong as their parents.
Start by cutting mature pods from the plant when they’re dry but still attached—this prevents seed loss from overripening. Lay them out on a screen or paper towel in a warm, dry spot for 1-2 weeks to finish drying.
Once completely dry, gently rub the pods between your fingers to release the tiny black seeds into a bowl. Store them in a sealed container away from moisture and heat.
When planting, scatter the seeds directly into well-drained soil in early spring or fall. They germinate slowly, so don’t rush—patience pays off with hardy onion plants that thrive without the fuss. The first harvest might be smaller, but each year, your saved seeds adapt better to your local climate.
Common mistakes? Overwatering dried pods or storing seeds in damp containers—both kill viability. If your pods shatter too soon, try harvesting earlier next time. With a little practice, you’ll have a reliable seed source that’s free and full of flavor.
📚 In This Guide
- What you need
- Instructions
- Tips and common mistakes
- Wrapping up and next steps
What you need
- ● Onion plants: Mature, bolted onions (at least 12–18 inches tall) with seed pods forming. Tip: Choose disease-free plants for the best seed quality! 🌡️
- ● Pruning shears or sharp scissors: 1 pair (for clean cuts without damaging stems).
- ● Brown paper bags or breathable mesh bags: 3–5 bags (to dry pods indoors).
- ● Newspaper or cardboard: 1 sheet (for drying pods flat).
- ● Small wooden stick or pencil: 1 (to poke holes in bags for airflow).
- ● Fine-mesh strainer or sieve: 1 (for separating seeds from chaff).
- ● Paper towels or parchment paper: 1 roll (for seed drying).
- ● Small envelope or airtight container: 1–2 (for seed storage).
- ● Labeling tags: 5–10 (to track onion varieties).
- ● Desiccant packets: 1–2 (for long-term seed storage).
- ● Magnifying glass: 1 (to inspect seed viability).
- ● Humidity monitor: 1 (if storing seeds in a damp climate).
How to harvest onion seed pods for homegrown seed saving
Here's the simple method I use every year to collect onion seeds without losing plants to rot or pests.
🌱 Step 1: Select and Prepare Healthy Onion Plants
Choose 1-2 mature onion plants that show strong stems and 50% seed pods forming. Avoid plants with signs of disease or pest damage—those seeds won't grow true. I always pick the largest, healthiest bulbs from my harvest, as they produce the most vigorous offspring. Cut the plants at the base with clean shears, leaving 6-8 inches of stem attached.
Hang the plants upside down in a dry, well-ventilated area. A garage or covered porch works perfectly—just avoid direct sunlight, which can cause the pods to dry too quickly. You'll know they're ready when the pods turn from green to tan and begin rattling when shaken. This usually takes 2-3 weeks, depending on your climate.
💧 Step 2: Dry and Clean the Seed Pods
Once the pods are completely dry, gently rub them between your hands to release the seeds. I like to do this over a clean sheet of newspaper or a large tray—it makes cleanup a breeze. The seeds will fall out easily, while the empty pods can be composted. Avoid using a fan or blower to speed this up; the seeds are delicate and can shatter if handled roughly.
Sift the seeds through a fine mesh strainer to remove any remaining chaff or debris. Store the clean seeds in a labeled paper envelope in a cool, dark place. Onion seeds stay viable for 2-3 years when stored properly, so don't rush to plant them right away—wait until spring for best results.
☀️ Step 3: Test Seed Viability Before Planting
Before saving seeds for next year, test a few to ensure they'll germinate. Place 10 seeds between two damp paper towels in a sealed plastic bag. Keep them in a warm spot (70-75°F) and check daily. You should see sprouts within 7-10 days—if fewer than half germinate, your seeds may need to dry longer or are past their prime.
If germination is strong, you're ready to plant. Sow seeds ¼ inch deep in well-draining soil and keep them moist until they sprout. I always plant a few extra seeds just in case—onion seedlings can be finicky, and not all may make it. Thin to 3-4 inches apart once they reach 2 inches tall for healthy growth.
⏰ Step 4: Maintain Seedlings for Healthy Transplants
Onion seedlings need consistent moisture but hate soggy soil. Water gently every 2-3 days until the soil feels damp 1 inch down. Avoid wetting the leaves to prevent fungal diseases. Once seedlings develop 4-5 true leaves (about 6-8 weeks after planting), they're ready to transplant into the garden.
Choose a sunny spot with full sun exposure and well-draining soil. Space plants 6-8 inches apart in rows 12-18 inches apart to allow for airflow and bulb development. Mulch lightly with straw to retain moisture and suppress weeds—this keeps the soil evenly moist without overwatering.
Tips & tricks for perfect onion seed pod harvesting
Real talk: Harvesting onion seed pods isn't rocket science, but these little tricks make all the difference between viable seeds and wasted effort.
Pod Ripeness Check: In Step 1, when you're deciding which plants to harvest, look for pods that have turned from green to tan and make a rattling sound when you gently shake them. This is your golden signal that the seeds are ready—don't wait until they're completely brown or they'll shatter when you try to release them. I've learned this the hard way after losing seeds to over-drying!
Drying Strategy: For Step 1's drying period, I've found that a well-ventilated area with indirect sunlight works best. If you're in a humid climate, consider adding a small fan on low to improve airflow without damaging the delicate pods. Just keep it far enough away so it doesn't blow the pods around. The 2-3 weeks drying time can vary—if your pods aren't rattling after 2 weeks, give them a little more time rather than rushing them.
Seed Storage Wisdom: When storing your cleaned seeds in Step 2, I recommend dividing them into smaller portions if you have a large harvest. Store each portion in separate envelopes labeled with the year and variety. This way, if one batch loses viability, you still have others to fall back on. Onion seeds stay good for 2-3 years, but I always test a few before planting to be sure.
Germination Test Tip: For the viability test in Step 3, I've found that placing the damp paper towels in a plastic bag with a rubber band creates a mini greenhouse effect. This helps maintain consistent moisture while keeping the seeds warm. If you're short on time, you can speed up germination slightly by placing the bag on top of your refrigerator—just don't let it get too hot!
Pro Tips for Onion Seed Pods
- Real talk: Harvesting onion seed pods isn't rocket science, but these little tricks make all the difference between viable seeds and wasted effort.
- Pod Ripeness Check: In Step 1, when you're deciding which plants to harvest, look for pods that have turned from green to tan and make a rattling sound when you gently shake them.
- Drying Strategy: For Step 1's drying period, I've found that a well-ventilated area with indirect sunlight works best.
Frequently asked questions
Got questions about harvesting onion seed pods?
You’re not alone! Here are answers to the most common concerns—from timing to troubleshooting—to help you save viable seeds like a pro.
When is the best time to harvest onion seed pods?
Harvest seed pods when they turn tan or brown and begin to split open naturally—usually 4-6 weeks after flowering. Wait too long, and seeds may scatter or lose viability. Early morning harvests prevent moisture buildup, keeping pods dry and intact.
How do I know if my onion seed pods are ready?
Look for these signs:
- Color change: Pods shift from green to tan/brown.
- Texture: They feel dry and papery to the touch.
- Sound: A slight rattling indicates seeds inside are loose.
What’s the ideal storage method for onion seed pods?
Store pods in a cool, dry place (50–60°F) (e.g., a paper bag or envelope) for 1–2 weeks to fully dry. After drying, transfer seeds to an airtight container (like a glass jar) with a desiccant packet to prevent moisture. Label with the variety and date!
Can I use store-bought onion seeds instead of saving my own?
While saving seeds preserves heirloom varieties, store-bought seeds (like Texas Early White) are convenient and reliable. Opt for organic, non-GMO seeds for lawns if you prioritize sustainability. Just ensure they’re labeled for your climate zone!
Why are my onion seed pods rotting or attracting pests?
Overly wet conditions or fungal diseases (like downy mildew) cause rot. To prevent this:
- Harvest pods early in the day when humidity is low.
- Space plants for better airflow (12+ inches apart).
- Apply neem oil if pests (like aphids) appear.
Pro Tip: Test seed viability before planting!
Place a handful of seeds in a glass of water. If 80% sink, they’re likely viable. Floaters? Discard them or try a paper towel germination test (moisten seeds between towels for 3–5 days—sprouts = good seeds!).
Wrapping up and next steps
Saving onion seed pods is a rewarding way to preserve heirloom varieties and ensure a fresh supply of homegrown onions year after year!
With just a few simple steps—like selecting healthy plants, drying pods properly, and storing them correctly—you’ll have viable seeds ready for your next lawn or garden project. Give it a try this season!
Ready to dive in? Start by picking a sunny spot in your yard and follow the guide to harvest your first batch of onion seed pods with confidence. 🌱