
Lawn
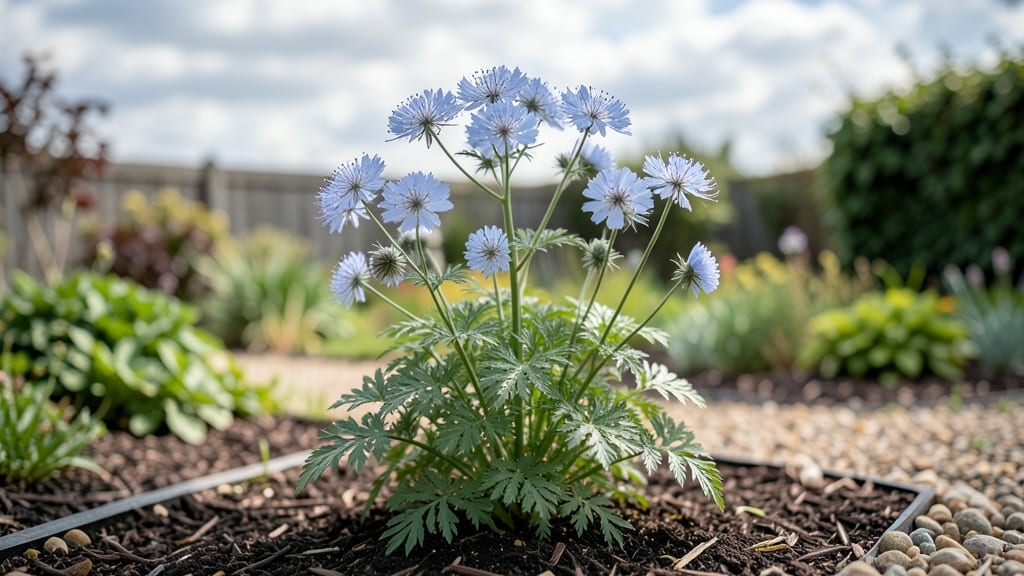
Your nigella seed pods are nature’s secret to next year’s garden. 🌱 These delicate, lace-like blooms don’t just add charm—they store seeds that’ll sprout reliably even after winter’s chill. I’ve grown nigella for years, and the trick is in how you handle those pods before they dry.
Plant nigella in well-draining soil where it gets full sun, and let it self-seed freely. The pods mature in about 100 days, turning from green to papery brown.
Once dry, they’ll split open on their own, scattering seeds for next spring—no extra work needed. The key is leaving them on the plant until they’re completely crisp.
You’ll end up with a cottage-garden favorite that blooms year after year with almost no effort. The seeds are edible too—add them to salads or baked goods for a subtle peppery kick. And if you love dried flowers, these pods make stunning, long-lasting arrangements.
Works in borders, containers, or wildflower patches. Here’s how to keep them thriving—and how to use those pods before they drop their treasure.
📚 In This Guide
- What you need
- Instructions
- Tips and common mistakes
- Wrapping up and next steps
What you need
- ● Nigella seeds (Love-in-a-Mist) – 1 packet (approx. 1,000 seeds) for a small patch or 3-5 packets for a full garden bed.
- ● Well-draining potting mix or garden soil – 2-3 cubic feet (or enough to fill your chosen containers). Mix in compost or aged manure (1 part compost to 3 parts soil) for nutrient-rich growth.
- ● Containers or garden bed – 6-inch pots (for seedlings) or a sunny, open garden spot (6+ inches deep, with good airflow).
- ● Watering can or hose with a gentle nozzle – Keep soil moist but not soggy!
- ○ Fertilizer (optional but helpful) – Balanced 10-10-10 or slow-release granular fertilizer (1 tbsp per plant at planting time).
- ● Garden trowel or small shovel – For planting seeds and transplanting seedlings.
- ○ Glove (optional) – Protects hands from prickly seed pods when harvesting.
- ○ Spray bottle (optional) – For misting seeds during germination.
- ○ Cold frame or frost cloth (optional) – Extends the growing season in chilly climates.
- ● Sunlight access – Full sun (6+ hours daily) is a must for robust blooms!
Step-by-Step instructions for growing nigella seed pods
Here’s how to coax those delicate, lace-like nigella blooms into reliable seed pods for next season’s harvest.
🌱 Step 1: Choose the Right Variety and Planting Site
Nigella thrives in full sun with well-draining soil—avoid heavy clay or soggy spots. I always pick self-seeding varieties like ‘Love in a Mist’ or ‘Miss Jekyll’ for their reliability. Plant seeds directly in the garden after the last frost, about ¼ inch deep and 12 inches apart.
If your soil feels dense, mix in a handful of sand or compost to improve drainage. Nigella hates wet feet, so raised beds are ideal if your yard stays damp. Water lightly after planting, but don’t soak the soil—these seeds need air to germinate.
☀️ Step 2: Provide Consistent Care for Strong Blooms
Once seedlings emerge (usually in 10-14 days), thin them to 8-10 inches apart to prevent overcrowding. Nigella grows best with minimal fuss—water only when the top inch of soil feels dry, and avoid wetting the foliage to prevent fungal issues.
Fertilizer isn’t necessary, but a light application of balanced 10-10-10 at planting time encourages sturdy stems. Watch for leggy growth—a sign of too little light. If stems stretch toward the sun, move plants to a sunnier spot or add a small cage for support.
⏰ Step 3: Harvest Seed Pods at Peak Maturity
When blooms fade, leave the seed pods on the plant until they turn brown and papery (usually 6-8 weeks after flowering). Gently twist pods to release seeds—don’t pull them off, or you’ll damage the stem. Store seeds in a cool, dry place for up to 3 years.
Here’s the thing—don’t rush harvesting. Green pods won’t store well, and fully dried ones ensure the best germination. If pods split open before you’re ready, collect seeds immediately and dry them on a paper towel for a few days.
🌿 Step 4: Cold-Stress Pods for Next Year’s Sprouts
For reliable germination, cold-stratify seeds before planting. Place dried pods in a paper bag and refrigerate for 4-6 weeks to mimic winter’s natural process. This step breaks dormancy and boosts sprout rates—skipping it means waiting longer for seedlings.
After stratification, sow seeds outdoors in early spring or scatter them in fall for self-seeding. Nigella’s delicate blooms reward patience—each pod produces dozens of seeds, so a few plants will quickly fill your garden with cheerful blue or white flowers.
Tips & tricks for perfect nigella seed pods
Here's what nobody tells you about growing these delicate blooms into reliable seed pods.
Soil Prep Secret: Before planting, test your soil's drainage by digging a small hole and filling it with water. If it doesn't drain within an hour, amend with sand or compost—nigella will literally rot if its roots stay wet. I've learned this the hard way after losing entire batches to soggy soil. The key is mimicking their natural Mediterranean habitat where water drains quickly.
Thinning Technique: When thinning seedlings in Step 2, don't just yank them out—use clean scissors to snip at soil level. This prevents disturbing the roots of remaining plants. Space them exactly 8-10 inches apart as instructed, but if you're growing for seed pods specifically, you can stretch this to 12 inches for better air circulation and fewer fungal issues. The extra space gives each plant room to develop those plump seed pods we're after.
Harvesting Hack: For the 6-8 week harvest window in Step 3, mark your calendar from when flowers first appear. When pods turn brown and papery, give them one final day on the plant—they'll release seeds more easily if they've had that extra time to fully mature. I keep a small basket nearby to collect fallen pods immediately, as they'll split open and scatter seeds within hours.
Cold-Stratification Tip: When refrigerating pods for 4-6 weeks in Step 4, place them in a paper bag with a few holes punched in it. This prevents moisture buildup that could cause mold. I like to write the date on the bag with a marker so I don't forget when to plant. The cold treatment is what makes the difference between seeds that sprout reliably and ones that sit stubbornly in the soil.
Pro Tips for Nigella Seed Pod
- Here's what nobody tells you about growing these delicate blooms into reliable seed pods.
- Soil Prep Secret: Before planting, test your soil's drainage by digging a small hole and filling it with water.
- Thinning Technique: When thinning seedlings in Step 2, don't just yank them out—use clean scissors to snip at soil level.
Frequently asked questions
Got questions about growing and using nigella seed pods?
Here are the answers to the most common ones—so you can cultivate these delicate blooms with confidence!
When is the best time to harvest nigella seed pods?
Harvest nigella seed pods when they turn a deep brown and begin splitting open naturally—usually 8 to 12 weeks after flowering. Wait too long, and the seeds may scatter. For best results, pick them on a dry day and store them in a cool, dark place to dry completely before use.
Can I grow nigella seed pods in containers?
Nigella thrives in containers as long as they’re at least 6 inches deep with well-draining soil. Choose a pot with drainage holes, and place it in a sunny spot. Just keep an eye on moisture—containers dry out faster than garden beds.
How do I protect nigella seed pods from frost?
Nigella is surprisingly cold-hardy but may struggle in heavy frost. If temps drop below 20°F (-6°C), cover young plants with frost cloth or move containers to a sheltered spot. Once established, they’ll bounce back in spring—just give them a little TLC until warmer weather arrives!
What are some easy substitutes for nigella seeds if I can’t grow them?
If you’re craving that nutty, slightly peppery flavor, try poppy seeds, sesame seeds, or black cumin seeds in cooking. For garnishes, crushed peppercorns or even toasted pumpkin seeds work in a pinch. Just remember—nigella’s unique taste is hard to beat!
Why are my nigella seed pods turning black and mushy?
Black, mushy pods usually signal overwatering or fungal issues (like powdery mildew). Ensure your plants have good airflow and water only at the base. If caught early, trim affected pods and treat with neem oil. For future crops, space plants further apart to prevent humidity buildup.
Wrapping up and next steps
Growing nigella seed pods is a rewarding way to add delicate charm to your garden while ensuring a steady supply of seeds for next year’s blooms.
These hardy plants thrive with minimal fuss, making them perfect for both beginners and seasoned gardeners. Why not start small this season and expand your collection? 🌱
Ready to take the next step? Experiment with different soil types, sunlight conditions, or companion plants to see what works best in your space. Share your progress—or even a few dried pods—with fellow gardening enthusiasts for extra inspiration!