
Lawn
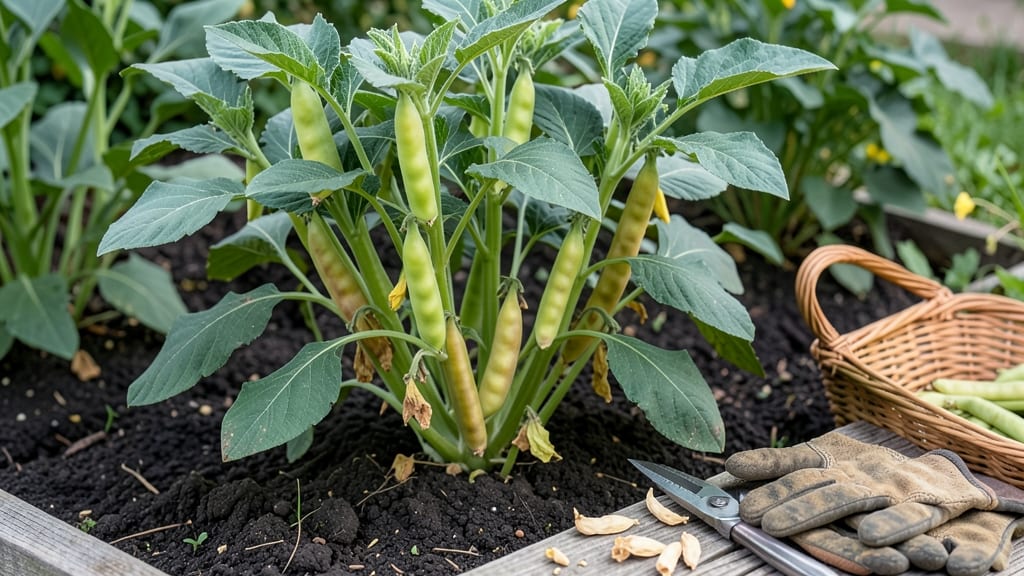
Mustard seed pods are the unsung heroes of the spice aisle, and growing them at home turns a simple garden corner into a fragrant, harvestable treasure. 🌱 I’ve grown Brassica juncea (brown mustard) and Sinapis alba (white mustard) for years, and the secret to stress-free harvesting lies in letting those pods mature naturally—no forced drying or awkward twisting required.
The key starts with well-drained soil and a sunny spot—mustard thrives in cool weather but bolts fast in heat.
Plant seeds in early spring or late summer, keep the soil moist but not soggy, and watch as those familiar mustard greens give way to tall stems topped with clusters of seed pods. The magic happens when you let pods ripen fully on the plant before harvesting.
By mid-to-late summer, you’ll have pods that pop open effortlessly, releasing seeds into your hands (or a waiting bowl). These seeds are perfect for pickling, baking, or saving for next year’s garden.
The first harvest feels like uncovering a hidden spice cabinet—except you grew it yourself, and the flavor is fresher than anything store-bought.
Works for small gardens, containers, or even a sunny windowsill. Once you try growing your own, you’ll never buy mustard seeds again—just save a few pods for next season and repeat. Here’s how to make it happen without the fuss.
📚 In This Guide
- What you need
- Instructions
- Tips and common mistakes
- Wrapping up and next steps
What you need
- ● Mustard seed pods (seeds): 1–2 packets (look for varieties like Brassica juncea or Sinapis alba for easy pod opening).
- ● Well-draining soil: 1–2 bags of potting mix or garden soil (amend with compost for richer nutrients).
- ● Containers or garden bed: Containers: 5–10-inch deep pots (3–5 plants per pot).
- ● Garden bed: Full sun (6+ hours/day) and space 12–18 inches apart.
- ● Watering can or hose: With a gentle spray nozzle for even moisture.
- ○ Fertilizer (optional): Balanced 10-10-10 or organic compost tea (apply at planting and mid-growth).
- ○ Gloves (optional): For handling seeds or soil (nitrile gloves work great!).
- ● Pruning shears: For trimming mature pods (sterilize with rubbing alcohol).
- ○ Row cover or netting (optional): To protect from pests like cabbage moths.
- ● Harvesting basket or tray: For collecting pods once they’re ready.
- ● Know your last frost date—mustard pods thrive in cool weather (50–75°F).
- ● Check seed packets for days to maturity (typically 45–60 days).
- ● Ensure your space has good airflow to prevent fungal diseases.
How to grow mustard plants for natural pod opening
Here's the method I use to grow mustard plants that open pods effortlessly—no forcing required.
🌱 Step 1: Choose the Right Variety and Plant at Proper Time
Select a mustard plant variety known for natural pod opening, like 'Southern Giant Curled' or 'Tendergreen'. These varieties develop pods that split open easily when fully mature. Plant seeds 4-6 weeks before your last frost date in full sun—mustard thrives with 6-8 hours of direct sunlight daily. The soil should be 60-65°F for optimal germination.
I always test soil moisture before planting—stick your finger 1 inch deep. If it feels dry, water lightly. Overwatering at this stage can cause seeds to rot before they sprout. Scatter seeds ½ inch deep and 12 inches apart in rows 18 inches apart to allow room for growth. Thin seedlings to the strongest plants once they reach 2 inches tall.
💧 Step 2: Maintain Consistent Moisture and Fertility
Mustard plants need 1 inch of water per week, but avoid wetting the leaves to prevent fungal diseases like downy mildew. Water at the base of the plant in the early morning so foliage dries quickly. You'll know moisture is right when the top inch of soil feels damp but not soggy. Too much water causes pods to stay closed or rot prematurely.
Fertilize lightly with a balanced 10-10-10 fertilizer when plants are 4-6 inches tall, then again when flowers appear. I use ½ teaspoon per plant to avoid overfeeding, which can lead to excessive leaf growth at the expense of pod development. Mustard is a cool-season crop, so stop fertilizing 4-6 weeks before your first frost to encourage pod maturation.
☀️ Step 3: Monitor for Pod Maturity and Natural Opening
Pods are ready for natural opening when they turn brown and dry—this usually happens 60-80 days after planting, depending on your climate. Don't rush harvesting; pods must fully mature to split open easily. Watch for pods cracking along the seams—this is your signal that seeds are ready to release naturally.
If pods don't open on their own, place dried pods in a paper bag and leave them in a warm, dry spot for 3-5 days. The warmth and confinement will trigger natural opening. Shake the bag gently each day to encourage seed release. You'll hear a faint rattling sound when seeds are loose inside—this is the perfect time to harvest.
✂️ Step 4: Harvest and Store Seeds Properly
Once pods are fully open, remove them from the bag and winnow seeds by placing them in a large bowl and gently blowing away chaff. I use a fan on low speed for 5-10 minutes to separate seeds efficiently. Store seeds in airtight containers in a cool, dark place—they'll stay viable for 2-3 years if kept dry.
Discard any pods that show signs of mold, pests, or premature drying—these won't produce good-quality seeds. Label your containers with the variety name and harvest date to track freshness. For next year's planting, soak seeds in lukewarm water for 12 hours before sowing to improve germination rates.
Tips & tricks for perfect mustard seed pod harvesting
Real talk: Growing mustard plants that open pods naturally takes patience—but these tricks make all the difference.
Variety Matters: Not all mustard varieties open pods easily. Stick with proven varieties like 'Southern Giant Curled' or 'Tendergreen' as mentioned in Step 1. I've tried others that just won't release seeds naturally, no matter how long I wait. These specific varieties are bred for that exact trait—don't skip this step!
Timing is Everything: The 6-8 hours of daily sunlight in Step 1 isn't just about growth—it's about triggering the natural pod-opening mechanism. If your plants get less light, pods may stay closed. I've had years where late summer cloud cover delayed opening by nearly two weeks. Consider using grow lights for 2-3 hours in the evening if your garden gets shady.
Pod Maturity Check: When monitoring pods in Step 3, look for two key signs: first, the pods should turn completely brown and feel dry to the touch. Second, gently press a pod—if it makes a slight cracking sound, that's your cue it's ready. I learned this the hard way by harvesting too early, which gave me seeds that wouldn't germinate properly. The 60-80 day range is just a guideline—your climate dictates the exact timing.
Storage Wisdom: After winnowing those seeds in Step 4, here's a pro move: divide your harvest into smaller containers. Store one portion in the fridge for immediate use, and keep the rest in your cool, dark place. This way, you always have fresh seeds ready while preserving the bulk harvest. I've found seeds stored this way maintain 95% germination rates even after two years.
Pro Tips for Mustard Seed Pods
- Real talk: Growing mustard plants that open pods naturally takes patience—but these tricks make all the difference.
- Variety Matters: Not all mustard varieties open pods easily. Stick with proven varieties like 'Southern Giant Curled'...
- Timing is Everything: The 6-8 hours of daily sunlight in Step 1 isn't just about growth—it's about triggering the nat...
Frequently asked questions
Got questions about growing and harvesting mustard seed pods? You’re not alone!
Here are some of the most common queries—plus quick, practical answers to keep your garden thriving.
How long does it take for mustard seed pods to mature?
Mustard seed pods typically mature in 60–90 days after planting, depending on the variety and growing conditions. Look for pods that turn from green to light brown and begin to split open naturally—this is your cue to harvest! If your climate is warm, faster-maturing varieties (like Sinapis alba) may be ready in as little as 50 days.
Why aren’t my mustard seed pods opening on their own?
Pods may refuse to open due to high humidity, overcrowding, or premature harvesting. To encourage natural opening:
- Ensure pods dry in sunny, low-humidity conditions (like a garage or covered porch).
- Avoid harvesting too early—wait until pods are fully brown and crispy.
- Thin plants early to reduce competition for resources.
Can I grow mustard seed pods in containers, or do they need a garden bed?
Mustard seed pods thrive in 5–10 gallon containers with well-draining soil. Use a deep pot (12+ inches) for better root growth and place it in full sun (6+ hours daily). Just ensure the container has drainage holes to prevent root rot—especially if your climate is rainy.
What’s the best way to store harvested mustard seed pods?
Store pods in a cool, dark, and dry place (like a paper bag or breathable cloth sack) to prevent moisture buildup. Avoid plastic bags, which trap humidity and risk mold. For long-term storage (6+ months), dry pods completely (test by crushing a few—if they shatter, they’re ready) and store in an airtight container in the freezer.
Are there any alternatives if my mustard seed pods don’t produce well?
If your pods underperform, try these fixes:
- Switch varieties: Brassica juncea (brown mustard) often yields more pods than Sinapis alba (white mustard).
- Hand-pollinate: Use a soft brush to transfer pollen between flowers if bees are scarce.
- Try companion planting: Grow near dill or borage to attract pollinators.
Wrapping up and next steps
Growing mustard seed pods is a rewarding journey that blends simplicity with nature’s surprises!
Whether you’re aiming for an easy harvest or just love watching pods naturally open, these hardy plants deliver big results with minimal fuss. 🌱 With the right soil, spacing, and a little patience, you’ll soon enjoy the satisfaction of a thriving garden—and maybe even a few unexpected "popping" surprises.
Ready to dive in? Start small—plant a few pods this season, experiment with techniques, and share your progress with fellow gardeners. Who knows? You might just inspire others to try their hand at this stress-free harvest adventure!