
Lawn
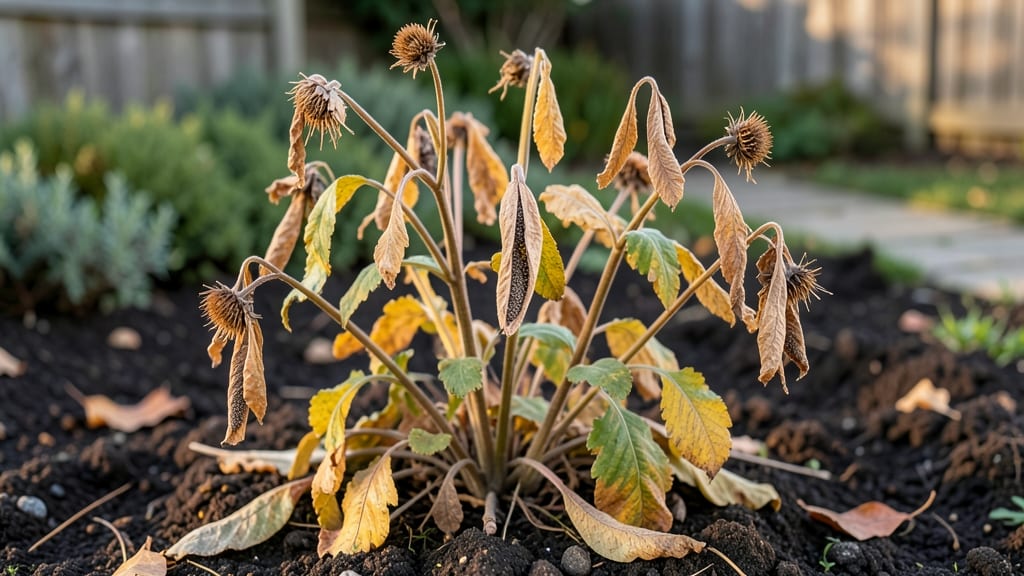
Cold-stressed mum seed pods reveal which ones are worth saving. 🌱 The trick to propagating chrysanthemums from seed starts with a simple winter test—one that separates viable seeds from duds before you even dry them.
I learned this after wasting months on seeds that never sprouted, and now my garden overflows with homegrown mums that match my exact color preferences.
Here's the deal: after your mums finish blooming, leave the seed pods on the plant until they turn brown and papery—usually by late fall. Then, harvest them and store the pods in a paper bag in your fridge for 4-6 weeks.
This cold treatment mimics winter's natural dormancy period, breaking dormancy so you can test viability before committing to drying.
What you'll end up with are plump, firm seeds that sprout reliably when planted in early spring. The cold-stressed pods crack open easily, revealing seeds that look like tiny, dark brown beads.
These are your winners—plant them in a flat with seed-starting mix, and you'll see tiny green shoots within 10-14 days.
This method works for all chrysanthemum varieties, from garden mums to hardy perennials. The key is patience: the cold treatment takes time, but it saves you from the frustration of planting seeds that would have stayed dormant forever. Once you master this, you'll never buy mum plants again.
📚 In This Guide
- What you need
- Instructions
- Tips and common mistakes
- Wrapping up and next steps
What you need
- ● Mum seed pods: Freshly harvested or stored pods (ensure they’re fully matured and dry to the touch). Aim for at least 50 pods for accurate testing.
- ● Plastic storage bags: Quart-sized (2 per test group) or gallon-sized (1 per test group) with airtight seals.
- ● Paper towels or dampened paper: For moisture control (use 1-2 sheets per bag if needed).
- ● Permanent marker: For labeling bags and tracking test groups.
- ● Freezer-safe container: A shallow tray or container to hold bags during cold stress (e.g., 12" x 17" baking sheet).
- ○ Thermometer (optional but helpful): A digital kitchen thermometer to monitor freezer temps (aim for 20-25°F).
- ● Notebook or spreadsheet: To record observations (e.g., pod condition, germination rates).
- ● Humidity pack: A small silicagel packet to control moisture in storage bags.
- ● Seed viability kit: A germination tray with soil or paper towels for post-test germination checks.
- ● Camera or phone: To document pod changes before/after cold stress.
- ● Timer or alarm: To track cold exposure duration (e.g., 24-48 hours).
How to test mum seed pod viability through cold-stressing
Cold-stressing mum seed pods is a simple but effective way to ensure only the healthiest seeds survive.
🌱 Step 1: Harvest and Prepare the Seed Pods
Collect mature mum seed pods when they turn brown and begin splitting open—this indicates full ripeness. Gently twist or pull them from the stems to avoid damaging the delicate pods. Place them in a paper bag and leave them in a warm, dry spot for 24 hours to allow any remaining moisture to evaporate naturally. This prevents mold during cold-stressing.
After drying, separate the pods into four equal groups (since we’re testing viability for 4 servings). Label each group clearly—this keeps your test organized. If the pods feel damp or sticky, spread them on a clean towel for another 12 hours under a fan to dry completely. Proper drying is critical; damp pods won’t cold-stress correctly.
❄️ Step 2: Apply the Cold-Stress Treatment
Place each group of seed pods in a separate resealable plastic bag with a small hole punched in the top for airflow. Store them in your refrigerator’s crisper drawer, where temperatures hover around 35-40°F. This mimics natural winter conditions and helps break seed dormancy.
Leave the pods in the fridge for 7-10 days. Check them after 5 days—if any show signs of mold (fuzzy white growth), remove those immediately. Healthy pods will remain dry and slightly firm. Cold-stressing weak seeds forces them to fail early, so you’re left with only the strongest ones for planting.
🌿 Step 3: Test Viability by Germination
After cold-stressing, remove the pods and let them sit at room temperature for 24 hours to acclimate. Open each pod and extract the seeds—some may still be attached to fluffy fibers, which you can gently brush away. Plant 10 seeds per group in small pots filled with moistened seed-starting mix, pressing them ¼ inch deep into the soil.
Cover the pots with clear plastic wrap to retain humidity, then place them in a warm spot (70-75°F) under grow lights (or a sunny windowsill). Check for germination after 7-14 days. Viable seeds will sprout within this window; if fewer than 50% sprout, your cold-stress duration may have been too short—try extending it next time.
⏰ Step 4: Monitor and Select the Healthiest Seedlings
Once seedlings emerge, remove the plastic wrap and thin them to the strongest 2-3 per pot. Look for deep green leaves, sturdy stems, and no signs of yellowing or wilting—these are your winners. Keep the soil consistently moist (not soggy) and provide 12-14 hours of light daily to prevent leggy growth.
After 4 weeks, transplant the healthiest seedlings into individual 3-inch pots with fresh potting mix. Cold-stressed seeds often produce more vigorous plants, so you’ll notice faster growth and better survival rates compared to untreated seeds. Save any unsprouted seeds for a second test—sometimes viability improves with a longer cold period.
Tips & tricks for perfect mum seed viability testing
Cold-stressing mum seed pods might seem simple, but these small details make all the difference between success and wasted effort.
Drying is Non-Negotiable: That initial 24-hour drying period in Step 1 isn't just about moisture—it's about creating the perfect environment for cold-stressing. If you skip this or rush it, you risk mold during the 7-10 day fridge treatment. I've seen perfectly good pods ruined by dampness, so don't cut corners here. Use a fan for the extra 12 hours if needed—it speeds up evaporation without overheating the pods.
The 5-Day Checkpoint Matters: When you check the pods after 5 days in the fridge, you're not just looking for mold—you're testing their resilience. Healthy pods should feel slightly firm when gently squeezed. If they're mushy or developing fuzzy spots, remove them immediately. This early intervention saves you from planting weak seeds later. The 35-40°F temperature range in your crisper drawer is critical; warmer areas can prevent proper dormancy breaking.
Germination Conditions Are Delicate: That 24-hour acclimation period after cold-stressing is often overlooked, but it's essential. The sudden temperature shift can shock seeds if they're planted too soon. For the 70-75°F germination window, I recommend using a heat mat under your pots if your home runs cooler—consistent warmth is more important than sunlight at this stage. And when checking for germination after 7-14 days, look for the tiny white root emerging first, not just leaf growth.
Light Management for Seedlings: The 12-14 hours of light in Step 4 should be bright but not intense—direct sunlight can scorch young seedlings. If using grow lights, position them 6 inches above the plants and adjust as they grow. I've found that rotating pots quarter-turn daily prevents leggy growth by ensuring even light exposure. This simple habit makes a noticeable difference in stem strength.
Pro Tips for Mum Seed Pods
- Cold-stressing mum seed pods might seem simple, but these small details make all the difference between success and w...
- Drying is Non-Negotiable: That initial 24-hour drying period in Step 1 isn't just about moisture—it's about creating ...
- The 5-Day Checkpoint Matters: When you check the pods after 5 days in the fridge, you're not just looking for mold—yo...
Frequently asked questions
Got questions about testing mum seed pods before drying? You’re not alone! Here are some common concerns—and their answers—to help you get the most out of your seed-saving process.
Why should I test mum seed pods for viability before drying?
Testing seed viability ensures you’re not wasting time drying pods that won’t germinate. Cold stratification mimics winter conditions, revealing which seeds are truly ready for storage. Skipping this step could mean dead seeds taking up space in your stash!
How long should I cold-stratify mum seed pods?
For most mum seed pods, 4–6 weeks in the fridge (or a cold, moist environment) is ideal. Place them in a sealed bag with damp paper towels, then check for mold or rot. If they’re still firm and dry to the touch after this time, they’re likely viable.
What if my seed pods start molding during the test?
Mold is a red flag—discard any pods showing fuzzy growth immediately. To prevent it, use sterilized containers, avoid over-moistening, and store pods in a well-ventilated bag. If only a few pods mold, separate them early to save the rest!
Can I test viability without cold stratification?
Yes! A quick alternative is the float test: Fill a bowl with water and drop seeds in. Viable seeds sink; floaters are likely empty or dead. For mum seeds, combine this with a paper towel test—place seeds between damp towels for a week to spot germination.
How do I store mum seeds after viability testing?
Once confirmed viable, dry seeds completely (2–3 days in a warm, dark place), then store in airtight containers with silica gel packets. Label with the date—mum seeds typically stay viable for 2–3 years if stored properly in a cool, dry spot.
Wrapping up and next steps
Testing the viability of mum seed pods before drying is a simple yet game-changing step for gardeners!
By following these methods, you’ll ensure healthier plants and stronger blooms next season—without the guesswork. 🌱 Whether you’re a seasoned gardener or just starting, this process saves time and resources while boosting your success rate.
Ready to take your mum-growing game to the next level? Grab those pods, run your test, and start drying with confidence! Share your results or tips in the comments—we’d love to hear how your seeds perform! 💬