
Lawn
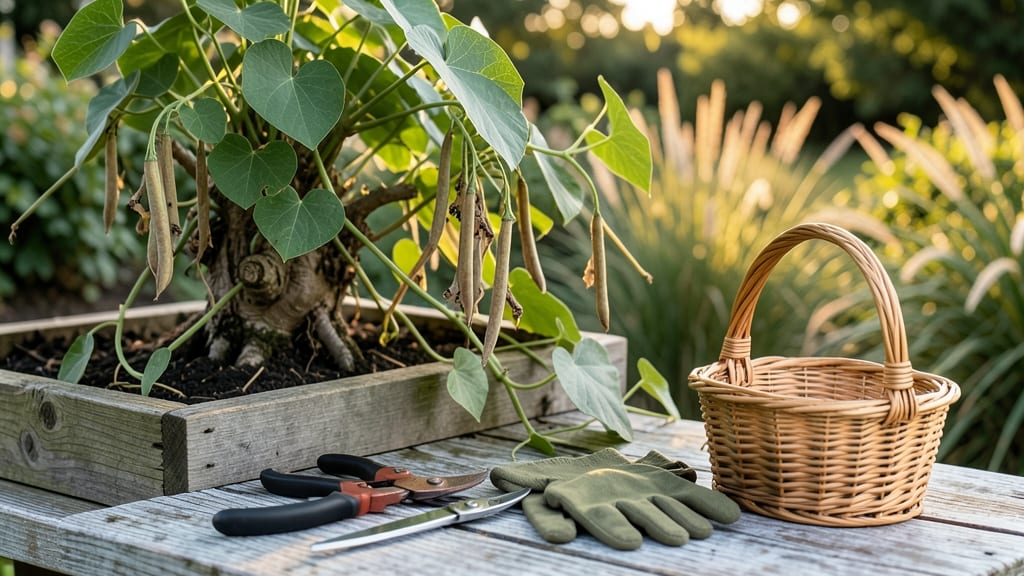
Moonflower seed pods hold the secret to next year’s moonlit blooms—if you know how to handle them right. 🌙 These delicate pods ripen in late summer, but cold stress in fall actually improves seed viability, breaking dormancy for stronger germination.
The key is timing: harvest them before the first hard frost, when the pods turn brown and papery but haven’t split open.
Gather your tools—a pair of pruners, paper bags for drying, and a cool, dark storage spot—and you’re ready. Extract the seeds carefully, as they’re sensitive to moisture and pests.
A single pod yields dozens of seeds, but only if you handle them properly—too much humidity or heat will turn them to mush before planting season.
Stored correctly in a sealed container with silica gel packets, these seeds stay viable for years. When spring arrives, a quick cold treatment (stratification) mimics winter’s natural dormancy break, ensuring your moonflowers emerge strong and ready to climb.
The payoff? Vines that bloom reliably under moonlight, just like your first harvest.
This method works for both gardeners in warm climates and those in colder zones—just adjust your harvest window. The real magic happens when you skip the store-bought seeds and grow your own, year after year, with vines that return stronger than before.
📚 In This Guide
- What you need
- Instructions
- Tips and common mistakes
- Wrapping up and next steps
What you need
- ● Mature moonflower seed pods: Harvest only fully brown, dry pods (usually late fall or early winter). Aim for 10–20 pods per batch for best results.
- ● Pruning shears or sharp scissors: Sterilized tools to avoid disease transfer. 1 pair is all you need!
- ● Paper bags or breathable fabric sacks: 2–3 medium-sized bags (12"x18" or larger) to collect pods and allow airflow.
- ○ Newspaper or paper towels: 1–2 sheets for drying pods indoors (optional but helpful).
- ● Refrigerator or cold storage unit: Set to 35–40°F (2–4°C). A standard fridge’s crispier drawer works perfectly!
- ● Small plastic container or Tupperware: 1–2 containers with a lid (for humidity control). Poke 5–10 small holes for airflow.
- ● Moistened paper towels or vermiculite: 1 handful to lightly dampen (not soak!) the pods during cold storage.
- ● Labeling tags: Waterproof markers + 5–10 tags to track harvest dates.
- ● Desiccant packets: 1–2 packets to prevent mold in storage containers.
- ● Grow lights or sunny windowsill: For post-stress germination checks (if you’re feeling experimental!).
- ● Journal or spreadsheet: To log pod sources, storage dates, and germination success rates.
How to harvest and store moonflower seed pods for spring planting
Cold-stressed moonflower seeds produce the hardiest plants—here’s how to collect, process, and store them properly.
🌿 Step 1: Identify and Harvest Mature Seed Pods
Moonflower pods turn from green to brown when fully mature, usually 3-4 weeks after blooming. Wait until they’re completely dry and begin splitting open naturally—this ensures maximum germination rates. I like to harvest on a dry morning when dew has evaporated, as moisture can encourage mold during storage.
Gently twist the pod from the stem and place it in a paper bag (not plastic—moisture buys here). If pods are still green, leave them on the vine another week. Overripe pods crumble easily, so handle them carefully to avoid losing seeds inside.
🪴 Step 2: Extract and Clean the Seeds
Once pods are fully dry, open them over a clean surface and remove the seeds. Moonflower seeds are large and flat, often with a papery coating. I use a small bowl and my fingers to separate seeds from chaff—no need for water or scrubbing, as this can damage the seed coat.
Discard any seeds that appear shriveled, discolored, or damaged. Store the remaining seeds in a paper envelope (not plastic) in a cool, dry place. The paper allows airflow while preventing moisture buys, which is critical for long-term viability.
⏰ Step 3: Cold-Stress for Better Germination
Moonflowers thrive when given a cold treatment to break dormancy. Place the seeds in a sealed plastic bag with a damp (not soaking) paper towel. Store the bag in your refrigerator’s vegetable crisper for 4-6 weeks. Check weekly—the towel should stay moist but not dripping.
This cold-stress mimics winter conditions, tricking seeds into thinking spring has arrived. After the treatment, let them dry out at room temperature for 24 hours before storing long-term. You’ll see better germination rates and stronger seedlings next season.
☀️ Step 4: Store Until Spring Planting
Keep seeds in a cool, dark place (like a basement or garage) in their paper envelope. Avoid humidity—moisture is the enemy of seed longevity. Label the envelope with the date and variety if you’re growing multiple types.
Moonflower seeds remain viable for 2-3 years under ideal conditions. When ready to plant, soak seeds in lukewarm water for 12 hours before sowing. This softens the seed coat and speeds up germination. Plant ½ inch deep in well-draining soil and keep moist until sprouts appear.
Tips & tricks for perfect moonflower seed pod harvesting
Between us, these small details make all the difference when working with moonflower seeds—trust me, I've learned the hard way after losing seeds to moisture and poor timing.
Timing is Everything: Harvest moonflower pods in the morning when dew has evaporated but before the afternoon heat sets in. This reduces moisture exposure, which is critical since damp seeds can develop mold during storage. I've found that pods harvested after 10 AM often have slightly higher moisture content, even if they look dry.
Handling Matters: When extracting seeds in Step 2, work over a clean, dry surface like a baking sheet or large bowl. The papery coating on moonflower seeds is delicate—don't be tempted to scrub them, as this can damage the seed coat. Instead, gently separate seeds from chaff using your fingers or a small brush. I keep a fine-mesh strainer handy to catch any tiny seeds that might fall through.
Cold-Stress Consistency: During the 4-6 week cold treatment in Step 3, maintain consistent moisture in that paper towel. I like to use a spray bottle to mist the towel weekly rather than soaking it, as excess water can lead to mold. The towel should feel like a wrung-out sponge—not dripping, but not bone-dry either. This mimics natural winter conditions perfectly.
Storage Wisdom: For long-term storage, I've found that adding a small silica gel packet to the paper envelope (along with the seeds) helps absorb any residual moisture. These packets are often included in shoe boxes or electronics packaging. Just make sure the seeds aren't directly touching the silica gel, as prolonged contact can dry them out too much.
Pro Tips for Moonflower Seed Pods
- Between us, these small details make all the difference when working with moonflower seeds—trust me, I've learned the...
- Timing is Everything: Harvest moonflower pods in the morning when dew has evaporated but before the afternoon heat se...
- Handling Matters: When extracting seeds in Step 2, work over a clean, dry surface like a baking sheet or large bowl. ...
Frequently asked questions
Got questions about saving moonflower seed pods through cold stress? You’re not alone! Here are answers to the most common queries to help you prep for next year’s stunning blooms.
When is the best time to harvest moonflower seed pods?
Harvest pods when they’ve turned completely brown and papery—usually 4–6 weeks after flowers fade. Wait too long, and seeds may scatter or lose viability. Aim for late fall or early winter before the first hard frost for ideal cold-stress timing.
How long should I cold-stratify moonflower seeds?
Moonflower seeds thrive with 6–8 weeks of cold stratification (40–50°F). Place pods in a breathable bag with damp peat moss, then refrigerate. Avoid freezing—consistent chill mimics winter’s natural dormancy, boosting germination rates.
Can I reuse moonflower seed pods from last year?
Yes! Store dry pods in a cool, dark place (like a paper bag) until fall. Test a few for viability by slicing open—if seeds are firm and plump, they’re ready for cold treatment. Discard shriveled or moldy pods immediately.
What if my moonflower pods won’t open naturally?
Gently squeeze the pod to release seeds (wear gloves—some varieties have sticky sap!). If pods resist, let them dry further on a windowsill. Never force-open wet pods—this risks mold. Pro tip: Place pods in a paper towel-lined box to catch escaping seeds.
Are there alternatives if I can’t cold-stratify?
Try sand stratification: Mix seeds with damp sand (1:3 ratio) in a sealed container, then chill for 4–6 weeks. For impatient gardeners, a quick soak in warm water (24 hours) can kickstart germination, though cold-stratification yields stronger plants.Why aren’t my moonflower seeds germinating after cold treatment?
Check these fixes:
- Depth: Plant seeds ½ inch deep—too shallow = drying out.
- Moisture: Keep soil consistently damp (not soggy).
- Warmth: Germination needs 70–80°F after stratification.
- Patience: Moonflowers can take 2–4 weeks to sprout.
Wrapping up and next steps
Moonflower seed pods are a gardener’s hidden treasure—especially when it comes to preserving viability through cold stress. By understanding their unique needs and following the right steps, you can ensure next year’s blooms are just as stunning.
Don’t let these delicate pods go to waste; harvest, dry, and store them wisely to unlock a garden full of enchanting night-blooming wonders!
Ready to try? Start small—pick a few pods, experiment with cold treatments, and watch your moonflower magic grow. Happy gardening! 🌙✨