
Size
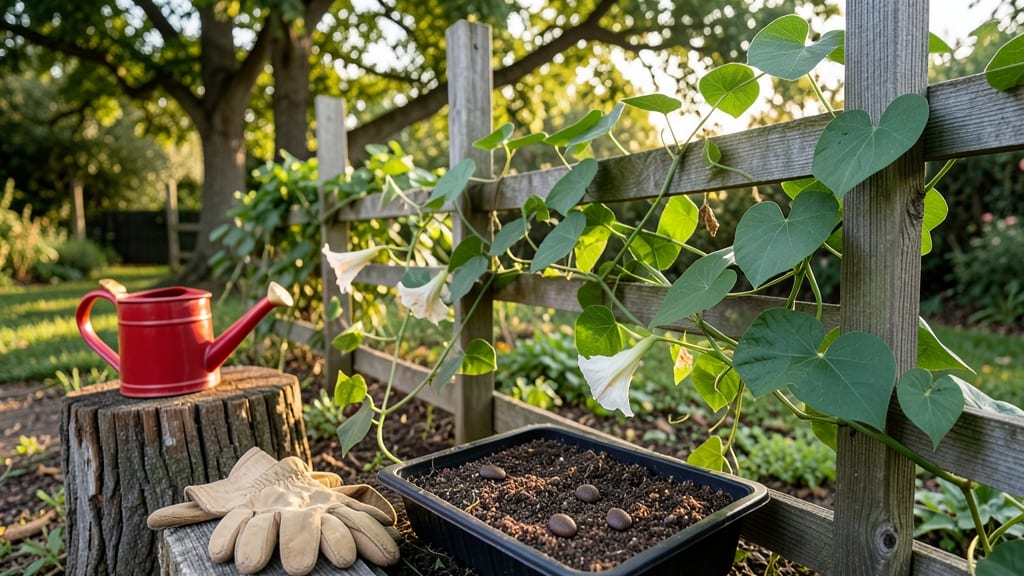
Growing moonflower seeds in a garden is the easiest way to get nocturnal blooms that smell like tropical nights. 🌙 I’ve watched these vines transform bare fences into moonlit canopies—all from a single packet of seeds. The secret? They’re forgiving, fast-growing, and thrive even if you forget to water daily.
Start with well-draining soil and a sunny spot (6+ hours of light). Plant seeds ½ inch deep after the last frost, and they’ll sprout in 7-14 days. Unlike fussy annuals, moonflowers tolerate poor soil and drought once established—just keep them moist until roots take hold.
By 60 days, you’ll have 5-foot vines covered in white, trumpet-shaped blooms that open at dusk and close by morning. The fragrance alone makes them worth growing, but they’re also a magnet for moths and hummingbirds after dark.
Best for trellises, fences, or wild garden edges. They self-seed too, so you’ll get free plants next year. Here’s how to avoid the one mistake that kills them—overcrowding—and keep them blooming all summer.
📚 In This Guide
- What you need
- Instructions
- Tips and common mistakes
- Wrapping up and next steps
What you need
- ● Moonflower seeds: 5–10 seeds (or more if you’re dreaming of a full garden!)
- ● Growing containers: Small pots (4–6 inches deep) for seedlings, or
- ● A well-draining garden bed (if planting directly outdoors)
- ● Potting mix: Lightweight, well-draining soil (add perlite or sand for extra aeration)
- ● Watering can or spray bottle: For gentle hydration (avoid overwatering!)
- ● Sunlight access: A sunny spot (6+ hours of light daily, or a grow light for indoors)
- ○ Fertilizer (optional but helpful): Balanced liquid fertilizer (10-10-10) or
- ● Compost or worm castings for organic nourishment
- ● Garden trowel (for transplanting seedlings)
- ● Plant markers (to track varieties if growing multiple types)
- ● Pruning shears (for shaping vines later)
- ● Mulch (to retain moisture and suppress weeds)
- ● Trellis or stakes (if you want to train vines vertically)
Step-by-Step instructions for growing moonflowers from seed
Moonflowers bloom in just 60 days—here’s how to coax those magical white trumpets from tiny seeds.
🌱 Step 1: Choose the Perfect Planting Location
Moonflowers thrive in full sun to partial shade, but they’ll reward you with bigger blooms when given at least 6 hours of direct sunlight daily. I always plant mine along a fence or trellis where they can climb and spread—this prevents them from sprawling on the ground, which can lead to broken stems.
Check your soil’s drainage first. Moonflowers hate soggy roots, so if your garden stays wet after rain, amend the area with 2-3 inches of compost to improve aeration. Press a handful of soil in your palm—if it crumbles easily when dry, it’s ready. If it sticks together, mix in some perlite or coarse sand to lighten it.
🌱 Step 2: Direct-Sow Seeds After Last Frost
Wait until the soil temperature reaches at least 60°F before planting—cold soil slows germination and can cause seed rot. I test this by pressing my hand into the ground for 5 seconds; if it feels warm, it’s time. Plant seeds ½ inch deep and 6 inches apart in rows spaced 18 inches apart for optimal air circulation.
Don’t cover the seeds with too much soil—they need light to germinate quickly. A light sprinkle of seed-starting mix on top is enough. Water gently but thoroughly right after planting, so the soil is moist but not waterlogged. You’ll see sprouts in 7-14 days, depending on warmth.
☀️ Step 3: Provide Support and Consistent Watering
Moonflowers are vining plants, so install 5-6 foot tall trellises or stakes at planting time. I use bamboo stakes tied with twine—it’s sturdy and lets the vines twine naturally. As the plants grow, gently guide the stems upward to encourage climbing. Without support, they’ll sprawl and produce fewer blooms.
Water deeply 2-3 times per week, aiming for 1 inch of water per week. Let the top 1-2 inches of soil dry out between waterings—this prevents fungal diseases like powdery mildew. You’ll know you’re watering right when the soil feels damp but not soggy down to 3 inches deep. Mulch with 2 inches of straw to retain moisture and suppress weeds.
✂️ Step 4: Prune and Encourage More Blooms
Deadhead spent blooms every morning to redirect the plant’s energy into new flowers. Simply pinch off the faded blossoms with your fingers—no need for shears. This keeps the vines producing flowers instead of setting seed. I also trim back any leggy growth that’s stretching toward the sun but not climbing the trellis.
Fertilize lightly once a month with a balanced, water-soluble fertilizer (like 10-10-10) diluted to half strength. Too much nitrogen makes plants leafy but flower-sparse. Stop fertilizing 4-6 weeks before your first frost—you want the plant to focus on hardening off, not new growth.
⏰ Step 5: Extend the Season with Simple Tricks
Moonflowers are annuals, but you can squeeze extra blooms out of them by cutting back the vines by half after the first frost. The plant will produce a second flush of flowers before dying back. Harvest the blooms in the early morning when they’re fully open—they close by noon and won’t reopen.
Save seeds from your best plants for next year by letting a few flowers go to seed. The pods turn brown and papery—when they split open, collect the seeds and store them in a cool, dry place. With just a few seeds, you’ll have a jungle of moonflowers again next season.
Tips & tricks for perfect moonflower growth
These simple strategies will help you transform tiny moonflower seeds into a lush, blooming garden in just 60 days.
Sunlight Strategy: While moonflowers tolerate partial shade, the 6 hours of direct sunlight mentioned in Step 1 is non-negotiable for optimal blooms. I've noticed that morning sun (6 AM to noon) works best—it prevents the delicate petals from wilting in afternoon heat. If your garden gets less than 6 hours, consider using reflective surfaces like white walls or mulch to bounce extra light onto the plants.
Soil Temperature Test: The 60°F soil temperature threshold in Step 2 is crucial for germination. I've learned to double-check by pressing my hand into the soil for 5 seconds—if it feels pleasantly warm (like a warm bath), it's ready. For cooler climates, use black plastic mulch to warm the soil faster. Never plant in cold, damp soil—it'll rot your seeds before they sprout.
Support System: Installing those 5-6 foot tall trellises in Step 3 is where many gardeners skimp, but it makes all the difference. I recommend using bamboo stakes tied with jute twine—they're sturdy enough to support the vines while allowing natural twining. Without proper support, moonflowers sprawl and produce fewer blooms. Place stakes at planting time so you don't disturb roots later.
Watering Wisdom: The 1-2 inches of soil drying between waterings in Step 3 is perfect for preventing powdery mildew. I've found that watering deeply in the morning (before 10 AM) gives plants all day to absorb moisture without evening dampness that invites fungal issues. Use a moisture meter if you're unsure—aim for dampness down to 3 inches deep after each watering.
Pro Tips for Moonflower Seed Grow A Garden
- These simple strategies will help you transform tiny moonflower seeds into a lush, blooming garden in just 60 days.
- Sunlight Strategy: While moonflowers tolerate partial shade, the 6 hours of direct sunlight mentioned in Step 1 is no...
- Soil Temperature Test: The 60°F soil temperature threshold in Step 2 is crucial for germination. I've learned to doub...
Frequently asked questions
about growing moonflowers from seed—because every gardener deserves a little clarity!How long does it take for moonflower seeds to sprout?
Moonflower seeds typically sprout in 7–14 days after planting, depending on soil warmth and moisture. For faster results, pre-soak seeds for 4–6 hours or plant in well-warmed soil (70°F+). Pro tip: Keep soil consistently moist but not soggy—patience pays off!
Can I grow moonflowers from seed indoors before transplanting?
Yes! Start seeds indoors 4–6 weeks before your last frost date. Use small pots with well-draining soil, cover with plastic wrap to retain humidity, and place under grow lights (12+ hours/day). Warning: Moonflowers are sensitive to root disturbance—transplant carefully with a soil ball!
What’s the best way to revive a struggling moonflower vine?
If your vine looks wilted or leggy, it’s likely thirsty or nutrient-deficient. Try this:
- Water deeply at the base (avoid leaves to prevent mildew).
- Fertilize lightly with a balanced 10-10-10 mix every 3–4 weeks.
- Prune leggy stems to encourage bushier growth.
Do moonflowers grow back every year, or are they annuals?
Moonflowers (Ipomoea alba) are annuals in most climates, meaning they die back after frost. However, in USDA Zones 9–11, they may self-seed or return if protected. Save seeds from dried pods for next year’s garden—nature’s free replanting!
What can I plant with moonflowers for a thriving garden?
Moonflowers thrive with companion plants like:
- Tomatoes (pest-repelling foliage).
- Marigolds (deter pests naturally).
- Cucumbers (shade-loving vines).
How do I save moonflower seeds for next season?
Let pods dry completely on the vine, then harvest seeds. Store them in a cool, dry place (like a paper envelope) for up to 2 years. Pro move: Label seeds with the harvest year—moonflower varieties can vary!
Wrapping up and next steps
Growing moonflower seeds is a rewarding and stress-free way to add enchanting nighttime blooms to your garden in just 60 days! 🌙✨ With minimal effort—think sunlight, soil, and patience—you’ll enjoy fragrant, delicate flowers that thrive even for beginners.
Whether you’re a seasoned gardener or a newbie, these fast-growing vines offer a magical touch to any space.
Ready to dive in? Start by planting your seeds this week—soon, your garden will be alive with the soft glow of moonflowers lighting up your evenings. Happy growing! 🌱💚