
Lawn
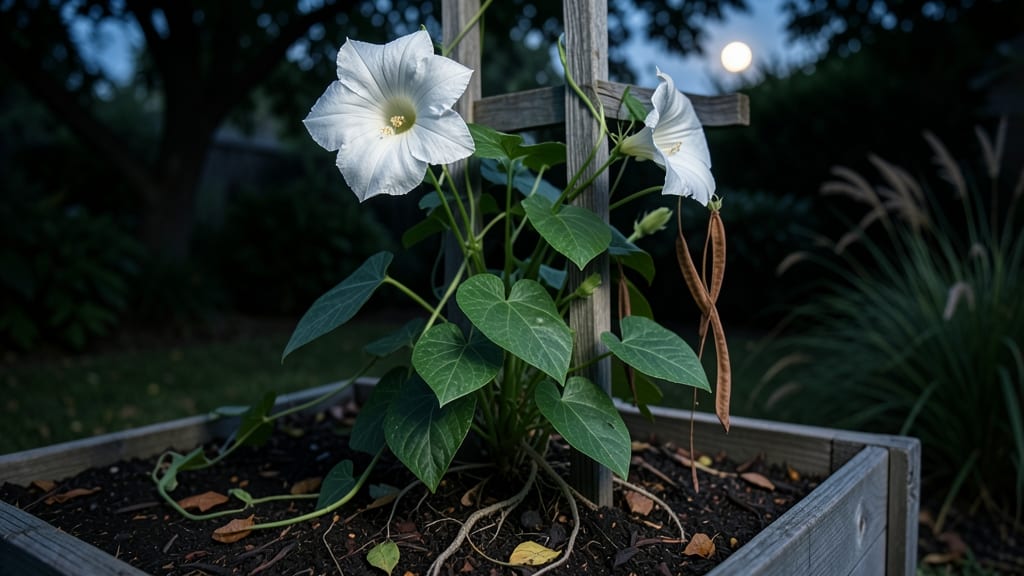
Moonflower bush seed pods hold the key to next year’s moonlit blooms—if you know how to break their dormancy. 🌙 I’ve learned that skipping cold stratification means waiting months (or never) for germination, but with the right timing and technique, you’ll have strong seedlings ready for planting by spring.
The process starts in late fall when pods turn brown and papery. Harvest them carefully, then extract the seeds while they’re still fresh—don’t let them dry out completely.
Store the seeds in a sealed container with slightly damp peat moss or paper towels in the fridge for 6-8 weeks to mimic winter’s natural dormancy period.
After stratification, plant the seeds in a sunny spot with well-draining soil, keeping them consistently moist but never soggy. Within 2-4 weeks, you’ll see those first tender shoots pushing through—proof that patience pays off with vibrant, fragrant blooms come summer.
This method works for gardeners in zones 8-11, though colder climates may need an extra month of chilling. Just watch for mold (a sign of over-moisture) and keep seedlings protected from pests until they’re strong enough to thrive on their own.
📚 In This Guide
- What you need
- Instructions
- Tips and common mistakes
- Wrapping up and next steps
What you need
- ● Moonflower bush seed pods: Freshly harvested, fully mature pods (ensure they’re dry and slightly papery to the touch). Aim for at least 10-15 pods for reliable germination.
- ● Potting mix: Well-draining, sterile seed-starting mix (avoid garden soil—it can harbor pests or diseases). A 10-inch diameter container or small pots (3-4 inches deep) will work.
- ● Containers: Plastic or paper seed trays with drainage holes (for grouping pods).
- ● OR Individual small pots (if you prefer isolating pods).
- ● Sand or perlite: Coarse sand or perlite (for moisture control). Mix 1 part sand/perlite to 3 parts potting mix.
- ● Spray bottle: For gentle watering (avoid over-saturating the pods).
- ○ Plastic wrap or humidity dome: To retain moisture during stratification (optional but helpful for humidity-loving pods).
- ● Refrigerator or cold frame: A consistent 35–45°F (2–7°C) environment for 4–8 weeks. A standard fridge works—just avoid the freezer!
- ● Labeling tags: Waterproof markers and tags to track pod varieties and planting dates.
- ● Grow lights: For early indoor germination after stratification (if your climate is still chilly post-winter).
- ● Heating mat: To gently warm soil post-stratification (speeds up germination).
- ● Fungicide: A light dose of neem oil or cinnamon powder to prevent mold during stratification.
- ● Journal/notebook: To log moisture levels, fridge temps, and germination progress.
How to cold stratify moonflower bush seed pods for successful germination
Cold stratification mimics nature's way of breaking seed dormancy—here's how to do it right.
🌱 Step 1: Harvest and Prepare Mature Seed Pods
Wait until moonflower seed pods turn completely brown and begin splitting open naturally—this ensures maximum viability. Gently twist each pod to release the large, flat seeds inside. I like to work on a clean towel to catch any stray seeds that might pop out unexpectedly. Store the seeds in a paper envelope with the harvest date written on it, since freshness matters for germination rates.
Moonflower seeds have a thick outer coating that requires cold treatment to soften. If you harvest too early, the seeds won't break dormancy properly, no matter how long you stratify them. Look for pods that feel dry and papery to the touch—these are ready for processing.
❄️ Step 2: Perform Cold Stratification in Damp Sand
Mix equal parts damp sand and perlite in a shallow container—this creates ideal airflow while maintaining moisture. I use a ratio of 1:1 by volume, adding just enough water to make the mix feel like a wrung-out sponge. Place the seeds about 1 inch deep in the mix, spacing them 2 inches apart to prevent rot during stratification.
Cover the container with plastic wrap and poke small holes for ventilation, then refrigerate for 6-8 weeks at 35-40°F. Check monthly to ensure the sand remains lightly moist—never soggy. This cold treatment simulates winter conditions, breaking the seed's natural dormancy cycle. If condensation builds up, uncover briefly to let excess moisture escape.
🌿 Step 3: Sow Stratified Seeds in Warmth
After stratification, plant the seeds ½ inch deep in a well-draining potting mix at 70-75°F. I use a heat mat to maintain consistent warmth since moonflowers germinate slowly without it. Keep the soil surface consistently moist but never waterlogged—excess moisture causes damping-off, which can wipe out seedlings overnight.
Place the container in bright, indirect light until germination occurs, which typically takes 2-4 weeks. You'll know it's working when you see the first true leaves—these will be broad and heart-shaped, signaling healthy growth. Avoid direct sunlight at this stage, as tender seedlings can scorch easily.
☀️ Step 4: Harden Off and Transplant Young Seedlings
Once seedlings reach 4-6 inches tall with 3-4 sets of true leaves, begin hardening them off. Start with 1 hour daily in partial shade, gradually increasing exposure over 10-14 days. I place mine on a shaded patio where they get morning sun but avoid afternoon heat. This slow acclimation prevents transplant shock.
Choose a location with full sun exposure and well-draining soil for planting. Moonflowers thrive in rich, slightly acidic soil—amend with compost if your soil is heavy clay. Plant seedlings 10-12 inches apart to allow room for their vigorous growth. Water deeply at the base after transplanting to encourage root establishment.
Tips & tricks for perfect moonflower seed stratification
Here's what nobody tells you about getting those moonflower seeds to sprout reliably—these tricks saved me from years of failed attempts.
Pod Maturity is Non-Negotiable: Those completely brown, papery pods are your golden ticket. I learned this the hard way after trying to stratify green pods—zero germination. Press gently: if it feels dry and crumbly like tissue paper, it's ready. Green pods contain immature seeds that won't break dormancy, no matter how long you refrigerate them. Store harvested seeds in paper envelopes with harvest dates to track freshness—seeds lose viability after just 6 months.
The Sand-Perlite Ratio Makes All the Difference: That 1:1 damp sand to perlite mix isn't just arbitrary—it's about balance. The sand provides weight and moisture retention while the perlite creates air pockets to prevent rot. I use a spray bottle to moisten the mix to a wrung-out sponge consistency before planting. Too wet? Seeds rot. Too dry? They won't germinate. The 2-inch spacing between seeds in Step 2 prevents fungal growth during those critical 6-8 weeks in the fridge.
Temperature Consistency is Key: Your fridge's coldest spot (usually the back of the crisper drawer) should maintain that 35-40°F range. I place a thermometer in the container to monitor—some fridges fluctuate wildly. The goal is to simulate winter conditions consistently. If condensation builds up, uncover briefly to let moisture escape; soggy conditions trigger mold. Monthly checks ensure the sand stays lightly moist without becoming waterlogged.
Visual Cues for Germination Success: After sowing at 70-75°F, watch for those broad, heart-shaped true leaves—this confirms successful stratification. The 2-4 week germination window can feel like an eternity, but patience pays off. I place containers under grow lights in bright indirect light to prevent leggy seedlings. Direct sunlight at this stage causes scorching, while too little light results in weak, etiolated plants that struggle to establish.
Pro Tips for Moonflower Bush Seed Pod
- Here's what nobody tells you about getting those moonflower seeds to sprout reliably—these tricks saved me from years...
- Pod Maturity is Non-Negotiable: Those completely brown, papery pods are your golden ticket. I learned this the hard w...
- The Sand-Perlite Ratio Makes All the Difference: That 1:1 damp sand to perlite mix isn't just arbitrary—it's about ba...
Frequently asked questions
Got questions about moonflower bush seed pods? You’re not alone! Here are some of the most common queries—and their straightforward answers—to help you master the cold stratification process like a pro.
How long does cold stratification take for moonflower seed pods?
Moonflower seed pods typically need 60–90 days of cold stratification to break dormancy. Place them in a sealed bag with moist peat moss or sand in your fridge (not the freezer!) for best results. Patience pays off—wait until late winter to plant outdoors after the last frost date.
Can I skip cold stratification for faster germination?
While possible, skipping stratification may delay or reduce germination rates. Moonflower seeds have hard coats that resist moisture. If you’re in a hurry, try nicking the seed coat lightly with sandpaper or soaking in warm water for 24 hours—but cold stratification remains the most reliable method for consistent blooms.
What’s the best way to store moonflower seed pods before planting?
Store seed pods in a cool, dry place (like a paper envelope or breathable bag) until you’re ready to stratify. Avoid plastic containers to prevent mold. Label them with the harvest date—fresh pods (within 1–2 months) germinate best. Pro tip: Keep them away from direct sunlight to maintain viability!
My moonflower seeds rotted during stratification—what went wrong?
Rotting usually means too much moisture or poor airflow. Ensure your medium (peat moss/sand) is damp, not soggy, and check pods weekly. If mold appears, toss them and restart with fresh seeds. Quick fix: Use a small fan on low to improve circulation in your fridge setup.
Will moonflower seed pods grow true to the parent plant?
Yes! Moonflower (Ipomoea alba) seeds are genetically consistent, so pods from your bush will produce similar white, fragrant blooms. However, color variations (like pale pink) can occur due to environmental factors. For guaranteed traits, save seeds from healthy, disease-free plants.
Wrapping up and next steps
Growing moonflower bush seed pods with cold stratification isn’t just a gardening hack—it’s your ticket to reliable, stunning blooms next season! 🌙 By mimicking nature’s timing, you’ll unlock faster germination, healthier seedlings, and a garden that wows with ethereal white flowers.
Whether you’re a seasoned green thumb or a curious beginner, this method is your secret weapon for success.
Ready to transform your garden? Grab those seed pods, follow the blueprint, and watch your moonflowers thrive. Next step: Mark your calendar for planting after stratification—your future blooms are counting on you! 🌱