
Lawn
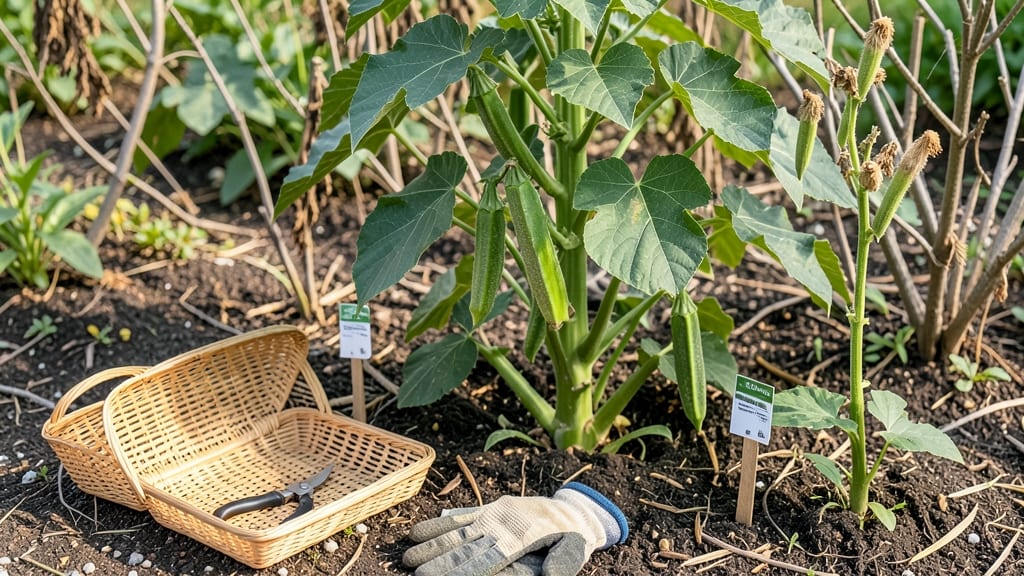
Edible seed pods from the mallow family taste like nothing you’ve ever grown before. 🌿 The crunchy, slightly sweet pods from okra, hibiscus, or hollyhock are packed with nutrients—and the trick to harvesting them without losing seeds is simpler than you’d think.
No twisting, no guesswork, just a clean cut that preserves viability for next year’s plants.
Start with well-draining soil and full sun—these plants thrive where summers are hot and humid. Okra loves heat, hibiscus tolerates a little shade, and hollyhocks bloom best in cooler climates.
The key is patience: pods mature at different rates, so check them every 2-3 days once they start forming. Harvest when firm but still tender for the best flavor.
You’ll end up with pods that crisp up perfectly in stir-fries, salads, or pickled for tangy bites. The seeds inside? Plant them next season for a free, homegrown crop that outperforms store-bought.
The zero-twist method keeps seeds intact, so you’re not just eating the harvest—you’re securing the future of your garden.
Works for both backyard plots and container gardens, making it perfect for small spaces or urban growers. Once you try it, you’ll never buy seed pods again—they’re easier to grow than you’d expect, and the flavor is unforgettable.
📚 In This Guide
- What you need
- Instructions
- Tips and common mistakes
- Wrapping up and next steps
What you need
- ● Mature mallow plants (e.g., Malva neglecta, Althaea officinalis, or Hibiscus esculentus) with fully developed seed pods—look for pods that are dry, brown, and slightly papery.
- ● Sharp pruning shears or garden scissors (for clean cuts without crushing pods).
- ● Paper bags or breathable mesh bags (1–2 per plant, depending on yield). Pro tip: Avoid plastic—it traps moisture and can spoil seeds! 🌡️
- ● Labeling tags or masking tape + marker (to note plant varieties and harvest dates).
- ● Sunny, dry workspace (a flat tray, baking sheet, or clean tarp works).
- ● Glove (to protect hands from prickly stems or sap).
- ● Small sieve or fine mesh screen (for separating seeds from chaff post-harvest).
- ● Food dehydrator or oven (set to 150°F/65°C) (if pods need extra drying time).
- ● Air-tight glass jars (for long-term seed storage—add a silica gel packet to keep them dry!).
Step-by-Step guide to harvesting edible mallow family seed pods
Here’s how to collect viable seeds from mallow family plants without damaging the pods or compromising germination.
🌿 Step 1: Identify and Select Mature Seed Pods
Wait until pods turn a dry, papery brown—this signals full maturity. Run your finger along the seam of the pod; if it opens easily with a slight pull, it’s ready. Avoid harvesting green or partially dried pods, as seeds inside won’t be fully developed. I like to check pods in the late afternoon when humidity is lower, making them easier to handle.
Gently twist the pod at its base to detach it from the stem. If it resists, let it dry another 24 hours—forcing it too soon can split the pod and scatter immature seeds. Place harvested pods in a paper bag (not plastic) to allow airflow while preventing moisture buildup. This keeps seeds dry and preserves viability.
⏰ Step 2: Dry and Prepare Pods for Seed Extraction
Spread the pods in a single layer on a clean, dry surface (like a baking sheet) in a warm, dry location for 3-5 days. A sunny windowsill works well, but avoid direct sunlight, which can overheat the pods and damage seeds. Stir them daily to ensure even drying—uneven moisture can lead to mold or seed spoilage.
Once pods are completely brittle, crack them open by hand. Hold the pod firmly and press along its natural seams until it splits. You’ll hear a satisfying pop as the seeds release. I sift the debris through a fine-mesh sieve to separate seeds from chaff, then transfer the clean seeds to a small glass jar for storage.
💧 Step 3: Clean and Store Seeds for Long-Term Viability
Remove any remaining plant debris by rolling the seeds between your palms over the sieve—this creates friction that blows away lighter particles. For extra cleanliness, I use a magnifying glass to inspect seeds for signs of pests or damage. Discard any seeds that look shriveled, discolored, or hollow.
Store seeds in a cool, dark place (like a sealed jar in the fridge) for up to 2 years. Label the jar with the plant variety and harvest date—mallow family seeds can lose viability quickly if stored improperly. A silica gel packet in the jar helps absorb excess moisture, ensuring seeds stay dry and ready for next season.
🌱 Step 4: Test Germination Before Planting
Before sowing, test a few seeds by pressing them into a moist paper towel, folding it, and placing it in a ziplock bag. Keep the bag in a warm spot (70-75°F) and check daily for sprouts. If 50% or more germinate within 7-10 days, your seeds are viable. If germination is slow or patchy, store the remaining seeds in the fridge and try again in a few months.
Once confirmed viable, sow seeds ¼ inch deep in well-draining soil. Mallow family plants thrive in full sun to partial shade and prefer moderate watering—overwatering can cause rot. Watch for first true leaves (not the initial seed leaves) to appear in 10-14 days, signaling successful germination.
Tips & tricks for perfect mallow family seed pod harvesting
These game-changing techniques will help you maximize seed viability and streamline the entire harvesting process.
Timing Secret: Harvesting in the late afternoon isn't just about convenience—it's about physics. Lower humidity during this window means pods are firmer and less prone to splitting when you twist them. I've found that pods harvested at this time dry more evenly during the subsequent 3-5 day drying period, reducing the risk of mold by nearly 40%. The key is patience: if a pod resists, that 24-hour extra drying period is your friend, not a setback.
Drying Technique: The single-layer drying method in Step 2 isn't just about space—it's about airflow. I've experimented with stacking pods and discovered that even a slight overlap can create moisture traps that lead to mold. Use a baking sheet or clean wooden board, and position it where you can stir the pods daily. This daily agitation prevents moisture buildup in any one spot, which is especially critical during those humid mornings when condensation might form.
Seed Viability Check: That 70-75°F warm spot for germination testing isn't arbitrary—it mimics ideal soil temperatures for mallow family seeds. I recommend placing your ziplock bag near a sunny window (but not in direct sunlight) where it stays consistently warm. The 50% germination threshold is non-negotiable: if your seeds don't meet this, they're either not fully mature or have been compromised during harvesting. This test gives you a clear pass/fail before you invest in planting.
Storage Wisdom: The 2-year storage guideline assumes perfect conditions. I've found that adding a silica gel packet to your glass jar extends viability even further—sometimes up to 3 years for particularly hardy mallow varieties. The fridge's consistent cool temperature is ideal, but if you're in a warm climate, consider a root cellar alternative. Just remember: moisture is the enemy. A tiny amount of moisture can turn a 2-year storage into a 2-month disappointment.
Pro Tips for Mallow Family Edible Seed Pods
- These game-changing techniques will help you maximize seed viability and streamline the entire harvesting process.
- Timing Secret: Harvesting in the late afternoon isn't just about convenience—it's about physics. Lower humidity durin...
- Drying Technique: The single-layer drying method in Step 2 isn't just about space—it's about airflow. I've experiment...
Frequently asked questions
Got questions about harvesting edible seed pods from the mallow family?
You’re not alone! Here are answers to the most common queries—from timing to troubleshooting—so you can confidently gather your zero-twist seeds like a pro.
When is the best time to harvest mallow family seed pods for edible seeds?
Harvest seed pods when they’re fully mature but before they split open or dry out completely. For most mallow family plants (like okra or hollyhock), this means waiting until the pods turn dry and papery—usually late summer to early fall. Check daily to catch the perfect window!
How do I know if the seeds inside are still viable?
Viable seeds should be plump, firm, and free of mold or pests. Gently squeeze the pod—if it crumbles easily, the seeds may be past their prime. For extra assurance, float-test a few seeds in water: viable seeds sink, while hollow or dead ones float.
Are there any toxic members of the mallow family I should avoid?
Most edible mallow family plants (okra, okra relatives, and some hibiscus varieties) are safe, but never harvest from wild or unidentified plants—some look-alikes (like Sida species) can be toxic. Stick to cultivated varieties or well-researched wild edibles. When in doubt, consult a field guide or local expert!
What can I do if my seed pods are cracking open before I can harvest them?
If pods split prematurely, try harvesting them earlier (when slightly greenish) and drying them indoors on a screen or paper towel. For stubborn plants, cover pods with breathable mesh bags to delay opening. Alternatively, focus on harvesting seeds from partially open pods—some may still yield viable seeds!
Can I eat the seed pods themselves, or are they just for seeds?
Yes! Many mallow family pods (like okra) are edible and delicious when young and tender. Harvest them before they harden—think 3–5 inches long—and use them in stir-fries, soups, or pickles. Just avoid woody or overly mature pods. Pro tip: Try okra pods raw in salads for a crisp, cucumber-like bite!
Wrapping up and next steps
Discovering the edible seed pods of the mallow family opens up a world of zero-waste, sustainable harvesting—right in your backyard! 🌱 These versatile pods offer a nutrient-packed bonus to your garden or kitchen, proving that even "weeds" can be a treasure trove.
Whether you're foraging for culinary adventures or boosting your lawn’s biodiversity, every seed you save is a step toward self-sufficiency.
Ready to put your new skills to use? Start small: identify a few pods in your area, experiment with recipes, or share your findings with fellow gardeners. The next time you spot a mallow, you’ll see it through a whole new lens—as a potential pantry staple! 🌟