
Lawn
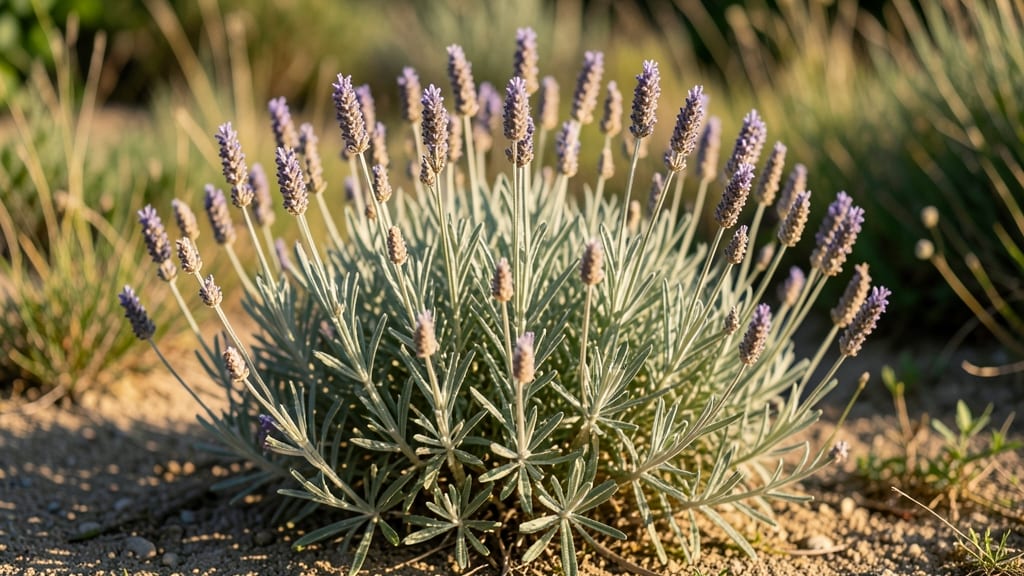
Harvesting lavender seed pods at the right moment means viable seeds for next year's fragrant garden. 🌿 After those purple blooms fade to brown, the pods contain tiny treasures—if you collect them correctly, without twisting or crushing.
I've learned the hard way that patience here pays off in lush lavender plants that thrive for years.
Timing is everything: wait until the flower stems turn completely brown and papery, then snip the entire seed head with clean shears. Spread them on a mesh screen in a dry, shaded spot for 2-3 weeks—this slow drying preserves viability.
Once the pods crumble easily, gently rub them between your fingers to release the seeds, then store them in a cool, dark place until planting season.
Germination isn't instant—lavender seeds need cold stratification (a month in the fridge) to break dormancy. Plant them shallowly in well-draining soil and keep them lightly moist. You might not see sprouts for 3-4 weeks, but when they arrive, they'll grow slowly at first.
Patience rewards you with hardy plants that love full sun and drought once established.
This method works for all lavender varieties, including English and French types. Just remember: seed-grown lavender takes 2-3 years to reach full fragrance potential, but the wait is worth it for that earthy, calming scent that transforms any garden corner into a serene retreat.
📚 In This Guide
- What you need
- Instructions
- Tips and common mistakes
- Wrapping up and next steps
What you need
- ● Lavender plants: Choose Lavandula angustifolia (English lavender) or Lavandula x intermedia (hybrid lavender) for best seed viability. Start with 3–5 mature plants (3+ years old) for optimal seed production.
- ● Pruning shears or sharp scissors: 1 pair (sterilized with rubbing alcohol to prevent disease).
- ● Brown paper bags or breathable mesh bags: 5–10 bags (10x12 inches each) for seed pod collection.
- ● Twine or rubber bands: 1 roll (to secure bags around stems).
- ● Labeling tags or masking tape: 10+ tags (to mark plant varieties and harvest dates).
- ● Glass jars or airtight containers: 2–3 jars (8–16 oz) for seed storage (with a desiccant packet or silica gel).
- ● Fine-mesh sieve or sifter: 1 (for separating seeds from chaff).
- ● Garden journal: To track harvest dates, weather conditions, and seed viability.
- ● Hand lens or magnifying glass: For inspecting seed pods for pests or damage.
- ● Humidity monitor: Ideal for storing seeds (target 30–40% humidity).
- ● Seedling trays and potting mix: If you plan to germinate saved seeds later.
Step-by-Step guide to harvesting lavender seed pods for viable seeds
Here’s how to collect and process lavender seed pods without damaging the plant or sacrificing seed quality.
🌿 Step 1: Identify and Select Mature Seed Pods
Lavender seed pods mature in late summer to early fall, turning from green to a papery brown. Look for pods that feel dry and brittle to the touch—these are ready for harvest. Avoid pods still holding green or purple hues, as they won’t produce viable seeds. I like to harvest on a dry, sunny morning when the pods are fully open and seeds are exposed.
Use clean, sharp pruning shears to snip the entire seed pod cluster, leaving about 1 inch of stem attached. This prevents damaging the plant’s growth points. Place the harvested pods in a paper bag (not plastic) to allow airflow and prevent moisture buildup, which can cause mold.
✂️ Step 2: Dry and Process the Seed Pods
Spread the harvested pods in a single layer on a tray lined with paper towels. Place them in a dry, shaded area with good airflow for 2-3 weeks. You’ll know they’re fully dried when the pods crumble easily between your fingers and the seeds rattle inside. If you’re in a humid climate, extend drying time to 4 weeks to prevent spoilage.
Once dry, gently rub the pods between your palms or use a clean, dry brush to release the tiny seeds. Avoid shaking them directly over the ground—lavender seeds are lightweight and can blow away. I place a fine mesh screen or clean sheet of paper beneath the pods to catch the seeds as they’re released.
💧 Step 3: Clean and Store the Seeds
After releasing the seeds, sift through the debris using a fine-mesh strainer or sieve to remove chaff and empty pod fragments. Lavender seeds are tiny, so work slowly to avoid losing them. Store the cleaned seeds in a labeled paper envelope or small glass jar in a cool, dark place. They’ll remain viable for 1-2 years if kept dry.
For best results, plant the seeds immediately or within a few months. Lavender seeds have a low germination rate, so sow them directly in well-draining soil outdoors in early spring. Avoid refrigerating the seeds—lavender prefers a natural stratification period from winter’s cold and spring’s warmth.
☀️ Step 4: Prepare the Soil for Planting
Lavender thrives in poor, well-draining soil with a pH of 6.5-7.5. Mix the seeds with sandy loam or a cactus/succulent blend to improve drainage. Avoid rich garden soil—lavender roots rot easily in heavy, moisture-retentive conditions. I like to create small mounds of soil and scatter the seeds lightly on top, pressing them in just enough to cover.
Water gently but infrequently—lavender seedlings hate soggy soil. Keep the soil lightly moist until germination, which can take 2-4 weeks. Once the seedlings appear, reduce watering further and place them in full sun. Young lavender plants are delicate, so protect them from strong winds until established.
Tips & tricks for perfect lavender seed pod harvesting
Harvesting lavender seed pods successfully takes patience and precision—here's how to avoid common pitfalls while maximizing your yield.
Timing is Everything: In Step 1, don't rush the harvest! The pods must be completely dry and papery brown—any green or purple tint means they're not ready. I've learned this the hard way after trying to harvest premature pods that crumbled before releasing seeds. The dry, sunny morning timing is critical for preventing mold during storage.
Drying Strategy: For Step 2's 2-3 week drying period, I recommend using a small fan on low setting near your drying tray. This creates gentle airflow without disturbing the delicate pods. In humid climates, place a desiccant packet (like silica gel) in the drying area to absorb excess moisture. The pods should feel like crisp autumn leaves when properly dried.
Seed Release Technique: When releasing seeds in Step 2, I've found that using a soft paintbrush works better than rubbing between palms. The brush gives you more control and prevents accidentally crushing the tiny seeds. Place your mesh screen or paper directly under the pods before brushing to catch every seed—lavender seeds are so light they'll float away with even a slight breeze.
Storage Wisdom: In Step 3, label your storage containers with the harvest date—lavender seeds maintain viability for 1-2 years, but their germination rate declines over time. I store mine in small glass vials with a tiny amount of uncooked rice at the bottom to absorb any residual moisture. This extra precaution has helped me maintain seed quality for up to 3 years in cool, dark conditions.
Pro Tips for Lavender Seed Pods
- Harvesting lavender seed pods successfully takes patience and precision—here's how to avoid common pitfalls while maximizing your yield.
- Timing is Everything: In Step 1, don't rush the harvest!
- Drying Strategy: For Step 2's 2-3 week drying period, I recommend using a small fan on low setting near your drying tray.
Frequently asked questions
Got questions about growing and harvesting lavender seed pods? You’re not alone! Here are some of the most common queries—and their answers—to help you succeed in your zero-twist harvesting journey.
How long does it take for lavender seed pods to mature?
Lavender seed pods typically take 60–90 days to mature after flowering. Look for pods to turn from green to a light brown or tan color—this signals they’re ready for harvesting. Pro tip: Check pods weekly in late summer or early fall for the best timing!
Can I harvest lavender seed pods too early?
Yes! Harvesting too early (before pods turn brown) means seeds won’t be viable. Immature pods may also drop seeds prematurely or fail to open naturally. Wait until pods are dry and crispy—this ensures maximum seed quality and yield.
What if my lavender seed pods won’t open naturally?
If pods stay closed, try the zero-twist method or gently tap them on a hard surface to release seeds. For stubborn pods, place them in a paper bag for a few days—they’ll often open on their own due to friction.
Are there alternatives to growing lavender from seed?
If seeds prove tricky, consider cuttings (from healthy stems) or buying established lavender plants from nurseries. Cuttings root best in well-draining soil with partial sun—just dip in rooting hormone for extra success!
Will harvesting seed pods harm my lavender plant?
Nope! Pruning mature pods actually encourages new growth and prevents the plant from diverting energy to seed production. Just avoid cutting into green stems—stick to brown, woody pods only.
Wrapping up and next steps
Growing lavender seed pods may seem like a delicate task, but with patience and the right techniques—like zero-twist harvesting—you can unlock a world of fragrant possibilities! These little pods aren’t just for show; they’re packed with potential for new plants, culinary experiments, or even handcrafted lavender sachets. 🌿✨
Ready to take your lavender journey further? Start by experimenting with your harvested seeds—try sowing them in well-draining soil or gifting them to fellow gardening enthusiasts. Every seed pod is a tiny treasure waiting to bloom!