
Planting
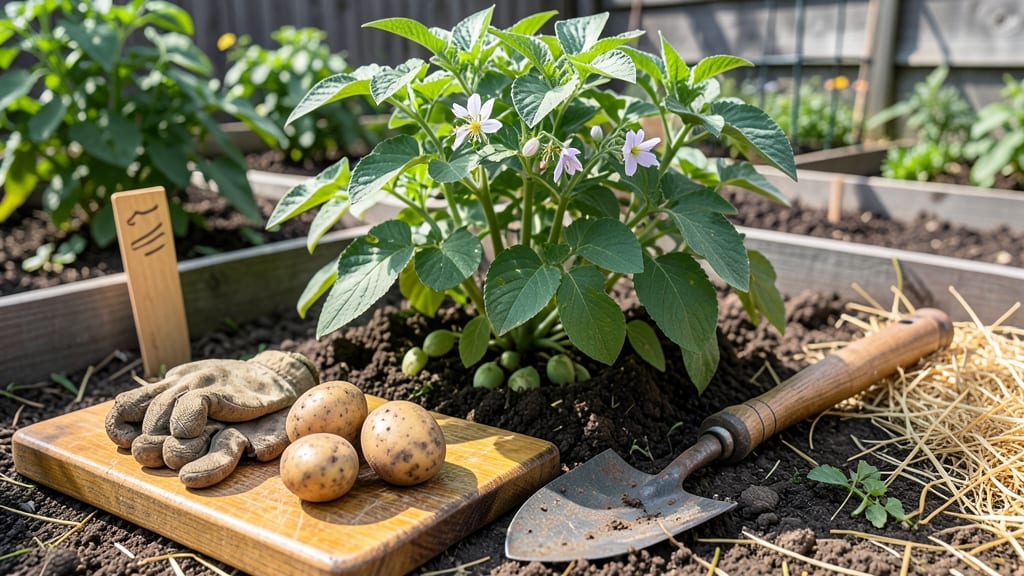
Planting seed potatoes in the ground transforms a simple bag of tubers into a lush, productive harvest—if you chit them first. 🌱 That’s the secret I learned after my first crop of weak, stunted plants.
Chitting (pre-sprouting) gives you a head start on the season, ensuring those little eyes turn into strong, fast-growing shoots before they even hit the soil.
The process is simpler than it sounds: just place your seed potatoes in a cool, bright spot (like a sunny windowsill) for 4-6 weeks before planting. You’ll see stubby sprouts emerge—those are your future plants, ready to dive into warm soil when the last frost passes.
I’ve found that chitting adds 2-3 weeks of growth before they even go in the ground, which means earlier harvests and bigger yields.
Once your potatoes are chitted, the actual planting is straightforward: dig trenches 4-6 inches deep, space them 12 inches apart, and cover with soil. As the plants grow, mound soil around the stems to encourage more tubers.
By midsummer, you’ll have a thriving potato patch that produces more potatoes than you can eat—if you don’t share them all with neighbors first.
This method works best in cooler climates where frost is a real threat, but even in warmer zones, chitting gives you a jump on the season. The key is timing: plant when the soil is 50°F or warmer and the frost risk is gone.
With chitting, you’re not just planting potatoes—you’re setting them up for success from day one.
📚 In This Guide
- What you need
- Instructions
- Tips and common mistakes
- Wrapping up and next steps
What you need
- ● Seed potatoes: 1–2 lbs (certified disease-free, ideally "seed" or "organic" labeled). Choose varieties like Yukon Gold, Red Pontiac, or Fingerlings.
- ● Garden plot: A sunny spot (6+ hours of sunlight) with well-draining soil. Size depends on yield goals (e.g., 10 sq ft for ~10 lbs of potatoes).
- ● Garden fork or tiller: For loosening soil to a depth of 12–18 inches.
- ● Garden hose or watering can: For consistent moisture (avoid overhead watering after planting).
- ○ Compost or aged manure: 2–3 cups per plant to enrich soil (optional but recommended).
- ● Mulch (straw, grass clippings, or leaves): To retain moisture and regulate soil temperature.
- ● Gloves and knee pads: For comfort during planting.
- ● Chitting tray or egg cartons: If you haven’t pre-sprouted (chitted) your potatoes—place them in a bright, cool spot (50–60°F) 4–6 weeks before planting.
- ● Potassium-rich fertilizer: Like 5-10-10 or wood ash, to boost tuber development (apply at planting or when flowers appear).
- ● Row covers or cloches: To protect young plants from late frosts (use if temps dip below 40°F).
- ● Plant markers: Sticks or labels to track varieties and avoid confusing rows.
- ● Soil pH tester: Ideal pH for potatoes is acidic to neutral (5.0–6.5). Adjust with lime (to raise pH) or sulfur (to lower) if needed.
Step-by-step instructions for planting seed potatoes in the ground
Here's how I get a head start on the season with chitted potatoes that grow into vigorous plants.
🌱 Step 1: Chit Your Seed Potatoes Indoors
Place your seed potatoes in a cool, bright spot—like a sunny windowsill—4-6 weeks before your last frost date. I store mine in egg cartons with the holes cut out so each potato gets airflow. This process, called chitting, encourages strong sprouts before planting.
Keep them in 50-60°F temperatures and watch for green sprouts that are 1-2 inches long. The reason we chit is simple: these early sprouts develop into the plant's first roots, giving you a 2-3 week growth advantage over unchitted potatoes. Just don't let them get too warm—they'll turn green and bitter.
🪴 Step 2: Prepare the Planting Site
Choose a location with full sun (at least 6-8 hours daily) and well-draining soil. I like to test my soil first—if it's heavy clay, I'll mix in 2-3 inches of compost per planting hole. The ideal soil should feel slightly damp but not soggy when squeezed.
Dig trenches 4-6 inches deep and space them 12-18 inches apart for small varieties or 24-30 inches for larger ones. The depth matters because it protects the sprouts from frost while still allowing roots to develop. If your soil is cold, wait until it warms to 45°F before planting.
☀️ Step 3: Plant the Chitted Potatoes
Place each chitted potato in the trench with the sprouts facing upward—this ensures they grow toward the light. Cover them with 3-4 inches of soil, leaving the top half exposed. The exposed part will develop new roots as it buries deeper over time.
Water deeply right after planting to settle the soil and encourage root growth. Here's the thing—don't worry if the sprouts look fragile at first. They'll toughen up quickly once the soil warms. I like to add a 2-inch layer of straw mulch afterward to retain moisture and keep soil temperatures stable.
⏰ Step 4: Maintain Through the Growing Season
As the plants grow, gently hill up soil around the stems every 2-3 weeks until they reach the top of the trench. This protects new tubers from light exposure (which turns them green and toxic) and encourages more potato production. Stop hilling when the plants flower.
Water consistently—1-2 inches per week—but avoid waterlogging. You'll know you're doing it right when the soil feels damp 2 inches down but not wet. Watch for yellowing leaves or wilting, which usually means too much water or not enough.
✂️ Step 5: Harvest at the Right Time
For new potatoes, dig carefully when the plants flower and the tops start to die back. For a full harvest, wait until the foliage yellows completely and dies off naturally. Use a fork to gently loosen the soil and pull the potatoes out—don't wash them until you're ready to use them.
Let them cure in a cool, dark place for 1-2 weeks to develop their skins. I store mine in a cardboard box with straw for airflow. If you leave them in the ground too long, they'll start sprouting again—so harvest before that happens!
Tips & tricks for planting seed potatoes like a pro
These little tricks will help you avoid common pitfalls and get the most out of your potato-growing season.
Timing Secret: The 4-6 week chitting window is non-negotiable for best results. I start mine in late winter when my last frost date is still 6 weeks away. If you're in a warmer climate, you might need to adjust—just make sure your sprouts are 1-2 inches long before planting. Pro tip: Set a reminder for your frost date and count backwards!
Temperature Matters: That 50-60°F range for chitting is crucial—any warmer and your potatoes will turn green and bitter. I keep mine on an unheated sunroom windowsill where temps stay steady. If your home runs hot, try a basement or garage with good light. Once planted, wait for soil to warm to 45°F before putting them in the ground—cold soil shocks delicate sprouts.
Hilling Hack: When you're hilling soil every 2-3 weeks in Step 4, use a garden fork to gently loosen the soil first. This prevents compacting and helps roots penetrate deeper. I also like to mix in a handful of compost with each hilling—it gives your potatoes a little nutrient boost without overfeeding. Stop when plants flower, but don't skip this step—it doubles your yield!
Harvesting Wisdom: For new potatoes, dig carefully when flowers appear—you'll find small, tender tubers near the surface. For full harvest, wait until foliage completely yellows. I use a fork to gently loosen soil first, then pull plants up by their stems. This prevents bruising those delicate potatoes. Let them cure in a cool, dark place for 1-2 weeks—they'll develop thicker skins and store better.
Pro Tips for Plant Seed Potatoes In The Ground
- These little tricks will help you avoid common pitfalls and get the most out of your potato-growing season.
- Timing Secret: The 4-6 week chitting window is non-negotiable for best results. I start mine in late winter when my l...
- Temperature Matters: That 50-60°F range for chitting is crucial—any warmer and your potatoes will turn green and bitt...
Frequently asked questions
Got questions about planting seed potatoes?
You’re not alone! Here are answers to the most common concerns—from timing to troubleshooting—to help you grow a bountiful harvest with confidence.
When is the best time to plant seed potatoes?
Plant seed potatoes 2–4 weeks before your last expected frost (typically late March to early May in most U.S. zones). For cooler climates, aim for early spring when soil reaches 45°F (7°C). In warmer zones, plant in fall or winter for a spring harvest. Chitting (pre-sprouting) speeds up growth—start indoors 4–6 weeks before planting.
Can I plant seed potatoes too early?
Yes, but avoid planting in frozen or waterlogged soil—it can rot the potatoes. Wait until soil is workable (not muddy) and temperatures stay above 40°F (4°C) at night. If frost threatens after planting, cover with straw or row fabric until danger passes. Early planting in cold climates may slow sprouting but won’t harm the tubers.
What if my seed potatoes don’t sprout after planting?
Don’t panic! Seed potatoes may take 2–4 weeks to sprout, especially in cool soil. Check for:
- Even moisture: Keep soil consistently damp (not soggy).
- Warmth: Use black plastic mulch or a cold frame to raise soil temps.
- Light: If planted too deep (>4" below soil), sprouts may struggle to reach the surface.
Do I need to cut seed potatoes before planting?
Only if your seed potato is larger than a basketball (5–6 oz). Cut it into pieces with 2–3 "eyes" (sprouts) per section, let cuts heal for 1–2 days, and dust with cinnamon or fungicide to prevent rot. Smaller pieces = faster sprouting! Pro tip: Plant the largest piece for bigger harvests.
How do I protect seed potatoes from pests or disease?
Prevent issues with these steps:
- Rotate crops: Avoid planting potatoes in the same spot for 3–4 years.
- Use certified disease-free seed potatoes (especially for organic gardens).
- Apply row covers early to deter flea beetles and Colorado potato beetles.
- Monitor for blight: Remove infected leaves immediately and avoid overhead watering.
Can I grow seed potatoes in containers or small spaces?
Use 5-gallon buckets, fabric grow bags, or raised beds (at least 12" deep). Plant 1–2 seed potatoes per container, spacing eyes 4–6" apart. Choose compact varieties like 'Yukon Gold' or 'Red Pontiac'. Containers dry out faster—water consistently and add compost for nutrients.
Wrapping up and next steps
Planting seed potatoes is a rewarding way to grow your own homegrown harvest—and with the right prep, like chitting, you’ll be well on your way to bountiful, disease-resistant tubers! 🌱 Whether you’re a beginner or a seasoned gardener, following these steps ensures strong sprouts and a thriving crop.
Now that you’re ready to plant, grab your gloves and get digging—your future meals (and bragging rights!) are just sprouts away.
Next up? Mark your calendar for harvest time (usually 90–120 days later) and watch your garden transform into a potato powerhouse! 🥔✨