
Propagation
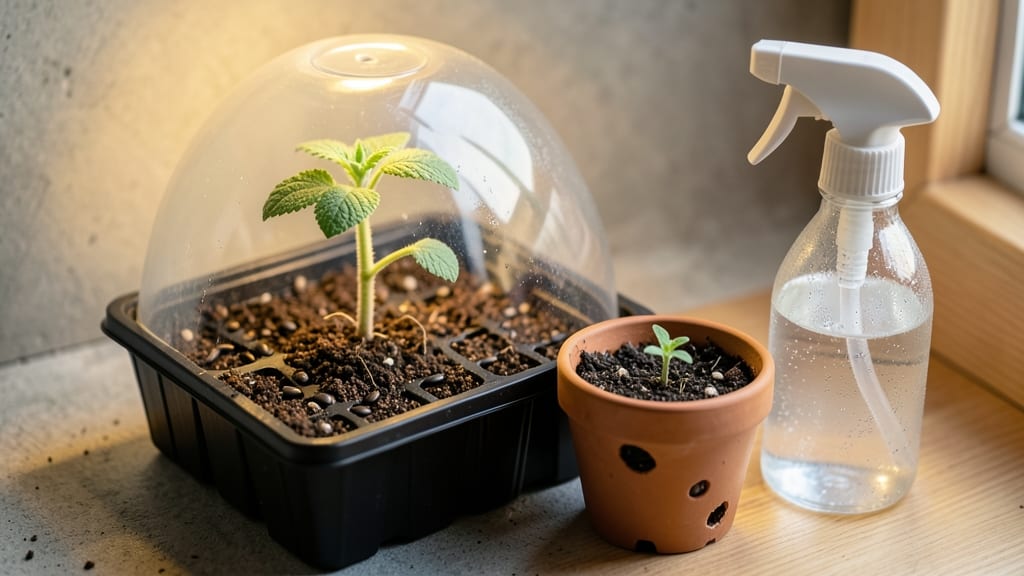
Growing catnip from seed indoors delivers fast germination in just 7 days—no waiting months for transplants. 🌱 I’ve grown it twice now, and the secret lies in the right soil warmth, moisture, and light.
Most people overlook the tiny details that make seeds pop so quickly, but trust me, it’s worth the effort. You’ll need a shallow tray, seed-starting mix, and a heat mat (or sunny windowsill) to kickstart those seeds.
The soil should stay damp but not soggy—think of it like a wrung-out sponge. Once sprouted, keep them under grow lights for 14-16 hours daily to prevent leggy seedlings. By week 3, you’ll have sturdy young plants ready to transplant or share with your feline friends.
The leaves stay fragrant and potent, making it a dual-purpose herb for pest control and happy cats. Just avoid overwatering—mold is the silent killer of indoor seedlings. This method works year-round, even in cold climates.
The key is patience and consistency—those first green shoots feel like magic after weeks of waiting. Let’s get those seeds sprouting!
📚 In This Guide
- What you need
- Instructions
- Tips and common mistakes
- Wrapping up and next steps
What you need
- ● Catnip seeds: 1–2 packets (about 100–200 seeds). Choose organic or non-GMO for best results.
- ● Seed-starting trays or small pots: 2–4 (2–3 inches deep) with drainage holes. Biodegradable pots work great!
- ● Seed-starting mix: 1–2 bags (lightweight, sterile potting mix designed for seeds). Avoid garden soil—it’s too dense!
- ● Grow lights or a sunny windowsill: Catnip needs 12–16 hours of light daily. LED grow lights are ideal.
- ● Spray bottle: For gentle watering (avoid over-saturating the soil).
- ● Plastic wrap or humidity dome: To create a mini greenhouse effect and speed up germination.
- ○ Fertilizer (optional but helpful): A balanced, water-soluble fertilizer (5-5-5 or 10-10-10) for young seedlings.
- ● Tweezers or toothpick: For carefully placing tiny seeds into the soil.
- ○ Heating mat (optional): Keeps soil warm (70–75°F) to boost germination speed.
- ● Small fan: For gentle airflow to prevent damping-off disease.
- ● Labels and marker: To track planting dates and varieties.
- ● Pruning shears or scissors: For future transplanting or harvesting.
Step-by-step instructions for growing catnip from seed indoors
Here's how I get catnip sprouting in just a week—no waiting months for those fuzzy leaves.
🌱 Step 1: Prepare Containers and Soil for Fast Germination
Use 4-inch wide pots with drainage holes for each of your 4 plants. Fill them with a light, airy seed-starting mix—I like to add a handful of perlite to the mix to help those tiny roots breathe. Press the soil down gently so it's firm but not packed, then moisten it until it feels like a damp sponge. Too much water now and you'll suffocate the seeds before they even sprout.
Here's the thing—catnip seeds are tiny, so I use a toothpick to make a shallow hole, about 1/8 inch deep, for each seed. This ensures they don't get buried too deep, which would slow germination. I plant 2 seeds per pot just in case one doesn't make it. Tap the soil lightly around the seeds to cover them, then give everything a gentle mist with a spray bottle until the surface looks evenly damp.
💧 Step 2: Create Ideal Warmth and Moisture Conditions
Catnip loves warmth, so I place my seed trays on a seedling heat mat set to 75-80°F. Without this, germination can take 2-3 weeks instead of 7 days. Cover the pots with clear plastic wrap to trap moisture and warmth—this creates a mini greenhouse effect. Check daily but only remove the wrap to water if the soil feels dry to the touch. Too much water now will rot those seeds before they sprout.
I like to set up a small fan on low near the trays to create gentle air movement. This prevents mold from forming on the soil surface, which can happen when humidity stays too high. You'll see the first tiny sprouts in just 3-5 days—they look like little green hairs poking through the soil. Once you see them, remove the plastic wrap immediately to prevent damping-off disease.
☀️ Step 3: Provide Bright Light for Strong Seedlings
As soon as those first leaves appear, move the seedlings to a spot with bright, indirect light. A south-facing window works well, but if your light is weak, supplement with a grow light kept just 2-3 inches above the plants. Catnip seedlings grow fast, so you'll need to raise the light as they stretch toward it. Without enough light, they'll grow leggy and weak, with long stems and tiny leaves.
Here's what strong catnip seedlings look like: thick stems, deep green color, and leaves spaced close together. You'll see the first true leaves (not the initial seed leaves) appear in about 10-14 days. At this point, you can thin the seedlings if both seeds in a pot sprouted, keeping only the strongest one. Use clean scissors to snip the weaker seedling at soil level—don't pull it, or you'll disturb the roots of the one you're keeping.
🌿 Step 4: Transplant and Encourage Bushy Growth
When seedlings have 4-6 true leaves (about 3-4 weeks after sowing), it's time to transplant them into slightly larger pots, around 6 inches wide. I use the same light, airy mix as before, pressing the soil gently around the roots to eliminate air pockets. Water thoroughly after transplanting to help the roots settle in. The first few days are critical—keep the soil consistently moist but not soggy.
To encourage bushy growth, pinch off the top set of leaves when the seedlings are about 4 inches tall. This might seem counterintuitive, but it tells the plant to focus on growing side branches instead of just one long stem. You'll see new leaves sprouting from the sides within a week—that's your signal everything is working. Keep the plants in bright light and water when the top inch of soil feels dry to the touch.
Tips & tricks for growing catnip from seed indoors
These simple strategies will help you skip the waiting game and get those fuzzy catnip leaves in record time.
Seed-Planting Precision: The 1/8-inch depth for planting is crucial—any deeper and your seeds won't get enough oxygen to sprout. I use a toothpick to make the hole because catnip seeds are so tiny they'll disappear in regular finger indentations. Press the soil gently around the seeds after planting to ensure good contact with the moist mix. This tiny detail makes the difference between 7-day germination and 3-week frustration.
Heat Mat Hack: That 75-80°F range on your heat mat isn't just a suggestion—it's the sweet spot for catnip seeds. I've found that even a 5°F drop can delay sprouting by 3-4 days. If you don't have a heat mat, try placing your pots on top of your fridge (not inside) for consistent warmth. The key is maintaining that temperature consistently—fluctuations are what slow things down.
Light Transition Timing: Move your seedlings to bright light as soon as you see those first tiny hairs emerge, not when they're fully developed. That 3-5 day window is when they're most vulnerable to becoming leggy. I keep my grow light just 2-3 inches above the seedlings at first, then raise it as they grow—this mimics natural sunlight patterns and prevents stretching. Watch for leaves that are dark green and close to the stem; that's your sign they're getting enough light.
Thinning Technique: When thinning those seedlings, don't pull—always snip at soil level with clean scissors. Pulling risks damaging the roots of your kept seedling, and the disturbance can shock both plants. I like to do this thinning right after the 10-14 day mark when true leaves appear, before the seedlings get too crowded. This gives your kept plant more room to develop strong roots while you still have time to save any stragglers.
Pro Tips for Grow Catnip From Seed Indoors
- These simple strategies will help you skip the waiting game and get those fuzzy catnip leaves in record time.
- Seed-Planting Precision: The 1/8-inch depth for planting is crucial—any deeper and your seeds won't get enough oxygen to sprout.
- Heat Mat Hack: That 75-80°F range on your heat mat isn't just a suggestion—it's the sweet spot for catnip seeds.
Frequently asked questions
Got questions about growing catnip indoors? You’re not alone! Here are answers to the most common queries to help you cultivate happy, healthy catnip for your feline friend.
How long does it take for catnip seeds to germinate indoors?
With the right conditions—warmth (70–75°F), moisture, and indirect light—catnip seeds typically sprout in 5 to 7 days. Some may take up to 2 weeks, but patience pays off! Keep the soil consistently damp (not soggy) to speed up germination.
Can I grow catnip indoors year-round?
Catnip thrives indoors as long as you provide 6–8 hours of bright, indirect light daily (a grow light works great). Just avoid drafts, maintain humidity, and fertilize lightly every 4–6 weeks. Your cat’s stash will always be fresh!
Is store-bought catnip safer than homegrown?
Both are safe, but homegrown catnip is chemical-free and fresher. Store-bought versions may contain additives or preservatives. If your cat has sensitivities, growing your own ensures purity. Just avoid pesticides—organic methods are best!
Why is my catnip turning yellow or wilting?
Yellowing leaves often signal overwatering or poor drainage. Let the top inch of soil dry out between waterings. Wilting can also mean thirst, heat stress, or root issues. Check for root rot (smelly, mushy roots) and adjust care accordingly.
Can I grow catnip in small pots or containers?
Yes! Catnip adapts well to 6–12-inch pots as long as they have drainage holes. Use a lightweight potting mix, and prune regularly to encourage bushy growth. Just rotate the pot occasionally for even light exposure—your cat will thank you!
Wrapping up and next steps
Growing catnip from seed indoors is a rewarding experience—especially when you see those first sprouts in just 7 days! With the right setup, patience, and a little love, you’ll have fresh catnip to share with your feline friends (or even dry it for later).
Whether you’re a beginner or a seasoned gardener, this method proves that indoor propagation is totally doable.
Ready to take the next step? Once your catnip is thriving, consider harvesting and drying it for long-term use—or experiment with growing other herbs indoors! 🌱✨