
Lawn
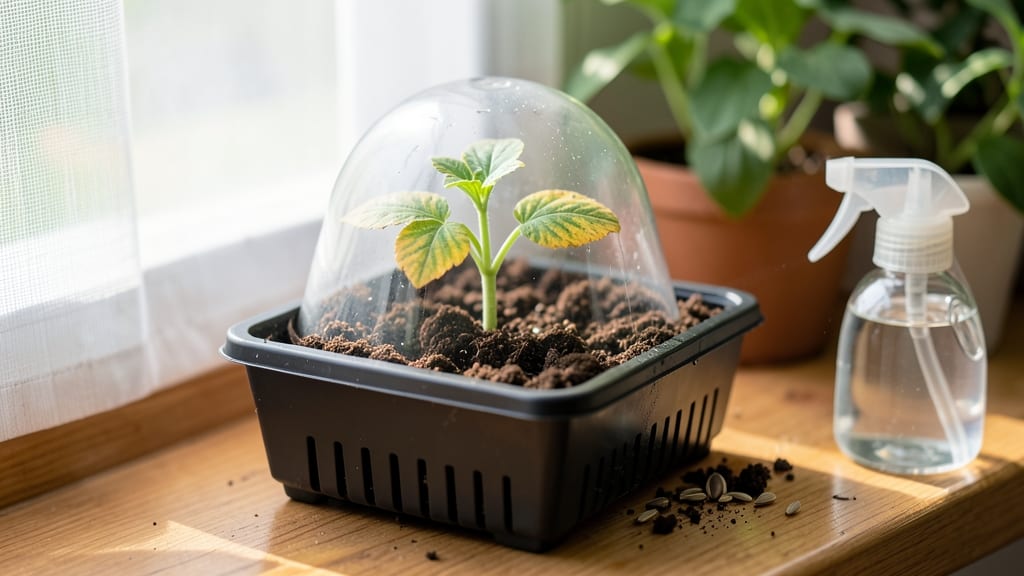
Getting a seed to sprout isn’t about luck—it’s about creating the perfect tiny greenhouse. 🌱 The right mix of moisture, warmth, and darkness triggers germination faster than you’d expect. I’ve watched seeds crack open in just 48 hours using this method, and you can too.
Start with a warm, damp paper towel or a shallow tray of moistened potting mix. Seeds need consistent moisture but not soggy conditions—think of a wrung-out sponge.
Place them in a sealed container or under plastic wrap to trap humidity, then store them in a spot that stays around 70-75°F. Most seeds will push through their shells within days, not weeks. The moment you see those first green hooks, move them to bright, indirect light.
Too much sun too soon scorches delicate sprouts, while too little light makes them stretch weak and leggy. This is where patience pays off—strong roots mean robust plants later. Troubleshooting is simple: if mold appears, improve airflow; if seeds rot, reduce moisture.
Hard seeds (like beans) may need a quick soak or light scratch to break their tough coats. Every seed has its own quirks, but these basics work for nearly everything.
📚 In This Guide
- What you need
- Instructions
- Tips and common mistakes
- Wrapping up and next steps
What you need
- ● Seeds: Choose fast-sprouting varieties like lettuce, radishes, or microgreens (1–2 tbsp per tray).
- ● Sprouting tray or container: A shallow tray with drainage holes (8"x12" or larger).
- ● Seed sprouting lid or mesh cover: A fine-mesh screen or breathable lid to retain humidity.
- ● Water: Room-temperature, chlorine-free (let tap water sit for 24 hours if chlorinated).
- ● Spray bottle: For gentle misting (8 oz or larger).
- ○ Humidity dome or plastic wrap: Optional but helpful for maintaining moisture (clear plastic works!).
- ● Paper towels or sprouting mats: 2–3 sheets (unbleached, seed-safe).
- ● Small bowl or dish: For soaking seeds (if pre-soaking is needed).
- ● Timer: To track 12-hour intervals (phone or kitchen timer).
- ● Scissors or knife: For trimming excess paper towels.
- ○ Fan (optional): A small, gentle fan for airflow (place on low).
- ○ Grow lights (optional): LED or fluorescent for 12+ hours of light/day.
- ● Notebook & pen: To log sprouting progress (fun for tracking growth!).
Step-by-step instructions for speed sprouting seeds in 48 hours
Here's my foolproof method for coaxing seeds to sprout faster than they ever have before.
🌱 Step 1: Soak Seeds Overnight for Maximum Hydration
Place your seeds in a clean container and cover them with lukewarm water—enough to submerge them completely. I like to use a small jar with a lid, but a bowl with a plate on top works too. Let them soak for 12-24 hours at room temperature. The water softens the seed coat and kickstarts the germination process.
Here's the thing—don't skip this step. Many seeds, like beans or peas, have tough outer shells that slow down sprouting. A good soak ensures they absorb water quickly and break through the soil faster. After soaking, drain the water completely and let the seeds sit for 10-15 minutes to prevent mold.
💧 Step 2: Set Up a Humidity Chamber for Ideal Conditions
Line a shallow container—like a plastic takeout tray—with a damp paper towel or a thin layer of moistened sphagnum moss. Arrange the soaked seeds 1-2 inches apart in a single layer, ensuring they don’t touch each other. Cover the container with another tray or a clear lid to create a sealed, humid environment.
Place the setup in a warm spot, ideally between 70-85°F. A sunny windowsill or a seedling heat mat works perfectly. The humidity inside the chamber mimics the damp, warm conditions seeds need to sprout quickly. Check the towel or moss every 8-12 hours—it should stay moist but not dripping wet.
⏰ Step 3: Monitor and Maintain Until Sprouts Appear
Keep the seeds in the humidity chamber for 24-48 hours. You’ll know they’re ready when tiny white sprouts (radicles) emerge from the seeds—this usually happens within 36 hours for most varieties. Avoid opening the chamber too often, as losing humidity can slow or even stop germination.
Once you see the first sprouts, it’s time to plant. Gently transfer them to moist potting mix or a seed-starting tray, pressing them ¼ inch deep into the soil. Water lightly to settle the soil around them, but don’t oversaturate. You’ll see the first true leaves appear in just 3-5 days after planting.
☀️ Step 4: Provide Light and Care for New Seedlings
Move the newly planted seeds to a bright, indirect light source immediately. A grow light or a south-facing window works best. Seedlings need 12-16 hours of light daily to grow strong and avoid becoming leggy. If your space is dim, supplement with a full-spectrum LED grow light kept 2-4 inches above the seedlings.
Water the soil gently whenever the top inch feels dry, but avoid soaking it. Overwatering can drown tender sprouts or cause damping-off, a fungal disease that kills seedlings overnight. You’ll know you’re doing it right when the soil stays consistently moist but not soggy.
Tips & tricks for perfect humidity-controlled seed sprouting
The secret to speed sprouting isn't just about time—it's about creating the perfect environment. Here's how to maximize your success without the guesswork.
Seed Selection: Not all seeds sprout at the same speed. Fast-sprouting varieties like radishes, beans, and peas typically show results within the 24-48 hour window, while slower seeds like tomatoes or herbs may need the full 48 hours. I always check seed packets for specific germination times—this tells you exactly what to expect. For best results, choose seeds labeled "fast-growing" or "quick-sprouting" if you're working against a tight timeline.
Temperature Matters: While the instructions recommend 70-85°F, I've found that a seedling heat mat set to 80°F can cut your sprouting time by 6-12 hours, especially in cooler homes. If your space runs cooler, place the humidity chamber near a warm spot like above the fridge or near a sunny window during the day. Just avoid direct sunlight during the sprouting phase—it can overheat the chamber and dry out your seeds.
Humidity Chamber Hacks: The key to consistent sprouting is maintaining that perfect moisture level. I like to use a clear plastic container with a tight-fitting lid so I can easily monitor progress without losing humidity. For extra insurance, place a small dish of water inside the chamber alongside the seeds—this creates a microclimate that stays moist longer. If you notice condensation on the lid, that's actually a good sign—it means your humidity levels are just right.
Visual Cues: In Step 3, when you're checking for those first white sprouts, look for the seeds to plump up noticeably first. This swelling is your first sign that germination is underway. The radicle (that tiny white root) usually appears within 12-24 hours after the seeds start swelling. If you're working with darker seeds like beans, they'll turn slightly lighter in color as they absorb water—another good indicator you're on the right track.
Pro Tips for Get A Seed To Sprout
- The secret to speed sprouting isn't just about time—it's about creating the perfect environment. Here's how to maximi...
- Seed Selection: Not all seeds sprout at the same speed. Fast-sprouting varieties like radishes, beans, and peas typic...
- Temperature Matters: While the instructions recommend 70-85°F, I've found that a seedling heat mat set to 80°F can cu...
Frequently asked questions
Got questions about speed-sprouting seeds? You’re not alone! Here are some of the most common concerns—and quick, actionable answers to help you grow like a pro.
How do I know if my seeds are viable before planting?
Test viability by placing a few seeds in a damp paper towel, sealing them in a plastic bag, and storing them in a warm spot. Check daily—if most sprout within 3–7 days, your seeds are good to go! For stubborn seeds, try soaking them in warm water for 12–24 hours to kickstart germination.
Can I speed-sprout seeds without a humidity dome or plastic wrap?
Use a spray bottle to mist seeds lightly 2–3 times daily, or place them in a sealed container (like a Tupperware) with a damp paper towel. Avoid overwatering—soggy seeds rot! For larger batches, try a greenhouse tray with a clear lid to trap moisture naturally.
Why aren’t my seeds sprouting after 48 hours?
Don’t panic! Check these first:
- Temperature: Too cold (<50°F) slows growth; too hot (>90°F) can kill seeds. Aim for 70–85°F.
- Moisture: Seeds need consistent dampness—not puddles. Press a finger into the soil; it should feel like a wrung-out sponge.
- Depth: Plant seeds 2–3x their width deep (shallow for tiny seeds like lettuce).
- Light: Most seeds sprout in darkness—wait until you see sprouts before exposing to light.
Do I need a heat mat for speed-sprouting, or can I use my oven?
Skip the oven—it’s unpredictable and can dry out seeds! A heat mat (set to 70–85°F) is ideal, but you can also:
- Place seeds on top of a refrigerator (warmer than the fridge’s interior).
- Use a sunny windowsill (indirect light) for mild warmth.
- Wrap seeds in a damp towel and tuck them inside a cooler with a warm water bottle.
What’s the fastest way to sprout grass seed for lawn repair?
For grass seed, use this hack:
- Mix seeds with peat moss or coconut coir (1:3 ratio) for better moisture retention.
- Keep the mix damp but not soggy in a sealed container.
- Place near a heat source (like a sunny window or heat mat).
- Sprouts should appear in 3–7 days. Transplant carefully to avoid damaging tender roots!
Wrapping up and next steps
Growing a seed into a sprout in just 48 hours is totally doable with the right setup! By controlling humidity, temperature, and airflow, you’ve unlocked a faster, more efficient way to kickstart your gardening journey.
Whether you’re prepping for a lush lawn or experimenting with microgreens, your patience is rewarded with visible results in days—not weeks.
Now that you’re armed with the know-how, take the next step: try it with your favorite seeds! Track your progress, tweak conditions as needed, and soon, you’ll be a sprouting pro. Happy growing! 🌱✨