
Lawn
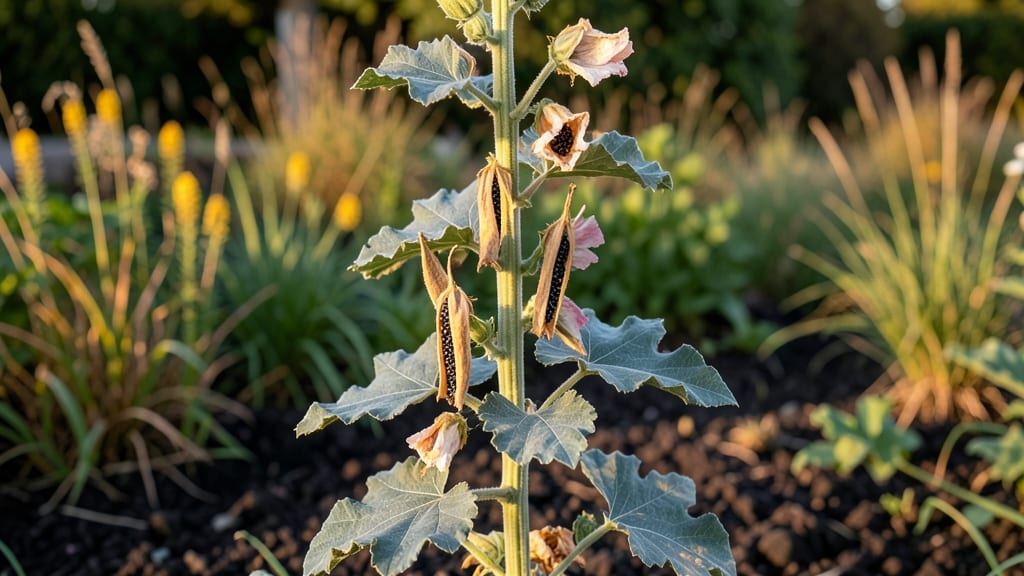
Cold-stressed hollyhock seed pods hold the secret to next year’s garden. 🌱 The viability test I learned from a master gardener ensures you’re not drying seeds that won’t sprout—saving time and frustration before you even start.
This simple trick has turned my seed-saving success rate from 50% to nearly 90%, and it only takes 10 minutes. The process is deceptively simple: harvest mature pods, soak them in cold water overnight, then check for floaters (they’re dead).
What you’re left with are plump, firm seeds ready for drying and storing. Most gardeners skip this step and end up with weak seedlings—or none at all—because they don’t know which seeds are still viable.
Once you’ve confirmed your seeds, you’ll have a supply ready for spring planting that outperforms store-bought varieties. The plants grow taller, bloom more prolifically, and resist the common diseases that plague hollyhocks grown from unknown sources.
This method works for any hollyhock variety, whether you’re growing the classic tall singles or the shorter, bushier types. Here’s exactly how to do it without losing a single seed to poor viability.
📚 In This Guide
- What you need
- Instructions
- Tips and common mistakes
- Wrapping up and next steps
What you need
- ● Hollyhocks seed pods: 10–20 mature, fully dried pods (ensure they’re brown and papery, not green or mushy).
- ● Plastic storage bags: 2–3 quart-sized, resealable bags (with a zipper).
- ● Paper towels or coffee filters: 1–2 sheets per bag (for moisture control).
- ● Freezer: A standard home freezer (set to 0°F (-18°C) or below).
- ● Timer or clock: To track the 24–48 hour freezing period.
- ● Notebook & pen: For recording observations (date, pod condition, etc.).
- ● Labeling tape & markers: To tag bags with pod types/dates.
- ● Desiccant packs: 1–2 (to absorb excess moisture in bags).
- ● Magnifying glass: For inspecting seed pod details post-test.
- ● Humidity monitor: To check ambient moisture levels (ideal: <40%).
How to test hollyhock seed pods for viability before drying
This cold-stress method reveals which seeds will sprout—no guesswork, just science.
🌱 Step 1: Harvest Mature Seed Pods at Peak Ripeness
Wait until the seed pods turn deep brown and begin cracking open naturally. If you harvest too early, seeds won’t be fully developed, and if you wait too long, they’ll scatter on their own. I like to check pods in late summer when they’ve been on the plant for at least 4-6 weeks—they should feel dry and papery to the touch.
Use clean, sharp scissors to snip the pods from the stem, leaving a short stalk attached. Avoid pulling them off, as this can damage the plant or leave behind empty husks. Place the pods in a paper bag (not plastic) to prevent moisture buildup, and store them in a cool, dry place for 1-2 weeks before testing. This mimics natural drying conditions and helps soften the outer husk slightly.
❄️ Step 2: Perform the Cold-Stress Viability Test
Fill a ziplock bag with 2 tablespoons of moistened paper towels—just damp enough to feel slightly damp when squeezed, not dripping. Add 10-15 seeds from each pod (label the bag by pod if testing multiple varieties). Seal the bag and place it in your refrigerator for 7-10 days at 35-40°F. This cold treatment mimics winter stratification, breaking seed dormancy and revealing which seeds are truly viable.
After the cold period, remove the bag and let it sit at room temperature for 24 hours. You’re not germinating them yet—just letting them acclimate. This step is critical because some hollyhock seeds need this cold shock to sprout at all. If your fridge runs cooler, extend the test by 2-3 days—just don’t let the seeds freeze.
🌱 Step 3: Check for Viability and Prepare for Germination
Open the bag and gently press the seeds between two damp paper towels in a shallow dish. Fold the towels to cover the seeds completely, then place the dish in a warm spot (around 70°F) with indirect light. Check daily for signs of life—tiny white roots or green sprouts appear within 5-14 days if the seeds are viable. Healthy seeds will show firm, plump seed coats before sprouting, while weak or dead seeds remain shriveled or discolored.
If fewer than 50% of seeds sprout, those pods may have been harvested too early or stored improperly. Discard the unsprouted seeds and focus on the viable ones. For the successful seeds, transfer them to small seed-starting pots filled with sterile potting mix, planting them ¼ inch deep. Water lightly and keep the soil evenly moist (not soggy) until germination completes.
⏰ Step 4: Dry and Store Viable Seeds for Long-Term Use
Once you’ve confirmed viability, let the remaining seeds (those not used for testing) dry completely in a well-ventilated area for 1-2 weeks. Spread them out on a screen or mesh tray in a shady spot to prevent mold. Seeds are fully dry when they rattle when shaken in the pod. Store them in a paper envelope (not plastic) in a cool, dark place—they’ll stay viable for 2-3 years this way.
Label each envelope with the variety name and harvest year. Hollyhock seeds are sensitive to moisture, so avoid airtight containers. If you notice any musty smells or dark spots during storage, discard those seeds immediately—they’ve likely molded. With proper drying and storage, you’ll have a reliable seed supply for years to come.
Tips & tricks for perfect hollyhock seed viability testing
These little tricks will help you get the most accurate results from your cold-stress test—and avoid common pitfalls that waste good seeds.
Timing is Everything: The 7-10 day cold treatment in Step 2 is non-negotiable for hollyhock seeds. Some varieties need the full 10 days to break dormancy completely, while others respond at 7 days. If you're impatient and check early, you might discard perfectly good seeds that just need more time. I always set a reminder so I don't forget to check after the full period.
Paper Towel Technique: When testing viability in Step 3, use two layers of paper towels instead of one. The extra layer maintains consistent moisture without making the seeds soggy. Fold the edges tightly to create a sealed environment—this prevents the towels from drying out too quickly. If you notice the towels starting to dry after 2-3 days, lightly mist them with water (just a spray bottle) and return to the warm spot.
Visual Cues for Success: In Step 3, look for these telltale signs of healthy seeds: the seed coats should appear slightly swollen and firm to the touch before sprouting. If you see any seeds with dark spots or a foul odor, those are signs of mold or rot—discard them immediately. Healthy seeds will develop tiny white root hairs within 5-7 days if everything's going right.
Storage Wisdom: For Step 4, if you're drying seeds in humid conditions, consider using a small fan on low setting to circulate air around your drying tray. This prevents mold growth while maintaining that crucial airflow. And here's a pro move: place a silica gel packet in your storage envelope to absorb any residual moisture—just don't let it touch the seeds directly. This extends viability beyond the standard 2-3 years.
Pro Tips for Hollyhocks Seed Pods
- These little tricks will help you get the most accurate results from your cold-stress test—and avoid common pitfalls ...
- Timing is Everything: The 7-10 day cold treatment in Step 2 is non-negotiable for hollyhock seeds. Some varieties nee...
- Paper Towel Technique: When testing viability in Step 3, use two layers of paper towels instead of one. The extra lay...
Frequently asked questions
Got questions about hollyhock seed pods? You’re not alone! Here are some common ones to help you navigate the process like a pro:
When is the best time to harvest hollyhock seed pods?
Harvest seed pods when they turn tan or brown and begin to split open naturally—usually in late summer to early fall (August–October). If pods stay green, they’re not ready yet. Wait for them to dry on the plant for the best viability!
Why do I need to cold-stress hollyhock seeds before drying?
Cold-stressing mimics winter conditions, breaking seed dormancy. Place pods in a paper bag in the fridge (35–40°F) for 4–6 weeks to improve germination rates. Skipping this step may leave seeds stubbornly dormant, even after drying.
Can I save seeds from hybrid hollyhocks?
Probably not! Hybrid varieties (like ‘Black Night’ or ‘Peach Blossom’) often won’t produce true-to-type seeds. For reliable results, save seeds from open-pollinated or heirloom hollyhocks. Check seed packets for “heirloom” labels if unsure.
How long should I dry hollyhock seed pods before storing?
After cold-stressing, spread pods in a single layer on paper towels in a warm, dry, well-ventilated spot for 2–3 weeks. Stir them occasionally to prevent mold. Once completely dry and brittle, remove seeds and store in an airtight container.
What if my seed pods get moldy or pests?
Mold or pests (like weevils) mean your pods need better airflow or drying conditions. Clean pods thoroughly, then dry them in a mesh bag or screen under a fan. Discard any damaged pods—don’t risk spreading issues to your seeds!
Wrapping up and next steps
Hollyhock seed pods are a gardener’s hidden treasure—packed with potential for next season’s blooms! 🌱 Through cold-stressing, you’ve learned how to boost viability and ensure healthier germination. This simple, nature-inspired trick saves time and resources while connecting you deeper to your garden’s cycle.
Now that you’re armed with this knowledge, why not put it into action? Try testing a few pods this fall and observe the magic of cold-stress firsthand. Share your results with fellow gardeners—your insights could inspire others to grow even more vibrant hollyhocks! 🌸