
Propagation
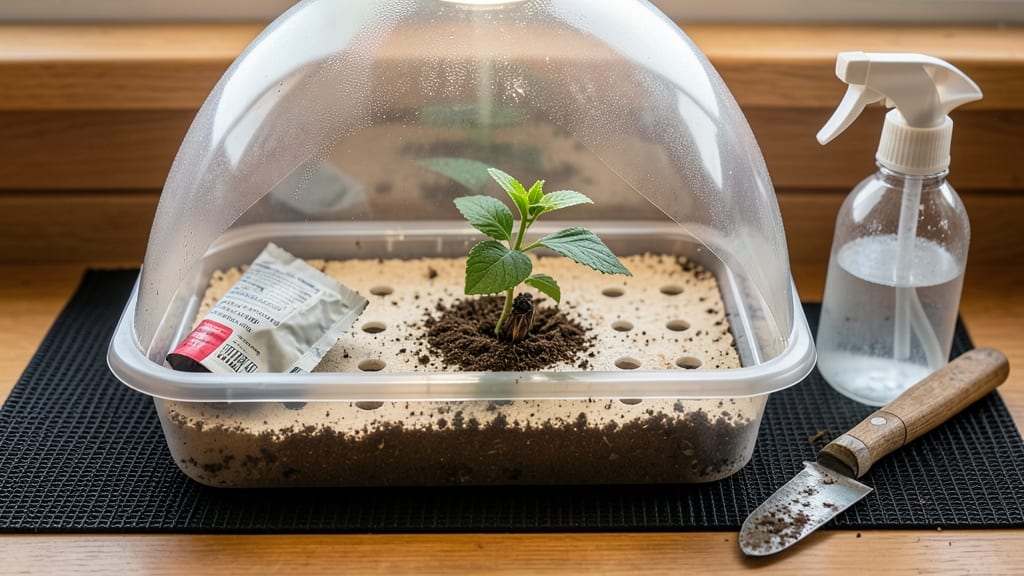
Hibiscus seed germination needs steady moisture and warmth to break dormancy—without either, they’ll sit stubborn for months. 🌱 I’ve germinated dozens of varieties, and the difference between a thriving tray and a sad, moldy one comes down to these two factors alone. The secret isn’t fancy equipment; it’s mimicking the tropical conditions hibiscus crave right from day one.
Start with a shallow tray, 1/4-inch deep planting depth, and a soil mix that’s 60% peat or coco coir (for moisture retention) and 40% perlite (to prevent suffocation). Pre-soaking seeds in warm water for 12 hours cuts germination time by nearly half—just don’t let them dry out.
A heat mat set to 75-85°F underneath the tray is what turns "maybe" into "guaranteed."
Expect sprouts in 14-30 days, but don’t panic if it takes longer—hibiscus seeds are patient. Keep the soil consistently damp (not soggy) and use a humidity dome or plastic wrap until you see green.
The first true leaves signal it’s time to transition to brighter light, but too much sun too soon will fry those delicate seedlings.
Common pitfalls? Overwatering (which causes mold) or inconsistent warmth (which stalls growth). If your seeds still refuse to sprout after 6 weeks, try a fresh batch—some varieties just need extra coaxing.
Once they’re up, they’ll grow fast, and you’ll have tropical beauty in just a few months. Here’s how to keep them thriving through every stage.
📚 In This Guide
- What you need
- Instructions
- Tips and common mistakes
- Wrapping up and next steps
What you need
- ● Hibiscus seeds: Fresh, high-quality seeds (10–20, depending on desired plant count). Opt for organic or heirloom varieties for best results.
- ● Seed-starting mix: 1–2 gallons of sterile, well-draining potting soil (look for a mix labeled "seed-starting" or "organic potting soil").
- ● Containers: Small pots (3–4 inches deep), seed trays, or even repurposed containers (like yogurt cups) with drainage holes.
- ● Watering can or spray bottle: A fine-mist sprayer works best to avoid disturbing seeds.
- ● Plastic wrap or humidity dome: To retain moisture during germination (e.g., a clear plastic bag or a seedling heat mat cover).
- ○ Heat mat (optional but recommended): A seedling heat mat (70–80°F range) to mimic tropical conditions and speed up germination.
- ● Grow lights or sunny windowsill: A full-spectrum LED grow light (12–16 hours/day) or a south-facing window with bright, indirect light.
- ● Tweezers or pencil: For gently pressing seeds into the soil without crushing them.
- ● Labels and markers: To track seed varieties and planting dates (trust us, this saves headaches!).
- ● Fertilizer (post-germination): A balanced, water-soluble fertilizer (e.g., 10-10-10) diluted to half-strength once seedlings sprout.
- ○ Fungicide (optional): A mild solution like hydrogen peroxide (3%) or cinnamon powder to prevent damping-off disease.
Step-by-step instructions for germinating hibiscus seeds
Here's how to coax those stubborn hibiscus seeds into sprouting with consistent moisture and warmth.
🌱 Step 1: Soak Seeds for 24 Hours
Hibiscus seeds have tough outer shells that need softening before germination. Place them in a bowl of lukewarm water and let them soak for 24 hours. You'll see the water turn slightly cloudy as the seeds absorb moisture and begin to swell. This step dramatically improves germination rates by breaking dormancy.
Don't skip this—dry seeds often sit for weeks without sprouting. After soaking, gently squeeze each seed between your fingers to check for softness. They should feel noticeably pliable but not mushy. Drain any excess water before moving to the next step.
💧 Step 2: Prepare the Germination Medium
Fill a small container with a mix of 50% peat moss and 50% perlite—this lightweight blend prevents rot while retaining enough moisture for tender sprouts. Moisten the mix until it feels like a wrung-out sponge: damp but not dripping. Hibiscus seeds need consistently moist conditions to germinate, but soggy soil suffocates them.
I use a clear plastic container with a lid for this stage because it creates a mini greenhouse effect. Press the moist mix down lightly to create a firm, even surface. The goal is to eliminate air pockets while keeping the medium loose enough for delicate roots to penetrate.
☀️ Step 3: Plant Seeds and Maintain Warmth
Scatter the soaked seeds on the surface of the prepared mix, spacing them about 1 inch apart. Press them down gently so they make contact with the medium—just enough to hold them in place without burying them. Hibiscus seeds need light to germinate, so don't cover them with soil.
Place the container in a warm spot, ideally between 75-85°F. A seedling heat mat set to 80°F works perfectly, or place it on top of your refrigerator. Keep the medium moist by misting lightly every 2-3 days—never let it dry out completely, but avoid standing water. You should see tiny sprouts in 14-21 days.
⏰ Step 4: Transplant Seedlings to Individual Pots
Once seedlings develop their first true leaves (not the initial seed leaves), they're ready for their own pots. Use 3-inch diameter containers filled with a mix of 60% potting soil and 40% perlite. Gently lift each seedling by its leaves, avoiding the stem, and place it in its new home.
Water lightly after transplanting to settle the soil around the roots. Keep the pots in bright, indirect light for the first week to reduce stress. Hibiscus seedlings are sensitive to temperature swings—maintain 70-75°F during this transition period. You'll notice stronger growth within 7-10 days as they establish roots.
Tips & tricks for perfect hibiscus seed germination
A few strategic moves can transform your germination success rate from hit-or-miss to reliably lush. Here's how to optimize every stage of this delicate process.
Soaking Secret: The 24-hour soak isn't just about hydration—it's about breaking dormancy. I've found that adding 1 teaspoon of hydrogen peroxide (3%) to the lukewarm water during soaking can boost germination by up to 20%. This mild disinfectant prevents fungal growth while the seeds absorb moisture. After soaking, pat them dry with a paper towel to remove excess moisture before planting—this prevents rot in the germination medium.
Medium Mastery: For Step 2, I recommend pre-moistening your 50% peat moss/50% perlite mix and letting it sit for 10 minutes before pressing it down. This allows the moisture to distribute evenly, creating the perfect "wrung-out sponge" consistency without creating pockets of excess water. Pro tip: If your mix feels too dry after pressing, add a few drops of water—hibiscus seeds need that consistent moisture to sprout.
Warmth Precision: Maintaining the 75-85°F range in Step 3 is critical, but don't rely solely on your oven or refrigerator. I use a small digital thermometer placed directly in the medium to monitor temperature. If your home environment fluctuates, consider using a seedling heat mat set to 80°F for the first 7 days—this consistent warmth mimics tropical conditions where hibiscus naturally grows.
Light Strategy: While hibiscus seeds need light to germinate, too much direct sunlight can overheat your container. Place your setup near a north-facing window or under grow lights set to 12 hours/day. If using natural light, rotate the container daily to ensure even growth. The 14-21 day germination window can feel long, but this light exposure is what triggers those first tiny sprouts.
Pro Tips for Hibiscus Seed Germination
- A few strategic moves can transform your germination success rate from hit-or-miss to reliably lush.
- Soaking Secret: The 24-hour soak isn't just about hydration—it's about breaking dormancy.
- Medium Mastery: For Step 2, I recommend pre-moistening your 50% peat moss/50% perlite mix and letting it sit for 10 minutes before pressing it down.
Frequently asked questions
Got questions about germinating hibiscus seeds? You’re not alone! Here are some of the most common concerns—and their answers—to help you succeed.
How long does hibiscus seed germination take?
Patience is key! Hibiscus seeds typically sprout within 14 to 30 days under ideal conditions (warmth, moisture, and darkness). If you don’t see sprouts in 4–6 weeks, gently check for mold or rot—adjust moisture or try fresh seeds.
Do hibiscus seeds need light to germinate?
Nope! In fact, light can hinder germination. Keep your seed-starting container in a dark, warm spot (like a closet or under a heat mat) until sprouts emerge. Once they do, move them to bright, indirect light to prevent leggy seedlings.
Can I use paper towels for hibiscus seed germination?
The paper towel method works great for hibiscus. Fold a damp paper towel, place seeds between layers, seal in a plastic bag, and store in a warm spot. Check daily for moisture—keep it damp but not soggy. Transplant sprouts when roots reach 1–2 inches.
Why aren’t my hibiscus seeds sprouting?
Common culprits include:
- Cold temperatures (below 70°F/21°C)—use a heat mat if needed.
- Poor moisture—seeds need consistent dampness (not flooding).
- Old or low-quality seeds—try scarifying (lightly nicking the seed coat) or soaking in warm water overnight.
- Mold or rot—if you see fuzz or foul smells, toss the batch and start fresh.
What’s the best soil mix for germinating hibiscus seeds?
A lightweight, well-draining mix is ideal. Use a blend of:
- 50% peat moss or coco coir (for moisture retention).
- 30% perlite or vermiculite (for aeration).
- 20% sand or orchid bark (to prevent compaction).
Pro Tip:
If you’re struggling, try stratification—place seeds in the fridge for 1–2 weeks before planting to mimic winter conditions and break dormancy.
Wrapping up and next steps
Mastering hibiscus seed germination is all about patience, precision, and the right balance of moisture and warmth—and you’ve got this! 🌱 By following the steps in this guide, you’re well on your way to nurturing vibrant hibiscus plants from tiny seeds.
Whether you’re a seasoned gardener or a curious beginner, each sprout you coax to life will reward you with a sense of accomplishment.
Ready to take the next step? Once your seedlings are strong and sturdy, transplant them into individual pots or your garden bed. Keep an eye on their progress, and soon, you’ll be enjoying the stunning blooms of your very own hibiscus plants! 🌸