
Lawn
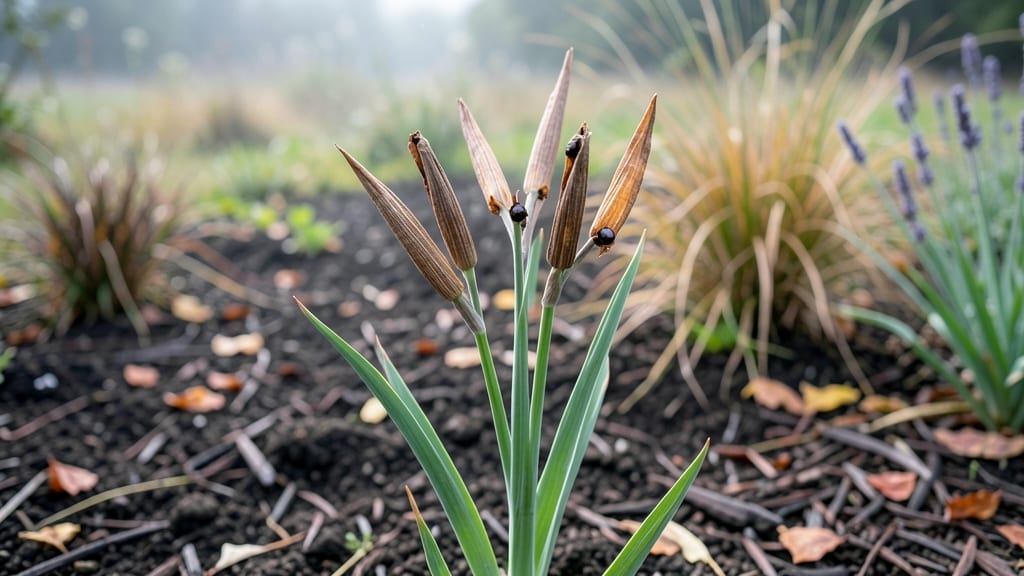
Those gladiolus seed pods hold the promise of next year's bold blooms—if you handle them right. 🌱 The secret to breaking their dormancy isn't just drying them out; it's a cold-moist process that mimics winter's natural cycle, tricking seeds into thinking spring has arrived when it's still December.
Start by collecting pods when they turn brown and papery, usually 4-6 weeks after flowering. Extract the flat, papery seeds inside and store them in a sealed container with slightly damp peat moss or paper towels.
Place the container in the fridge for 8-12 weeks—this chilling period is non-negotiable for germination. When you plant them in spring, you'll see those first green shoots within 2-4 weeks, proving the cold treatment worked. The payoff? Stunning, disease-resistant blooms that outperform store-bought corms every time.
Works for gardeners in zones 5-9, though timing varies slightly by region. Here's how to do it without losing a single seed to rot or mold.
📚 In This Guide
- What you need
- Instructions
- Tips and common mistakes
- Wrapping up and next steps
What you need
- ● Fresh gladiolus seed pods: 5–10 mature, fully browned pods (harvested after blooms fade and pods dry naturally).
- ● Pruning shears or sharp scissors: 1 pair (sterilized with rubbing alcohol for hygiene).
- ● Paper towels or newspaper: 2–3 sheets (for drying seeds).
- ● Small paper bags or envelopes: 3–5 (for seed storage).
- ● Spray bottle with water: 1 (for misting pods).
- ● Plastic zip-top bags: 2–3 (quart-sized, for cold-moist stratification).
- ● Refrigerator or cool, dark space: 1 (maintains 35–45°F for stratification).
- ● Seed tray or small pots: 2–3 (for sowing prepped seeds).
- ● Potting mix: 1 bag (well-draining, sterile mix for germination).
- ○ Heat mat (optional): 1 (speeds up germination post-stratification).
- ● Plant labels: 5–10 (to track varieties).
- ● Humidity dome or plastic wrap: 1 (keeps moisture in during germination).
Step-by-Step instructions for preparing gladiolus seed pods
Here's how to transform those dried pods into next year's vibrant blooms using a simple cold-moist method.
🌱 Step 1: Collect and Dry the Seed Pods
Wait until the gladiolus pods turn completely brown and begin splitting open naturally—this usually happens 4-6 weeks after flowering. When you see the pods cracking, gently twist them from the stem and place them in a single layer on a paper towel or mesh screen. Store them in a dry, well-ventilated spot for 2-3 weeks.
Don't rush this drying process. If you harvest too early, the seeds won't mature properly, and if you leave them too long, they may shatter or attract pests. You'll know they're ready when the pods feel light and papery, and the seeds inside rattle when shaken.
💧 Step 2: Extract the Seeds
Once fully dry, open each pod carefully with your fingers or a small knife. You'll find 1-3 plump, brown seeds per pod—each one capable of growing into a full gladiolus plant. Place the seeds in a small bowl and separate any empty or shriveled ones. Discard these immediately, as they won't germinate.
I like to count my seeds and store them in a labeled envelope until the cold-moist prep. This helps me keep track of varieties, especially if I'm growing multiple types. Label yours with the variety name and the year collected for future reference.
⏰ Step 3: Cold-Moist Stratification
Fill a small container with a mix of equal parts peat moss and perlite (about 2 inches deep) and moisten it until damp but not soggy. Place the seeds ½ inch deep in the mix, spacing them 1 inch apart to prevent crowding. Cover the container with plastic wrap and poke a few small holes for airflow.
Store the container in your refrigerator's crisp drawer (around 34-40°F) for 8-12 weeks. This cold-moist period mimics winter conditions and breaks seed dormancy. Check the mix every 2 weeks—it should stay consistently damp but never waterlogged.
☀️ Step 4: Plant the Stratified Seeds
After stratification, remove the container from the fridge and let it sit at room temperature for 24 hours to acclimate. Plant the seeds 1 inch deep in individual 2-inch pots filled with seed-starting mix. Water gently until the soil is moist but not saturated.
Place the pots in a warm, bright spot with indirect light (a south-facing window works well). Keep the soil consistently moist but avoid overwatering—gladiolus seeds rot easily if too wet. Germination typically takes 3-6 weeks, depending on the variety and your growing conditions.
🌿 Step 5: Care for Seedlings
Once seedlings emerge, move them to a location with full sun (at least 6 hours daily) and gradually increase sunlight exposure over 1 week to prevent shock. Keep the soil moist but not soggy, and fertilize lightly with a diluted balanced fertilizer (10-10-10) every 4 weeks.
Transplant seedlings outdoors after the last frost date, when soil temperatures reach 60°F and stay there consistently. Space them 6 inches apart in well-draining soil with plenty of organic matter. With patience, your seeds will bloom in 1-2 years—worth the wait for those striking flowers!
Tips & tricks for perfect gladiolus seed pod prep
These little-known tricks will help you maximize germination rates and avoid common pitfalls when preparing gladiolus seed pods.
Timing is Everything: The 4-6 week window after flowering is critical for pod collection. I've found that pods harvested too early won't contain fully mature seeds, while waiting too long risks them splitting open naturally. Watch for the pods to turn completely brown and begin cracking—this is your cue to harvest. Once collected, the 2-3 week drying period should feel like an eternity, but trust me, it's worth the wait for properly mature seeds.
Seed Selection Matters: When extracting seeds in Step 2, don't be tempted to keep every seed you find. Focus on those that are plump, brown, and firm to the touch. I've learned the hard way that shriveled or empty seeds won't germinate, no matter how careful you are during stratification. A quick visual inspection and gentle squeeze between your fingers can save you from disappointment later.
Stratification Success: The 8-12 week cold-moist period in Step 3 is where the magic happens, but it requires attention. I recommend using a clear container so you can easily monitor moisture levels without disturbing the seeds. The mix should feel like a damp sponge—not dripping wet, not bone dry. If you notice condensation forming on the plastic wrap, that's a good sign your seeds are getting the right conditions.
Germination Patience: After the 24-hour acclimation period in Step 4, be prepared for the waiting game. Germination can take anywhere from 3-6 weeks, so don't be tempted to move your pots to direct sunlight too soon. I've seen beginners rush this process and end up with leggy, weak seedlings. Start with indirect light and gradually increase exposure over that crucial 1-week period.
Pro Tips for Gladiolus Seed Pods
- These little-known tricks will help you maximize germination rates and avoid common pitfalls when preparing gladiolus...
- Timing is Everything: The 4-6 week window after flowering is critical for pod collection. I've found that pods harves...
- Seed Selection Matters: When extracting seeds in Step 2, don't be tempted to keep every seed you find. Focus on those...
Frequently asked questions
Got questions about harvesting and storing gladiolus seed pods? You’re not alone! Here are answers to the most common queries to help you prep for next season’s stunning blooms.
When should I harvest gladiolus seed pods?
Harvest seed pods when they turn brown and begin to dry out—usually 4-6 weeks after flowering. Wait until they’re fully mature but before they split open naturally. Use sharp scissors to avoid damaging the stems.
How do I store gladiolus seed pods for planting?
Store pods in a cool, dry place (like a paper bag or envelope) for 1-2 months to dry completely. Once fully dry, separate the seeds and refrigerate them in a sealed container with a moist paper towel until spring planting.
Why does the article mention “cold-moist prep”?
Gladiolus seeds need a cold stratification period (4-6 weeks at 35-40°F) to break dormancy. The moist paper towel mimics natural winter conditions, ensuring higher germination rates when you plant them in spring.
What if my seed pods split open before I harvest them?
No stress! If seeds scatter, collect them immediately and store them dry. Scattered seeds may still germinate if planted right away (though cold-moist prep is still ideal). Just avoid letting them dry out completely before storage.
Can I use gladiolus corms instead of seeds?
While seeds are fun for experimentation, most gardeners prefer dividing corms (digging up and replanting mature corms) for faster, more reliable blooms. Save seeds for unique varieties or if you’re growing from scratch!
Wrapping up and next steps
Harvesting and storing gladiolus seed pods with care ensures a vibrant garden next season! 🌱 By following cold-moist prep methods, you’ll preserve viability and set the stage for stunning blooms. Whether you’re a seasoned gardener or just starting, this simple process is your ticket to next-year’s floral success.
Ready to grow your own gladioli? Start by planting your prepped seed pods in well-draining soil this fall—your future garden will thank you! 🌸