
Lawn
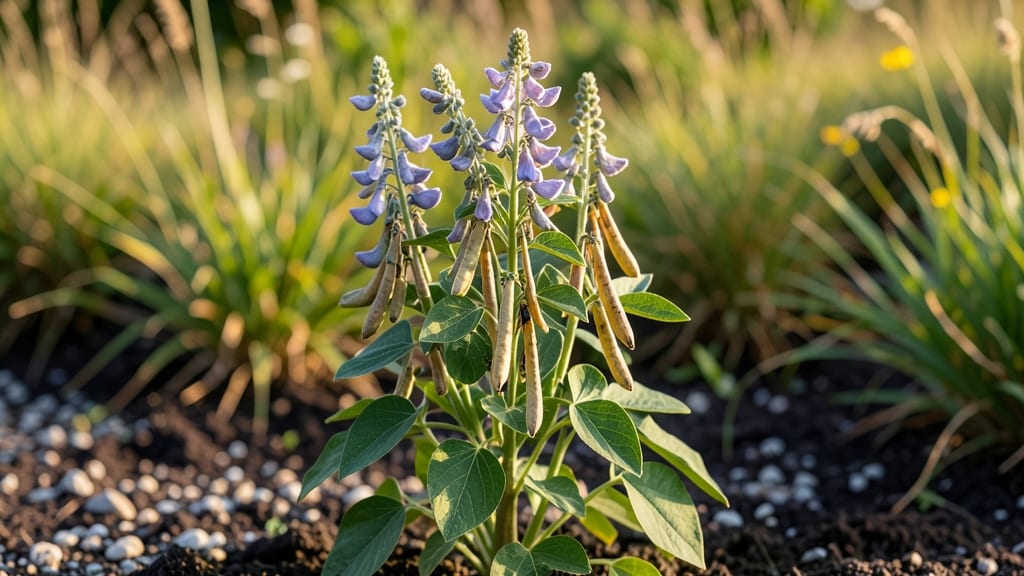
False indigo seed pods are nature’s own seed-saving treasure chest. 🌿 These striking, papery pods hold the key to multiplying your pollinator-friendly perennial—no digging, no fuss, just zero-waste propagation that starts with a simple harvest in late summer.
I’ve collected hundreds of these over the years, and the process is easier than you’d think, especially once you know the tricks to beat shattering pods and boost germination.
The magic happens in late August through October, when the pods turn from green to tan and start splitting open. Grab a bucket, wear gloves (those pods are tough!), and harvest them before they release seeds everywhere.
Once home, you’ll clean, dry, and store them—no fancy equipment needed. The real secret? A little scarification and cold stratification to trick the seeds into thinking winter has come, fooling them into breaking dormancy.
What you end up with are vibrant seedlings that thrive in poor soil, drought, and full sun—just like their parents. These plants will reward you for years with butterfly magnets and striking blue-purple blooms.
The best part? You’ll never need to buy false indigo again, and your garden becomes a self-sustaining pollinator paradise.
Even if you’ve struggled with shattering pods or low germination before, this method works—I’ve perfected it after years of trial and error. Let’s walk through the steps so you can turn those pods into next year’s garden stars without the guesswork.
📚 In This Guide
- What you need
- Instructions
- Tips and common mistakes
- Wrapping up and next steps
What you need
- ● False indigo seeds (Baptisia spp.) – 20-50 seeds (varies by desired coverage; spacing ~12-18" apart). Pro tip: 💡 Buy organic or locally sourced seeds for best results!
- ● Well-draining soil mix – 1 part native soil + 1 part compost (or pre-mixed perennial garden soil). pH 6.0-7.0 is ideal.
- ● Organic mulch – 1-2 inches of wood chips or straw to retain moisture and suppress weeds.
- ● Watering can or hose with a gentle spray nozzle – For consistent moisture without disturbing seedlings.
- ● Hand trowel or transplanting spade – For digging holes (4" deep) and planting.
- ● Garden gloves – Protects hands from prickly stems and soil.
- ● Pruning shears – For trimming dead foliage or harvesting seed pods (sterilize with rubbing alcohol first!).
- ○ Optional: Seed-starting trays & grow lights – If starting indoors (6-8 weeks before last frost).
- ● Full sun exposure (6+ hours daily). 🌡️ Partial shade tolerates but reduces flowering.
- ● Established lawn or garden bed (or space to create one!).
- ● Patience! False indigo thrives in clusters—it may take 2-3 years for full maturity.
How to grow and harvest false indigo seed pods for pollinators
This drought-tolerant beauty thrives with minimal fuss—just follow these steps to cultivate a thriving patch that feeds bees and butterflies while giving you striking seed pods.
🌱 Step 1: Choose and Prepare Your Planting Site
False indigo (Baptisia australis) loves full sun and well-draining soil. Pick a spot with at least 6 hours of direct sunlight daily—morning sun with afternoon shade works too, especially in hotter climates. The plant tolerates poor soil but grows best in slightly acidic to neutral soil with a pH of 6.0-7.0.
If your soil is heavy clay, amend it with 2-3 inches of compost mixed into the top 12 inches of soil. This improves drainage and gives roots room to establish. I like to test soil moisture before planting—stick your finger in the ground; if it feels dry 2 inches down, the soil is ready. If it's still damp, wait a few days.
☀️ Step 2: Plant Bare-Root or Container-Grown Plants
False indigo is typically planted as bare-root or container-grown plants in early spring, about 4-6 weeks before your last frost date. Dig a hole twice as wide as the root ball but only as deep—planting too deep can suffocate the roots. Gently loosen any circling roots before placing the plant in the hole.
Backfill with native soil, pressing lightly around the base to remove air pockets. Water deeply to settle the soil and help roots make contact. Mulch with 2-3 inches of organic mulch (like shredded bark) to retain moisture and suppress weeds. Keep the mulch 3-4 inches away from the stem to prevent rot.
💧 Step 3: Water and Maintain Through the First Season
Water newly planted false indigo once a week for the first month, providing 1 inch of water per week. After that, it’s drought-tolerant—water only if the soil feels bone-dry 3-4 inches down. Overwatering can lead to root rot, so let the soil dry slightly between waterings once established.
Fertilize lightly in early spring with a balanced, slow-release fertilizer (10-10-10) at half-strength. False indigo doesn’t need much feeding—too much nitrogen encourages leafy growth over flowers. Watch for powdery mildew on leaves in humid climates; improve airflow by spacing plants 2-3 feet apart and avoiding overhead watering.
✂️ Step 4: Harvest Seed Pods at Peak Maturity
False indigo produces striking blue-black seed pods in late summer to fall. Harvest them when they turn dark and papery, usually 8-10 weeks after flowering. Cut pods with clean pruners, leaving a ¼-inch stem attached. Spread them on a paper towel-lined tray in a dry, shaded area to dry for 2-3 weeks.
Once fully dry, gently rub the pods between your hands to release seeds. Store seeds in a paper envelope in a cool, dry place. These seeds are non-toxic and loved by birds—scatter a few in your garden for winter interest. The empty pods also make beautiful dried arrangements; bundle stems and hang upside down to preserve their shape.
🪴 Step 5: Overwinter and Encourage Regrowth
False indigo is hardy to USDA zones 4-9 and requires no winter protection. In colder zones, mulch heavily with 4-6 inches of straw after the first frost to insulate roots. In spring, remove old growth 2-3 inches above the ground to encourage fresh shoots. New growth emerges in 3-4 weeks, signaling it’s time to resume care.
This perennial spreads slowly, so divide clumps every 3-4 years in early spring. Dig up the plant, separate roots with a clean knife, and replant divisions 12-18 inches apart. False indigo’s long taproot makes it difficult to transplant, so plan divisions during cooler months when roots are less active.
Tips & tricks for growing stunning false indigo seed pods
These simple tricks will help you grow a thriving false indigo patch that thrives with minimal fuss while maximizing those striking seed pods.
Sunlight Strategy: If your garden gets intense afternoon sun, consider planting false indigo where it gets morning sun with afternoon shade—this prevents leaf scorch while still giving it the 6 hours of sunlight it needs daily. I’ve seen plants in full sun thrive, but they’ll appreciate this compromise in hotter climates.
Soil Prep Secret: For heavy clay soil, mix in 2-3 inches of compost down to 12 inches deep—this isn’t just about drainage, it’s about giving roots room to establish their deep taproot system. I like to add a handful of coarse sand too if my soil feels particularly dense. The key is creating a loose, crumbly texture that mimics its native habitat.
Watering Wisdom: After the first month, let the soil dry out completely between waterings—stick your finger 3-4 inches down to check. False indigo’s drought tolerance comes from its ability to store moisture deep in its roots, so frequent shallow watering actually encourages shallow root growth. This is where most gardeners go wrong!
Harvesting Hack: When harvesting those 8-10 week-old seed pods, cut them in the early morning when they’re still slightly dewy. This helps preserve their shape during the 2-3 week drying process. I also like to hang them upside down in small bundles right after harvesting—this keeps them organized and makes the drying process even more efficient.
Pro Tips for False Indigo Seed Pods
- These simple tricks will help you grow a thriving false indigo patch that thrives with minimal fuss while maximizing ...
- Sunlight Strategy: If your garden gets intense afternoon sun, consider planting false indigo where it gets morning su...
- Soil Prep Secret: For heavy clay soil, mix in 2-3 inches of compost down to 12 inches deep—this isn’t just about drai...
Frequently asked questions
When do false indigo seed pods mature?
False indigo seed pods typically mature 80–100 days after planting, depending on your climate. Look for pods that turn from green to a papery brown and begin splitting open—this signals readiness for harvest. Pro tip: Harvest in late summer to early fall for the best seed yield.
Why aren’t my pods producing seeds?
False indigo relies on pollinators like bees and butterflies to fertilize flowers. If pods aren’t forming, check for:
- Sufficient pollinators (plant near wildflowers if needed)
- Healthy blooms (remove damaged flowers)
- Proper sunlight (6+ hours daily)
Can I collect seeds from fallen pods?
Yes! Fallen pods still contain viable seeds—just dry them indoors for 1–2 weeks before opening. Warning: Store seeds in a cool, dry place to avoid mold or pests. For best results, harvest pods before they split naturally.
What’s a good alternative if false indigo doesn’t thrive?
Try these pollinator-friendly perennials with similar drought tolerance:
- Black-eyed Susan (Rudbeckia hirta)
- Purple coneflower (Echinacea purpurea)
- Goldenrod (Solidago spp.)
How do I store false indigo seeds long-term?
Seeds stay viable for 2–3 years if stored properly:
- Place in a paper envelope or airtight container
- Keep in a cool, dark place (like a fridge)
- Avoid humidity—moisture = mold!
Wrapping up and next steps
False indigo seed pods aren’t just a stunning addition to your lawn—they’re a low-maintenance, pollinator-friendly powerhouse that rewards you with zero-waste beauty and sustainability. By embracing their natural cycle, you’re not only creating a thriving ecosystem but also simplifying your gardening routine.
Ready to transform your space? Start small—plant a few seed pods this season and watch your garden (and local bees!) thrive! 🌿🐝
Next step: Grab your materials, follow the harvesting tips, and share your progress with fellow gardeners—your green thumb is about to shine brighter than ever!