
Lawn
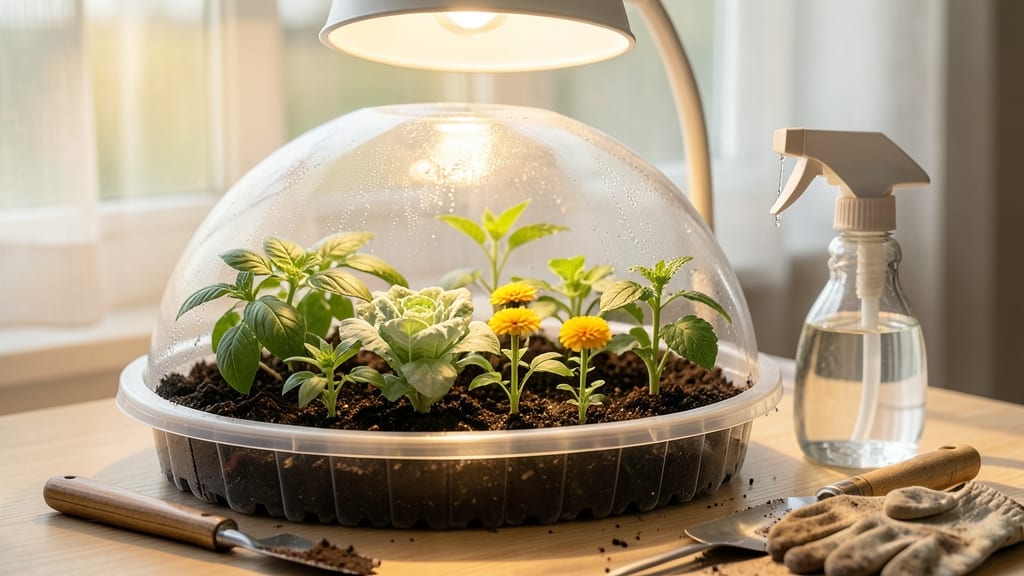
Turn empty milk cartons and a few minutes into a stackable DIY seed starter tray that outgrows store-bought seedling trays. 🌱 My first DIY tray cost less than $5 and gave me 48 perfect-sized cells for delicate seedlings—no more crowded flats or leggy starts.
The secret lies in repurposing what you already have, then layering light, warmth, and moisture just right.
You’ll need recycled containers (like yogurt cups or plastic clamshells), a sharp knife or scissors, and a clear plastic dome or ziplock bag for humidity. The soil mix should be light and sterile—think 50% potting mix and 50% perlite or vermiculite.
Plant your seeds at the right depth (usually twice their width), then stack the tray under grow lights or a sunny window for consistent warmth.
Within 7-14 days, you’ll see tiny sprouts pushing through the soil, ready to outperform anything from a garden center. The stackable design saves space, and the individual cells make transplanting foolproof—no tangled roots or lost seedlings. Plus, you’ll cut waste by reusing materials instead of buying disposable trays.
This method works for veggies, herbs, and flowers alike, and scales from a single tray to a full nursery system. Swap plastic for biodegradable peat pots if you prefer, or add a heating mat for cold-season starts. Here’s how to build yours—no green thumb required.
📚 In This Guide
- What you need
- Instructions
- Tips and common mistakes
- Wrapping up and next steps
What you need
- ● Base tray: 1 shallow plastic container (e.g., a takeout tray, muffin tin, or seedling tray with drainage holes—8"x12" recommended)
- ● OR a wooden crate or cardboard box (line with plastic wrap for moisture control)
- ● Stackable inserts: 6–12 egg cartons (paper or plastic) OR
- ● 12–24 biodegradable peat pots (3"–4" diameter) OR
- ● DIY inserts: cardboard squares (cut to fit tray, ~2"x2") or yogurt cups (poke drainage holes)
- ● Drainage: Small gravel or perlite (¼ cup for base layer)
- ● Drill (if adding holes to plastic containers)
- ● Growing medium: 1 bag seed-starting mix (sterilized, lightweight—avoid garden soil)
- ○ Optional but helpful: Spray bottle (for gentle watering)
- ● Clear plastic wrap (to create a mini greenhouse)
- ● Plant labels (toothpicks + masking tape)
Step-by-Step instructions for building a DIY seed starter tray
Here's the method I rely on to create sturdy, stackable trays that give seedlings the perfect head start.
🪴 Step 1: Choose and Prepare Your Base Materials
Start with a sturdy wooden frame—12x12 inches works perfectly for a single tray. I use ½-inch thick pine boards because they're affordable and hold up well to moisture. Cut four sides to your desired dimensions, leaving a ¼-inch gap between the bottom and sides for drainage. Sand all edges smooth to prevent splinters that could harm delicate seedlings.
For the bottom, I recommend using window screen mesh stapled tightly across the frame. This creates perfect drainage while keeping soil in place. If you don't have mesh, a layer of coarse hardware cloth works just as well. The key here is ensuring water can escape freely—seedlings rot quickly when their roots sit in soggy conditions.
🌱 Step 2: Assemble the Tray Frame and Add Depth
Use 1-inch wood screws to assemble the frame, pre-drilling holes to prevent wood splitting. For depth, attach 2-inch tall sides made from the same pine boards. This gives your seedlings enough room to develop strong root systems before transplanting. I reinforce corners with wood glue before screwing for extra durability—these trays will get heavy once filled with moist soil.
For stackability, add ½-inch tall wooden strips along the bottom edges of each tray. These create a stable platform when stacking, preventing wobbling that could damage seedlings. Sand all surfaces again after assembly to remove any rough spots that might catch on seedling leaves.
✂️ Step 3: Line the Tray and Prepare for Planting
Cut a piece of biodegradable seedling mat (available at garden centers) to fit the bottom of your tray. This mat creates individual planting cells while preventing soil from falling through the drainage holes. I press it firmly into place, tucking the edges neatly along the sides. For extra stability, staple the mat around the perimeter—just don't cover the drainage holes.
Fill the tray with sterile seed-starting mix up to ½ inch below the top edge. Press the soil down gently but firmly—you want it compact enough to stay in place but loose enough for roots to penetrate easily. I like to add a thin layer of vermiculite on top before planting seeds, as it helps retain moisture without compacting like soil.
💧 Step 4: Plant and Maintain Your Seedlings
Follow your seed packet instructions for planting depth, but generally, ¼ inch deep works for most seeds. Space seeds according to their mature size—crowding now leads to weak, leggy seedlings later. Water gently from the bottom by placing the tray in ½ inch of water for 10-15 minutes. This method prevents soil displacement and ensures even moisture without overwatering.
Place your completed tray under grow lights or in a south-facing window where it will receive 12-16 hours of light daily. Watch for condensation on the drainage cover—this means your humidity levels are perfect. If you notice seedlings touching the cover, it's time to thin them or raise the lights slightly. The goal is strong, compact growth, not stretched-out stems reaching for light.
⏰ Step 5: Harden Off and Transplant
When seedlings develop their first true leaves (not the initial seed leaves), start hardening them off. Move the tray outside to a shaded area for 1 hour on day one, gradually increasing exposure over 7-10 days. This acclimates them to outdoor conditions and prevents transplant shock. I like to place trays on the ground rather than elevated planters during this period—it helps roots strengthen naturally.
Transplant when seedlings reach 2-3 inches tall and have developed 3-4 true leaves. Use a small knife to separate the biodegradable mat cells, then plant directly into the garden or larger containers. The mat will decompose over time, eliminating the need to disturb delicate roots. Water thoroughly after transplanting to help settle the soil around the new roots.
Tips & tricks for perfect DIY seed starter trays
These practical insights will help you build trays that give your seedlings the best possible start—without the common pitfalls.
The Drainage Detail: The ¼-inch gap between the bottom and sides in Step 1 is non-negotiable for preventing soggy roots. I've seen seedlings rot when this gap is too small—water needs a clear path out. For extra insurance, add a small piece of mesh over the drainage holes before stapling the window screen in place. This creates a secondary barrier against soil loss while maintaining airflow to the roots.
Assembly Pro Tip: In Step 2, when attaching the 2-inch tall sides, use a level to ensure they're perfectly vertical. Uneven sides make stacking unstable and can cause seedlings to lean. I mark the height with a pencil on the frame before screwing—this guarantees consistent depth across all trays. The ½-inch strips for stackability should be flush with the bottom; any gaps will cause wobbling when you stack multiple trays.
Planting Precision: The biodegradable seedling mat in Step 3 is your secret weapon for organization. Before planting, I press the mat firmly into the tray and use a pencil to lightly mark where each seed will go. This prevents overcrowding and makes thinning easier later. For seeds that need light to germinate (like lettuce), press the mat just enough to hold soil but not so tight that it blocks light from reaching the surface.
Watering Wisdom: The 10-15 minute bottom-watering technique in Step 4 works wonders, but timing matters. Place your tray in a shallow dish of water and check the soil after 5 minutes—if water hasn't reached the top, add another 5 minutes. Overwatering here leads to anaerobic conditions that stunt growth. For seedlings sensitive to moisture (like tomatoes), reduce to 8-10 minutes and let the tray sit on a rack to drain completely before returning to its growing spot.
Pro Tips for Diy Seed Starter Tray
- These practical insights will help you build trays that give your seedlings the best possible start—without the commo...
- The Drainage Detail: The ¼-inch gap between the bottom and sides in Step 1 is non-negotiable for preventing soggy roo...
- Assembly Pro Tip: In Step 2, when attaching the 2-inch tall sides, use a level to ensure they're perfectly vertical. ...
Frequently asked questions
Got questions about your DIY seed starter tray? You’re not alone—growing seedlings from scratch can feel tricky at first! Here are answers to the most common queries to help you get started with confidence.
What’s the best time to start seeds in a DIY tray?
Timing depends on your climate and the plants you’re growing. For cool-season crops like lettuce or spinach, start 6–8 weeks before the last frost. Warm-season plants (tomatoes, peppers) need 8–12 weeks before transplanting. Check your local frost dates for precision!
How do I prevent mold or damping-off in my seedling tray?
Mold and damping-off are sneaky foes! Ventilation is key—cover trays with a lid or plastic wrap only until seeds sprout, then remove it. Use sterilized soil (bake it at 200°F for 30 mins) and avoid overwatering. A light spray of hydrogen peroxide (3%) can also help.
Can I reuse my DIY seed starter tray?
Clean trays thoroughly with soapy water and a 10% bleach solution to kill pathogens. Rinse well and let them dry completely. For plastic or wooden trays, sand rough spots to prevent mold. Reusing saves money and reduces waste—just avoid reusing trays if they showed signs of disease.
What’s a good alternative if I don’t have a tray?
No tray? No problem! Use egg cartons, toilet paper rolls, or even repurposed plastic containers (like yogurt cups). Poke drainage holes in the bottom, fill with soil, and plant seeds directly. Just remember: transplant carefully to avoid disturbing delicate roots.
How much light do seedlings need in a DIY tray?
Seedlings crave 12–16 hours of light daily. A sunny windowsill works, but for stronger plants, supplement with a grow light (LED or fluorescent) 4–6 inches above the tray. Rotate trays daily for even growth. Yellowing leaves? It’s a sign they’re stretching for light!
Wrapping up and next steps
Creating your own DIY seed starter tray is a rewarding way to kickstart your gardening journey—saving money, reducing waste, and giving your seedlings the perfect head start! 🌱 With just a few household materials and a little creativity, you’ve got a stackable nursery ready to nurture your future plants.
Whether you’re a beginner or a seasoned green thumb, this project proves that sustainable gardening starts with simple, hands-on solutions.
Now that you’re equipped with the know-how, it’s time to grab those seeds and get growing! Start small with a few easy-to-grow herbs or veggies, and soon you’ll be expanding your setup for a full garden. Happy planting! 🌿