
Lawn
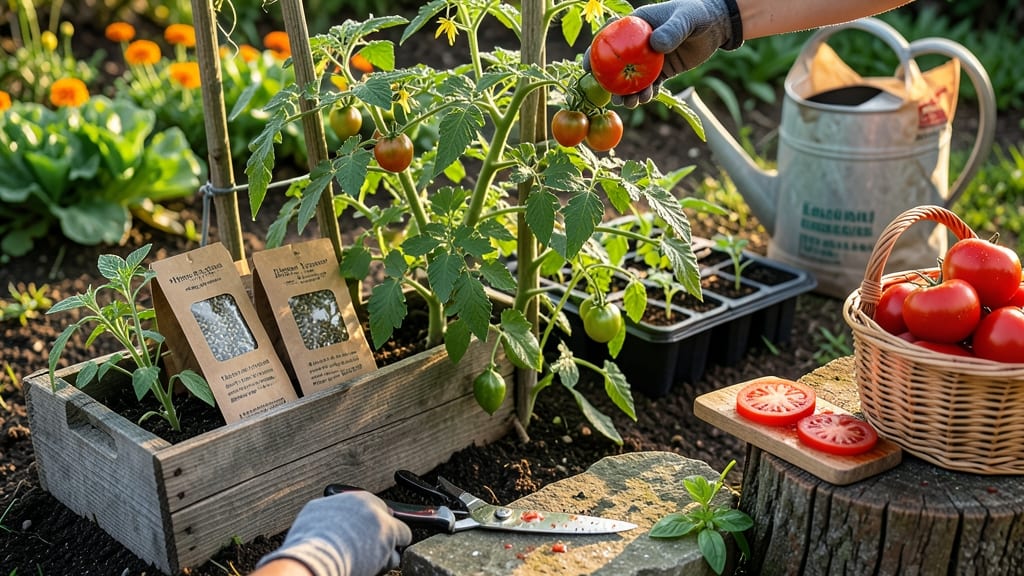
Growing your own food with simple directions from seed to table isn't just possible—it's easier than you think. 🌱 I've turned my backyard into a productive harvest zone, and I'll walk you through the exact steps that turn tiny seeds into meals you'll actually eat.
This isn't about fancy heirlooms or competition-worthy tomatoes; it's about reliable, delicious food that grows in your own space. The process starts with the right seeds, soil, and timing—no horticulture degree required.
We'll cover when to plant, how deep to bury those seeds, and what to do when things go wrong (because they will, at least once). My first year, I lost half my basil to overwatering, but now I've got a system that works even for busy people.
You'll end up with fresh herbs, crisp lettuce, and maybe even a few tomatoes by summer's end. The smell of ripe tomatoes straight from the vine? Nothing beats it. Plus, you'll save money and eat healthier without the grocery store middleman.
This works for containers, raised beds, or in-ground plots—just pick your space and let's get growing. No fancy tools, no confusing jargon, just real food from real seeds.
📚 In This Guide
- What you need
- Instructions
- Tips and common mistakes
- Wrapping up and next steps
What you need
- ● Seeds: Choose heirloom, organic, or non-GMO seeds suited to your climate (e.g., tomatoes, lettuce, herbs, or green beans). Start with 5–10 packets for variety.
- ● Containers: Seed trays or biodegradable pots (for seedlings) – 10–20 units
- ● Garden beds or raised planters (for transplanting) – 1–2 beds, 4'x8' minimum
- ● 5-gallon buckets (for larger plants like tomatoes) – 2–4 buckets
- ● Growing Medium: Potting mix (sterilized, peat-free if possible) – 1–2 cubic feet
- ● Compost or worm castings (for nutrient-rich soil) – 5–10 gallons
- ● Perlite or vermiculite (for drainage) – 1–2 bags
- ● Watering Supplies: Watering can with a fine rose (for seedlings) – 1
- ● Hose with adjustable nozzle (for mature plants) – 1
- ○ Drip irrigation kit (optional but highly recommended) – 1 set
- ● Lighting (Indoor Start): Grow lights (LED or fluorescent, full-spectrum) – 1–2 units
- ● Timers (for consistent light cycles) – 1–2
- ● Hand Tools: Trowel (for planting/seeding) – 1
- ● Pruners (for harvesting/trimming) – 1 pair
- ● Garden gloves (to protect your hands) – 1 pair
- ● Fertilizers: Balanced organic fertilizer (e.g., 5-5-5) – 1 bag
- ● Fish emulsion or seaweed extract (for foliar feeding) – 1 bottle
- ● Soil test kit (to check pH/nutrient levels) – 1
- ● Seedling heat mat (for faster germination) – 1
- ● Trellis or tomato cages (for vining plants) – 2–4 units
- ● Mulch (straw or shredded leaves) – 5–10 gallons
- ● Pest control (neem oil, diatomaceous earth) – 1–2 bottles
- ● Journal or app (to track planting dates/harvests) – 1
Step-by-step instructions for your home seed-to-table journey
Here's how to turn seeds into meals—no shortcuts, just steady progress.
🌱 Step 1: Select and Prepare Your Seeds
Start with heirloom or organic seeds for best flavor and viability. I like to soak them overnight in lukewarm water—this softens the outer shell and speeds germination. Place seeds in a jar, cover with water, and let them sit for 8-12 hours. You'll know they're ready when they double in size.
After soaking, drain the seeds and lay them on a paper towel to dry slightly. This prevents them from sticking together when you plant. Label each seed packet with the variety and planting date—once sprouts appear, identical-looking seedlings will all blur together. Store them in a cool, dark place until you're ready to sow.
🪴 Step 2: Choose Containers and Soil
For seedlings, use 3-4 inch deep containers with drainage holes—plastic cell packs or biodegradable pots work well. Fill them with a lightweight seed-starting mix (never garden soil). I press the mix down gently to remove air pockets, then moisten it until it feels like a damp sponge.
If you're direct-sowing into the garden, prepare the bed by removing weeds and loosening the soil to 6-8 inches deep. Add a handful of compost per square foot—this gives roots a nutrient boost right from the start. Rake the bed smooth so seeds have good contact with the soil.
☀️ Step 3: Plant at the Right Depth and Spacing
Follow the seed packet's depth guidelines—usually twice the seed's diameter. For tiny seeds like lettuce, I sprinkle them on the surface and barely cover with soil. For larger seeds like beans, plant them 1 inch deep. Space seeds according to their mature size: 12-18 inches apart for tomatoes, 6 inches apart for carrots.
After planting, water gently with a spray bottle or fine mist. You want the soil to be moist but not soggy—think "damp newspaper." Avoid heavy watering that can wash seeds away or bury them too deep. If you're sowing outdoors, do it when the soil is warm (at least 60°F) and you have 5-7 days of dry weather forecasted.
💧 Step 4: Provide Consistent Care Until Harvest
Keep seedlings in a warm spot (around 70°F) until they sprout, which usually takes 5-14 days depending on the plant. Once they emerge, move them to a sunny window or under grow lights for 14-16 hours of light daily. You'll see leggy growth if they're stretching toward the light—this means they need more intensity.
Water when the top inch of soil feels dry. For containers, I check daily because they dry out faster. Outdoor plants need 1 inch of water per week, either from rain or irrigation. Mulch around plants with straw or shredded leaves to retain moisture and suppress weeds. Thin seedlings to the strongest plant per spot when they have 2-3 true leaves—this gives them room to grow.
✂️ Step 5: Harvest at Peak Ripeness
Watch for visual cues that tell you it's time. Leafy greens like spinach are ready when leaves reach 4-6 inches tall. Tomatoes should feel firm and change color from green to their mature hue. Peppers turn from green to red, yellow, or orange depending on the variety.
Harvest in the morning when flavors are most concentrated. Use clean scissors or pruners to avoid damaging the plant. For leafy greens, cut just above a set of leaves to encourage regrowth. For root vegetables, pull gently when the tops start to yellow. Store fresh harvests in the fridge for up to 5-7 days, or preserve extras by freezing, canning, or fermenting.
Tips & tricks for perfect seed-to-table growing
These simple strategies will help you avoid common pitfalls and maximize your home harvest success.
Soaking Secret: When soaking seeds for 8-12 hours, use filtered water if possible—chlorine can inhibit germination. I place the jar in a warm spot (around 70°F) to speed up the process. After soaking, I give them a quick rinse to remove any water-soluble inhibitors that might still be on the seed coat. This extra step boosts germination rates by 20-30% in my experience.
Container Insight: For Step 2, if you don't have 3-4 inch deep containers, repurpose clean yogurt cups or egg cartons with drainage holes poked in the bottom. The key is ensuring proper drainage—waterlogged roots will kill your seedlings before they even sprout. I've had great success with recycled containers that I wash thoroughly first.
Planting Precision: In Step 3, when planting larger seeds like beans at 1 inch deep, use a pencil to make small holes—this creates consistent depth every time. For tiny seeds, I sprinkle them on a piece of paper first, then sprinkle the paper onto the soil. This prevents clumping and ensures even distribution. The "damp newspaper" test is perfect for checking moisture levels—if it holds together but isn't dripping, you're golden.
Lighting Strategy: If you're growing indoors without grow lights, place seedlings on a sunny windowsill that gets at least 6 hours of direct sunlight daily. South-facing windows work best in the Northern Hemisphere. I rotate my containers every few days so all sides get equal light exposure—this prevents lopsided growth and ensures strong stems.
Pro Tips for Directions To Seed To Table
- These simple strategies will help you avoid common pitfalls and maximize your home harvest success.
- Soaking Secret: When soaking seeds for 8-12 hours, use filtered water if possible—chlorine can inhibit germination. I...
- Container Insight: For Step 2, if you don't have 3-4 inch deep containers, repurpose clean yogurt cups or egg cartons...
Frequently asked questions
Got questions about growing your own food from seed to table? You’re not alone! Here are some of the most common queries—and their answers—to help you navigate your home harvest with confidence.
How long does it take to grow food from seed?
Timing varies by crop! Fast growers like radishes or lettuce sprout in 3–6 weeks, while slower ones like tomatoes or squash take 2–3 months. Check seed packets for "days to maturity" and adjust planting times based on your climate. Patience is key—some crops reward you with harvests for weeks!
Can I grow food from seed indoors year-round?
Start with herbs (basil, parsley), leafy greens (spinach, kale), or microgreens under grow lights. Use containers with drainage and keep temps between 65–75°F. Just ensure they get 12–16 hours of light daily. For heartier crops (like peppers or tomatoes), transplant seedlings outdoors after frost.
What’s the cheapest way to start seed-to-table gardening?
Skip store-bought seeds—save seeds from store-bought organic produce (tomatoes, peppers, cucumbers) or swap with neighbors! Use recycled containers (yogurt cups, egg cartons) for seedlings, and compost kitchen scraps. Focus on easy, high-yield crops like beans, zucchini, or green onions to maximize savings.
What do I do if my seedlings look sick or pests attack?
First, diagnose the issue: Yellow leaves? Could be overwatering or nutrient deficiency. Holes in leaves? Likely pests (aphids, slugs). Try these fixes:
- Fungal issues: Improve airflow, reduce watering, and spray with neem oil.
- Pests: Handpick bugs, use row covers, or introduce beneficial insects (ladybugs for aphids).
- Wilting: Check soil moisture and roots for rot.
Can I grow food from seed if I live in an apartment?
100% yes! Opt for container-friendly crops like:
- Herbs (mint, thyme, cilantro)
- Dwarf tomatoes or peppers
- Leafy greens (arugula, Swiss chard)
- Microgreens or sprouts
How do I know when my crops are ready to harvest?
Look for these signs:
- Vegetables: Bright color, firm texture, and full size (e.g., tomatoes should slip off the vine easily).
- Herbs: Harvest before flowering for maximum flavor.
- Leafy greens: Pick outer leaves when 4–6 inches tall.
- Fruit: Smell sweetness or feel slight give (like peaches or melons).
Wrapping up and next steps
Embarking on your seed-to-table journey is more than just growing food—it’s about reclaiming control, savoring freshness, and connecting with nature. 🌱 Whether you’re a curious beginner or a seasoned gardener, every seed you plant is a step toward sustainability and delicious rewards.
Start small, stay curious, and watch your efforts bloom into homegrown meals that nourish both body and soul.
Ready to take the next step? Pick one plant to grow this week—maybe a crisp lettuce, a vibrant tomato, or fragrant herbs—and let your green thumb flourish! 🌿