
Lawn
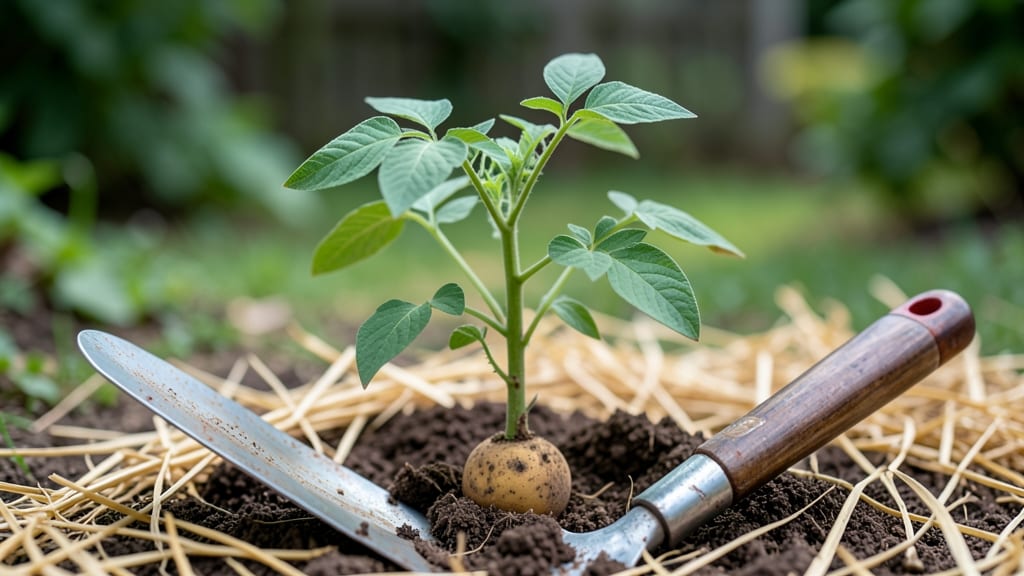
Chitting seed potatoes gives you a 10-day head start on the growing season—thicker, stronger sprouts mean faster harvests and fewer surprises in the garden. 🌱 I’ve chitted potatoes for years, and the difference between pre-sprouted tubers and store-bought ones is night and day: plants emerge faster, establish deeper roots, and produce more tubers.
The process is simpler than it sounds—just light, warmth, and patience. You’ll need 3 simple supplies: seed potatoes (certified disease-free), a bright windowsill or basement shelf, and a shallow container (like a cardboard box or egg carton).
The key is consistency—keep them in 50-60°F temperatures and avoid moisture buildup, which causes rot. Uneven sprouting? No problem—just rotate the container weekly for balanced light exposure. Once those pencil-thin sprouts appear (usually 2-4 weeks), it’s time to plant.
The chitted potatoes handle transplant shock better than bare tubers, and you’ll see greenery breaking soil within 7-10 days of planting. For best results, bury them 4-6 inches deep in loose, well-draining soil. This method works for all potato varieties—russets, reds, or fingerlings—and even adapts to small spaces.
Whether you’re a first-time gardener or a seasoned grower, chitting turns a basic crop into a reliable, high-yielding harvest. Ready to try it?
📚 In This Guide
- What you need
- Instructions
- Tips and common mistakes
- Wrapping up and next steps
What you need
- ● Certified seed potatoes: 5–10 lbs (2.3–4.5 kg), depending on your garden size. Choose disease-resistant varieties like Yukon Gold, Red Pontiac, or Fingerlings.
- ● Growing containers or garden beds: Containers: 5–10 gallon pots (1–2 plants per pot) with drainage holes.
- ● Garden beds: Loose, well-draining soil with a pH of 5.0–6.5. Raised beds are ideal!
- ● High-quality potting soil or compost: 2–3 cubic feet (0.06–0.09 m³) per plant, mixed with compost for nutrients.
- ○ Slow-release fertilizer (optional but recommended): Balanced 10-10-10 or organic options like bone meal (1 tbsp per plant).
- ● Watering can or hose with a gentle spray nozzle.
- ● Garden trowel or small shovel: For planting and harvesting.
- ● Pruning shears: To trim excess foliage if needed.
- ● Garden gloves: Protect your hands from soil and sharp potato edges.
- ● Measuring tape or ruler: To track planting depth (3–4 inches for chitted potatoes).
- ○ Row cover or frost cloth (optional): For early planting in cooler climates.
- ● 🌡️ Chitting station: A cool, bright spot (50–60°F or 10–15°C) with indirect light to encourage sprouts.
- ● ✨ Soil prep: Mix in compost or aged manure 1–2 weeks before planting for extra nutrients.
- ● 🎯 Spacing: Plant potatoes 12–15 inches apart in rows 2–3 feet apart for optimal airflow.
Step-by-step instructions for chitting seed potatoes
Here's how I get my potatoes to sprout strong, uniform shoots every season—no guesswork involved.
🌱 Step 1: Select and Prepare Your Seed Potatoes
Choose certified disease-free seed potatoes—the small, firm ones labeled for planting. Avoid large potatoes from the grocery store; they're bred for storage, not sprouting. I like to pick varieties like Yukon Gold or Red Pontiac for their reliable yields.
Place your potatoes in a bright, cool spot (around 45-50°F) for 2-4 weeks before chitting. This mimics their natural dormancy period and prevents premature sprouting. You'll see small dimples where the eyes are—these are the future shoots. If you notice any green patches, cut them off with a clean knife and let the wounds dry for a day.
✂️ Step 2: Cut and Cure the Potatoes
When you're ready to chit, place your potatoes on a flat tray or egg carton so they don't roll. Using a sharp knife, cut each potato into 2-4 pieces, ensuring each piece has at least 2-3 eyes. Keep the cuts to a minimum—every slice exposes more surface area to rot.
Let the cut pieces dry for 1-2 days in a shady, well-ventilated spot. This "curing" process forms a protective callus over the wounds, preventing disease. Once dry, place them eyes-up in the tray. I like to write the variety name on the tray with a marker so I don’t mix them up later.
☀️ Step 3: Create the Ideal Chitting Environment
Move your trays to a bright, indirect light spot—a sunny windowsill works perfectly. You want consistent temperatures between 50-60°F during the day and no lower than 40°F at night. If your home runs warmer, place the trays on a cool basement floor or near a north-facing window.
Watch for tiny green sprouts in 2-4 weeks. These are your chits, and they signal the potato is ready for planting. If you see long, leggy sprouts, your light is too weak—move the tray closer to the window or add a grow light for 12-14 hours daily. Avoid direct sunlight, which can turn the sprouts green and bitter.
🪴 Step 4: Plant Your Chitted Potatoes
Once your chits reach 1-2 inches long, it's time to plant. Dig trenches 4-6 inches deep in loose, well-draining soil. Space your potatoes 12-15 inches apart in rows 3 feet apart to allow for air circulation and future growth. Place them eyes-up in the trench, then cover lightly with soil—just enough to secure them without burying the sprouts.
Water gently but thoroughly after planting to settle the soil. Mulch with 2-3 inches of straw or grass clippings to retain moisture and regulate soil temperature. Avoid watering again until you see new growth—overwatering at this stage can rot the tubers. In 2-3 weeks, you'll see vigorous top growth, and that’s when you know your chitting paid off.
Tips & tricks for perfect chitted seed potatoes
Here's what nobody tells you about getting those perfect, uniform sprouts every single time.
Variety Matters: Stick with certified seed potatoes labeled specifically for planting—grocery store potatoes are bred for long-term storage, not sprouting. Varieties like Yukon Gold or Red Pontiac develop strong, consistent chits. Avoid russets for chitting; they're more prone to uneven sprouting and disease.
Temperature Control: The 45-50°F range during the initial 2-4 week dormancy period is critical. If your home runs warmer, place trays on a cool basement floor or near a north-facing window. Too-warm conditions can trigger premature sprouting, while temperatures below 40°F will stall growth completely. A simple thermometer in the chitting area helps monitor consistency.
Lighting Strategy: Bright, indirect light is key during the 2-4 week sprouting phase. A sunny windowsill works, but avoid direct sunlight which causes green, bitter sprouts. For consistent results, especially in cloudy climates, supplement with a grow light for 12-14 hours daily. Position it 6-12 inches above the trays to prevent leggy growth.
Planting Depth: When your chits reach 1-2 inches, plant with the eyes facing up but only cover them lightly with soil—just enough to secure them. Burying the sprouts too deeply forces them to grow upward through the soil, creating weak stems. The 4-6 inch trench depth ensures tubers form below the surface while allowing shoots to emerge easily.
Pro Tips for Chitted Seed Potatoes
- Here's what nobody tells you about getting those perfect, uniform sprouts every single time.
- Variety Matters: Stick with certified seed potatoes labeled specifically for planting—grocery store potatoes are bred for long-term storage, not sprouting.
- Temperature Control: The 45-50°F range during the initial 2-4 week dormancy period is critical.
Frequently asked questions
Got questions about chitting seed potatoes?
You’re not alone! Here are answers to the most common queries to help you grow like a pro.
What does "chitting" mean, and why should I do it?
Chitting is the process of encouraging seed potatoes to sprout before planting. It gives your tubers a head start, leading to earlier and more vigorous growth. With chitted potatoes, you’ll see faster germination and stronger plants—meaning a healthier harvest!
How long does it take for seed potatoes to chit?
Most seed potatoes will start sprouting in 2–4 weeks when kept in cool, bright conditions (around 45–55°F). Longer exposure to light speeds up the process, but avoid direct sunlight or warmth, which can cause the sprouts to turn green or leggy. Patience pays off—wait until sprouts are 1–2 inches long before planting.
Can I chit seed potatoes indoors? What’s the best setup?
Place your seed potatoes in a cool, well-lit spot like a basement, garage, or even a cardboard box with holes for airflow. Avoid refrigerators (humidity can cause rot) or sunny windowsills. If indoors feels too warm, a ventilated egg carton on a tray works perfectly—just keep them out of direct light until planting time.
What if my seed potatoes rot while chitting?
Rotting usually happens from too much moisture or poor airflow. To prevent it:
- Store potatoes in a single layer (don’t stack them).
- Use a tray with drainage holes to avoid soggy conditions.
- Check weekly for soft spots or mold—discard affected tubers immediately.
Can I still plant seed potatoes that haven’t chitted?
Yes! While chitting gives you an edge, unchitted seed potatoes will still grow—just plant them 1–2 weeks later than your chitted ones. Bury them slightly deeper (4–6 inches) to protect them from frost and encourage sprouting underground. If you’re short on time, this is a great backup plan!
What’s the best way to handle green or leggy sprouts?
Green or stretched sprouts mean your potatoes got too much light or warmth before planting. If sprouts turn green, they’ll still grow, but avoid planting them immediately—they may produce bitter tubers. For leggy sprouts, trim them back to 1–2 inches before planting to encourage stronger root growth.
Wrapping up and next steps
Growing your own potatoes from chitted seed potatoes is a rewarding way to enjoy a fresh, homegrown harvest—without the stress of last-minute store buys! 🌱 By following the right steps, you’ll set yourself up for a thriving garden and a delicious crop.
Whether you’re a beginner or a seasoned gardener, this method makes the process simple and fun.
Ready to dig in? Start small—grab a few chitted potatoes, prep your soil, and plant them with confidence. Soon, you’ll be reaping the benefits of your hard work, one crisp, homegrown spud at a time. Happy gardening!