
Lawn
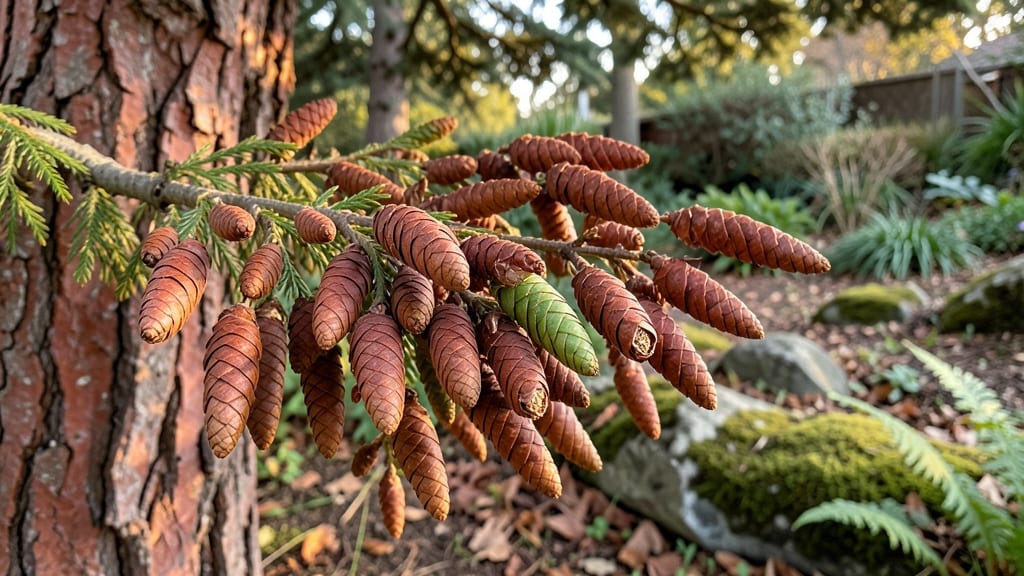
Collecting cedar tree seed pods in late fall unlocks next year’s forest of fragrant evergreens. 🌲 The key is patience—cedar seeds need a cold snap to break dormancy, mimicking nature’s timing.
I’ve learned that gathering them after the first hard frost gives the best germination rates, but you’ll need to stratify them first.
Grab a bucket and rake under mature cedar trees in November, when the pods turn brown and brittle. You’ll want about 2 pounds of pods for every 100 square feet of planting area.
Store them in a paper bag in your fridge for 6-8 weeks to simulate winter—this cold treatment is what tricks the seeds into thinking spring has arrived.
Once stratified, scatter the seeds on well-drained soil in full sun. Cedar seedlings prefer sandy, slightly acidic soil, so mix in a little peat moss if your garden is heavy clay.
Plant them just barely covered—¼ inch deep at most—and keep the soil moist but never soggy during their first year.
Germination can take 6-12 months, so don’t be discouraged if nothing happens for a while. The real payoff comes years later, when your cedars grow into those classic, aromatic trees that birds and wildlife will love. Here’s how to keep them thriving once they sprout!
📚 In This Guide
- What you need
- Instructions
- Tips and common mistakes
- Wrapping up and next steps
What you need
- ● Mature cedar seed pods: Collect at least 50–100 pods (more = better success rate). Look for dry, brown, and slightly open pods—these are ready for harvest!
- ● Pruning shears or small handsaw: For safely snipping pods from high branches.
- ● Large paper bags or breathable mesh sacks: 2–3 bags (to prevent moisture buildup during transport).
- ● Newspaper or cardboard: For a drying surface (avoid plastic—it traps humidity!).
- ● Fine-mesh sieve or colander: To separate seeds from chaff once dried.
- ● Small paper envelopes or airtight containers: For long-term seed storage (label with the year!).
- ○ Rubbing alcohol (70% or higher) and cotton swabs: For sanitizing tools and surfaces (optional but highly recommended to prevent mold).
- ● Seed stratification kit: If you’re impatient for germination, a refrigerator or cold stratification tray speeds up the process.
- ● Humidity dome or plastic wrap: For creating a mini greenhouse during early germination (if starting indoors).
- ● Garden journal or notepad: To track pod collection dates, drying conditions, and germination progress.
- ● Work gloves: Cedar needles can be itchy—protect your hands!
How to collect and cold-stress cedar tree seed pods
Here's how to turn this year's seed pods into next season's strong cedar seedlings.
🌱 Step 1: Harvest Mature Seed Pods at Peak Ripeness
Look for seed pods that have turned a rich, deep brown color and feel dry to the touch—this usually happens in late fall or early winter. I gently twist them off the branches, being careful not to damage the tree. The pods should open easily when held between your fingers, releasing their tiny seeds inside.
Harvest on a dry day so the pods don't stick to your gloves or tools. Collect them in a paper bag or envelope—plastic traps moisture and can cause mold. Store the pods in a cool, dry place until you're ready to process them, which should be within a few weeks.
⏰ Step 2: Cold-Stress the Seeds for Better Germination
Place the harvested seed pods in a sealed plastic bag with a damp paper towel. This mimics the natural winter stratification process that breaks seed dormancy. Put the bag in your refrigerator's crisper drawer for 4-6 weeks—this cold treatment tricks the seeds into thinking winter has passed.
Check the bag occasionally to ensure the paper towel stays damp but not soggy. If you see condensation inside, open the bag for a few hours to let excess moisture escape. This cold-stratification step is critical—skipping it results in poor germination rates.
🌿 Step 3: Sow the Seeds in Early Spring
After cold-stratification, fill small seedling trays with sterile seed-starting mix (not garden soil) and moisten it until evenly damp. Scatter the seeds on the surface—cedar seeds are tiny, so I use a toothpick to space them about ½ inch apart without pressing them into the soil.
Cover the seeds with a thin layer of vermiculite (about ¼ inch deep) to help retain moisture. Place the trays in a warm spot (65-75°F) with indirect light until germination begins, which typically takes 2-4 weeks. Keep the soil consistently moist but never waterlogged.
☀️ Step 4: Provide Gentle Light and Protection
Once seedlings emerge, move them to a bright, indirect light location. Cedar seedlings are sensitive to strong direct sun at this stage—too much light causes them to dry out quickly. A south-facing window with sheer curtains works well, or use a grow light positioned 6 inches above the seedlings.
Watch for leggy growth (long, weak stems) as a sign of insufficient light. If you notice this, either move the seedlings closer to the light source or lower the grow light. Thin seedlings to 3 inches apart once they develop their first true leaves to prevent overcrowding.
🪴 Step 5: Transplant Seedlings Outdoors in Fall
Cedar seedlings grow slowly, so wait until they're 4-6 inches tall with a sturdy stem before transplanting. Choose a partially shaded spot in your garden with well-draining soil—cedars hate soggy roots. Dig a hole twice as wide as the seedling's root ball but only as deep as the container it's in.
Water the seedling thoroughly before removing it from its tray to minimize root disturbance. Plant it at the same depth it was growing in the container, then firm the soil gently around the base. Mulch with 2 inches of pine straw to retain moisture and protect young roots from temperature swings.
Tips & tricks for perfect cedar seedling growth
Turn your seed pod harvest into thriving seedlings with these tried-and-true strategies that build on nature's own processes.
Harvesting Precision: When harvesting in Step 1, focus on pods that release seeds easily when squeezed—this indicates full maturity. I've found that pods still attached to branches often contain fresher seeds than those that have already fallen. Collect on a dry morning to prevent moisture buining up in the pods, which can lead to mold during storage. The key is gentle handling: use pruning shears for thicker branches and simply twist smaller pods off by hand. This careful approach preserves seed viability for the full 4-6 week cold-stratification period we'll use later.
Cold-Stressing Secrets: During the critical 4-6 week cold-stratification in Step 2, I've discovered that placing the sealed bag on the refrigerator's top shelf (rather than the crisper drawer) creates more consistent temperatures. The crisper can get too cold, potentially damaging the seeds. Check moisture levels weekly—if the paper towel feels damp but not wet, you're good. Too much moisture creates anaerobic conditions that can kill seeds; too little prevents proper hydration. This balance is what mimics nature's winter conditions perfectly.
Lighting Technique: For Step 4's bright indirect light requirement, I recommend using a simple LED grow light on a timer for 12 hours daily. Position it 6 inches above seedlings to prevent overheating. Natural south-facing windows work well, but supplement with artificial light if your space lacks sufficient sunlight. Watch for leggy growth—this is your cue to either increase light intensity or reduce the distance between seedlings and their light source. Remember, cedar seedlings are shade-tolerant trees, so they need gentle light to prevent stress.
Transplanting Wisdom: When transplanting in Step 5, I've learned that watering seedlings thoroughly the day before transplanting reduces shock. The well-hydrated roots handle the disturbance better. After planting, create a small watering well around each seedling to ensure water reaches the roots. Mulch with 2 inches of pine straw as specified, but avoid piling it directly against the stem—this prevents moisture buildup that can cause rot. The mulch's primary job is to regulate soil temperature, not smother the plant.
Pro Tips for Cedar Tree Seed Pods
- Turn your seed pod harvest into thriving seedlings with these tried-and-true strategies that build on nature's own processes.
- Harvesting Precision: When harvesting in Step 1, focus on pods that release seeds easily when squeezed—this indicates full maturity.
- The crisper can get too cold, potentially damaging the seeds.
Frequently asked questions
Got questions about cedar tree seed pods? You’re not alone! Here are some of the most common queries—plus straightforward answers to help you navigate their quirks, from harvesting to troubleshooting.
When do cedar tree seed pods typically appear?
Cedar seed pods (often called "berries") usually form in late summer to early fall (August–October) and ripen by winter. They start green, turn brown, and may stay on the tree until spring. If you’re waiting for them to open, patience is key—some varieties take months!
How do I tell if a cedar seed pod is ripe and ready to harvest?
Ripe cedar seed pods are dry, brown, and slightly papery when touched. They’ll also release seeds easily if gently squeezed. Avoid harvesting green or moist pods—they won’t yield viable seeds. Pro tip: Shake a branch over a bucket to catch falling seeds naturally!
Can cold weather damage cedar seed pods before they’re ready?
Yes! While cedars are hardy, freezing temps before pods fully ripen can cause them to shrivel or drop prematurely. If your area faces early frosts, harvest pods as soon as they turn brown to maximize seed viability. Store them in a cool, dry place until spring planting.
What can I do if my cedar tree isn’t producing seed pods?
Several factors may be at play: age (young trees <5 years old rarely produce pods), stress (drought or poor soil), or lack of pollination. Try pruning healthy branches to encourage growth or check for pests like spider mites. If the tree is mature but still bare, consider planting a pollinator-friendly companion nearby.
Are there alternatives to cedar seed pods for wildlife or landscaping?
For wildlife, try juniper berries (similar in appearance) or pine cones. For landscaping, consider arborvitae (Thuja) or juniper shrubs, which offer year-round interest and wildlife benefits. Just note: Cedar seed pods are non-toxic to birds but not edible for humans.
Wrapping up and next steps
From understanding the unique resilience of cedar tree seed pods to learning how to nurture them for next year’s growth, you’re now equipped with the knowledge to give your trees the best care—even in cold weather! 🌲❄️ These little powerhouses are a testament to nature’s adaptability, and with the right steps, you can help them thrive.
Ready to take action? Start by inspecting your cedar trees this fall, gently prune any damaged pods, and prepare your soil for winter. Small efforts now can lead to stunning blooms and lush growth come spring!