
Lawn
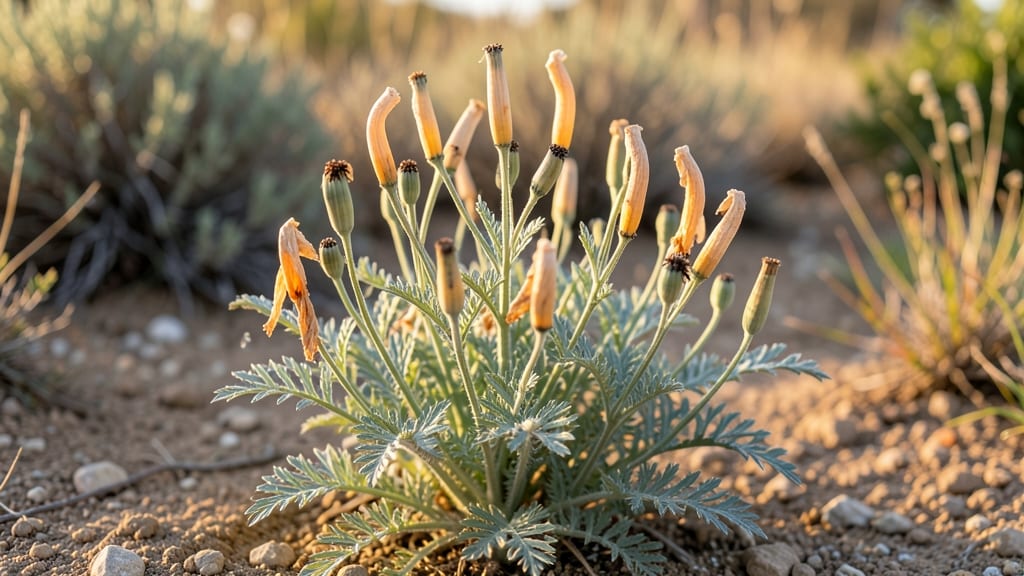
California poppy seed pods hold the secret to next year’s golden blooms—if you know how to harvest them right. 🌻 I’ve learned the hard way that letting them dry on the plant too long means scattering seeds everywhere, while picking them too early ruins germination.
The key is timing: wait until the pods turn from green to a papery brown, usually by late summer or early fall, when they’re dry but still intact.
Once you’ve got those pods in hand, drying takes just a few weeks in a cool, dry spot—no fancy equipment needed. I spread mine on a screen or paper towels in my garage, flipping them occasionally to prevent mold.
The goal is to let them dry completely so the seeds pop out easily when you’re ready to plant. This method works for both gardeners and crafters looking for natural dried decorations.
When stored properly in a sealed container, these seeds stay viable for years, giving you a head start on spring planting. The cold stress of winter actually improves germination rates—nature’s way of timing blooms perfectly.
You’ll end up with more poppies than you can handle, and the process is oddly satisfying, like unlocking a free gift from last year’s garden.
Beyond replanting, dried poppy pods make stunning centerpieces or wreaths that last through the winter. Just avoid crushing them before they’re fully dry, or you’ll lose those precious seeds. The best part? You’re not just saving money—you’re preserving a piece of your garden’s legacy for seasons to come.
📚 In This Guide
- What you need
- Instructions
- Tips and common mistakes
- Wrapping up and next steps
What you need
- ● California poppy seed pods – Collect 10-20 mature pods (or purchase from a nursery). Ensure they’re fully dried and brown for best results.
- ● Well-draining potting mix – 1 gallon of a cactus/succulent blend (or regular potting soil mixed with 30% perlite or sand to improve drainage).
- ● Small pots or trays – 4-6 shallow containers (3-4 inches deep) with drainage holes. Plastic nursery trays or biodegradable peat pots work well.
- ● Watering can or spray bottle – A fine-mist sprayer is ideal to avoid disturbing seeds.
- ○ Garden twine or labels – For marking containers (optional but helpful!).
- ● Pruning shears – For harvesting seed pods from stems.
- ● Glove – Protects hands from prickly stems (if harvesting fresh pods).
- ● Seedling heat mat – Speeds up germination in cooler climates (70-75°F is ideal).
- ● Grow lights – Provides 12-14 hours of light/day if natural sunlight is limited.
- ● Cold frame or refrigerator – For stratification (exposing seeds to cold for 4-6 weeks to mimic winter conditions).
- ● A sunny location – California poppies need full sun (6+ hours/day) to germinate and grow.
- ● Patience – Germination can take 2-4 weeks (or longer in cold soil).
- ● Knowledge of your frost dates – Plant outdoors 2-3 weeks before the last frost for best results.
How to collect and store California poppy seed pods for next year’s blooms
Here’s the simple method I use every fall to harvest and preserve seed pods—no fancy tools, just patience and timing.
🌱 Step 1: Identify and Harvest Mature Seed Pods
Wait until the pods turn from green to a dry, papery brown color—this usually happens in late summer or early fall after the bright orange blooms have faded. Gently twist or cut the pods from the stem with clean pruners or even your fingers. Avoid crushing them; the seeds inside need to stay intact for germination.
Harvest on a dry day when the pods are fully mature but haven’t split open yet. If you see seeds spilling out, you’ve missed the window. I like to collect pods in the morning when dew has dried, as moisture can encourage mold during storage.
🪴 Step 2: Dry and Clean the Seed Pods
Spread the pods out on a clean, dry surface like a baking sheet or mesh screen. Let them dry in a well-ventilated area out of direct sunlight for about 7-10 days. You’ll know they’re ready when they rattle when shaken—this means the seeds inside are loose and fully mature.
Once dry, gently shake the pods over a bowl or paper to release the tiny black seeds. Avoid using a fan or blowing on them, as the seeds are lightweight and can scatter easily. If some pods resist, lightly crush them with your fingers, but don’t overdo it—you want the seeds, not the chaff.
⏰ Step 3: Store the Seeds for Cold Stratification
Place the cleaned seeds in a paper envelope or small breathable container. Label it with the date and variety if you’re growing multiple types. The key to reliable germination is cold stratification—mimicking winter’s natural chilling process. I store my seeds in a sealed plastic bag inside the fridge’s crisper drawer, where temperatures stay around 35-40°F for 4-6 weeks.
Don’t skip this step—California poppies often need this cold treatment to break dormancy. If you forget, you can still plant them in fall or early winter, but stratification ensures stronger, more uniform germination come spring.
☀️ Step 4: Plant Stratified Seeds in Fall or Early Spring
After stratification, sow the seeds directly in the garden or in small pots filled with well-draining soil. Scatter them lightly on the surface—California poppies don’t need deep planting—and press them into the soil just enough to cover them. Water gently but avoid soaking the seeds, as they rot easily in soggy conditions.
If planting in fall, the seeds will naturally experience another round of cold exposure, which helps trigger germination. If planting in spring, keep the soil consistently moist until sprouts appear, usually within 2-4 weeks. Thin seedlings to 6-12 inches apart once they’re a few inches tall—they’ll spread naturally over time.
Tips & tricks for perfect California poppy seed pod preservation
These little-known details make all the difference between seeds that sprout reliably and ones that disappoint.
Timing is Everything: Harvest pods in the morning when dew has evaporated—this reduces moisture that could encourage mold during storage. I've learned the hard way that harvesting after rain or in damp conditions means seeds often fail to germinate later. The pods should be dry to the touch, not just visually.
Drying Strategy: For that 7-10 day drying period in Step 2, I place my pods on a mesh screen rather than a baking sheet. The airflow prevents any accidental moisture buildup from condensation. If your kitchen is particularly humid, consider using a small fan on low setting nearby—just keep it far enough away so it doesn't blow seeds around.
Stratification Secrets: The 4-6 week cold treatment in Step 3 works best when seeds have completely dried first. I've had better germination rates when I store them in a sealed bag with a tiny bit of damp paper towel (just barely moist) rather than completely dry. This mimics natural winter conditions where seeds experience occasional moisture. Label your containers with the date—trust me, you'll forget!
Pro Tips for California Poppy Seed Pods
- These little-known details make all the difference between seeds that sprout reliably and ones that disappoint.
- Timing is Everything: Harvest pods in the morning when dew has evaporated—this reduces moisture that could encourage ...
- Drying Strategy: For that 7-10 day drying period in Step 2, I place my pods on a mesh screen rather than a baking she...
Frequently asked questions
Got questions about those iconic California poppy seed pods? Here’s what you need to know—from timing to troubleshooting—to make the most of your harvest for next season’s blooms!
When should I collect California poppy seed pods?
Harvest pods when they’re dry and papery but before they split open—usually late summer to early fall (August–October in most of California). Wait until the pods turn brown and feel brittle to the touch. Collect them on a dry day to avoid moisture, which can cause mold or premature seed loss.
How long do California poppy seed pods take to germinate?
These seeds are cold-stressed for reliable germination, so plant them in late fall (October–November) or early spring (February–March). With proper chilling (4–8 weeks at 40–50°F), germination typically takes 1–3 weeks after sowing. Patience pays off—skipping cold treatment may result in sparse or slow sprouts!
Can I plant California poppy seed pods directly in my lawn?
Yes! They thrive in well-draining soil and don’t need transplanting. Scatter pods lightly (they’re tiny!) or sow seeds after collecting them. For lawn integration, mix seeds with sand and sprinkle over bare spots. Lightly rake to ensure soil contact, then water gently. Avoid overcrowding—they self-seed happily!
What if my seed pods attract pests or don’t produce seeds?
Pests like aphids or earwigs may target pods, but they’re usually harmless. To prevent issues, store pods in a paper bag (not plastic) in a cool, dry place until ready to use. If pods fail to form seeds, check for overcrowding, poor soil, or lack of sunlight. Thin plants or relocate them to sunnier spots for better blooms next year.
Are there alternatives if I can’t find California poppy seed pods?
If pods are scarce, try store-bought seeds from reputable nurseries (look for Eschscholzia californica). For a similar look, consider Mexican poppies (E. lobbii) or golden poppies (Papaver rupifragum). Just note: Wild-collected seeds may offer better local adaptation and color variation!
Wrapping up and next steps
California poppy seed pods are a gardener’s secret weapon for reliable, cold-stressed blooms year after year! By embracing their natural resilience, you’re not just planting seeds—you’re inviting a burst of golden color to return with minimal effort.
Whether you’re a seasoned green thumb or just starting, these hardy pods make it easy to grow with confidence.
Ready to transform your lawn into a poppy paradise? Start small—collect pods, let them dry, and scatter them in late fall. Watch as nature does the rest, and soon, you’ll be rewarded with a stunning, low-maintenance display that keeps coming back! 🌼