
Lawn
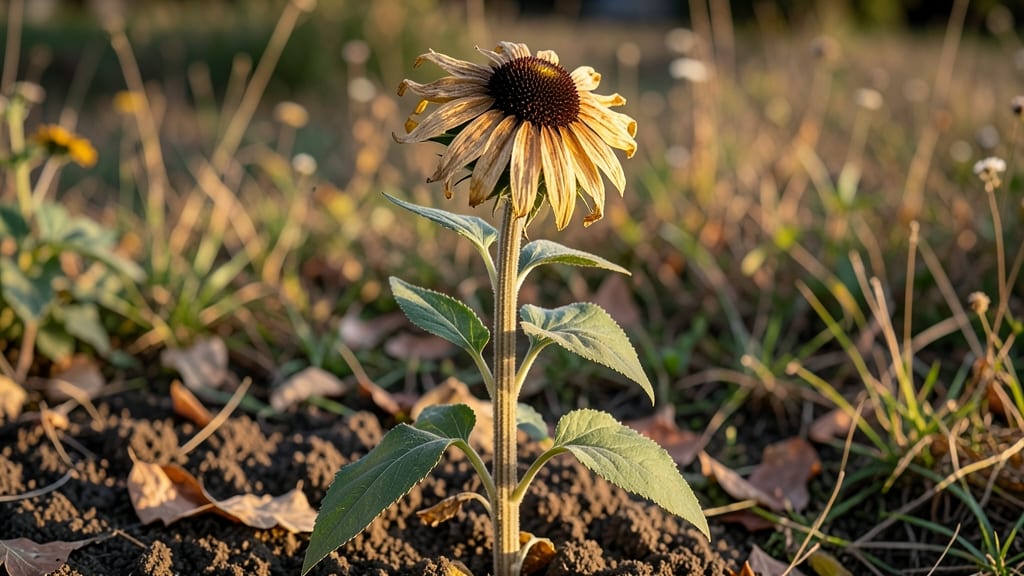
Harvesting black-eyed Susan seed heads is easier than you think—and it’s the secret to free plants next season. 🌻 These papery brown domes appear after the bright yellow blooms fade, marking the plant’s way of creating new life.
What starts as a wild, airy look becomes your ticket to a garden full of these cheerful perennials without spending a dime.
The best time to collect them is when they’ve fully dried but haven’t scattered seeds everywhere—usually late fall or early winter. Grab a pair of scissors or just twist the stems off; you’ll want to leave some on the plant for wildlife (birds and bees adore them) and winter interest.
Store the dried heads in a paper bag until you’re ready to sow or arrange them in dried bouquets.
You’ll end up with seeds that sprout reliably, producing those same bold yellow blooms in just a few weeks. The process takes less than 10 minutes and turns your garden into a self-sustaining source of free plants.
Plus, the seed heads add texture and movement to winter gardens that no other plant can match.
Works for both gardeners who want to expand their borders and those who love creating dried arrangements. Here’s how to do it without the mess—or the guilt of cutting back too soon.
📚 In This Guide
- What you need
- Instructions
- Tips and common mistakes
- Wrapping up and next steps
What you need
- ● Mature Black Eyed Susan plants (Rudbeckia hirta) – Ensure seed heads are fully brown and dry (late summer/fall).
- ● Sharp pruning shears or garden scissors – Clean, sterilized tools to avoid disease spread.
- ● Paper bags or breathable seed-saving envelopes – 1-2 bags per plant (8"x10" size works well).
- ● Labeling tags or masking tape + marker – To note variety/year (e.g., "Rudbeckia 'Goldsturm' – 2024").
- ○ Drying tray or clean cardboard – For seed head drying (optional but recommended).
- ● Glove – Protects hands from prickly stems.
- ● Fan or dehumidifier – Speeds up drying in humid climates.
- ● Seed cleaning tray or sieve – For separating seeds from chaff post-drying.
- ● Spray bottle with water – Light misting to check seed readiness (seeds should rattle when shaken).
Instructions for harvesting black eyed Susan seeds
Here’s how to collect seeds from your blooms without the fuss.
🌿 Step 1: Wait for Flowers to Fully Bloom and Seed Heads to Form
Let the flowers complete their natural cycle—wait until the petals have fallen away and the seed heads turn a dry, papery brown. This usually happens 6-8 weeks after flowering. The seed heads will feel light and brittle when gently squeezed, signaling they’re ready.
Don’t rush this step. Harvesting too early means immature seeds that won’t sprout. I like to check seed heads in the morning when they’re dry—this is when they’re easiest to handle.
✂️ Step 2: Cut Seed Heads with Clean Pruners
Use sharp pruners to snip the seed heads from the stems, leaving about 2-3 inches of stem attached. This prevents seeds from scattering while you process them. Work on a dry day to avoid dampness, which can encourage mold.
Place the cut seed heads in a paper bag or open container. The paper helps absorb any moisture and keeps seeds from getting wet. If you’re harvesting multiple plants, label each bag with the variety or date.
🪴 Step 3: Dry the Seed Heads Completely
Spread the seed heads out in a dry, well-ventilated area with indirect sunlight for 1-2 weeks. A garage, covered porch, or even a cardboard box with small holes works well. Turn them occasionally to ensure even drying.
You’ll know they’re ready when the seed heads crumble easily at the touch. If they feel damp or sticky, they need more time. Avoid direct sunlight—it can overheat the seeds and reduce viability.
🌱 Step 4: Extract Seeds from the Heads
Once fully dry, rub the seed heads between your hands or use a fork to gently break them apart. The seeds will fall out naturally. Sift the mixture through a fine mesh screen or strainer to separate seeds from chaff.
Store the clean seeds in a cool, dry place in a sealed envelope or jar. They’ll stay viable for 2-3 years if kept dry. Label them clearly—next year’s garden will thank you!
💧 Step 5: Optional: Stratify for Better Germination
For faster germination, mix the seeds with slightly damp sand or peat moss and refrigerate in a sealed bag for 2-4 weeks. This mimics winter conditions and tricks the seeds into thinking they’ve survived a cold spell, encouraging stronger growth.
After stratification, sow the seeds in well-draining soil and keep them moist until sprouts appear. This step isn’t required, but it can make a noticeable difference in seedling vigor.
Tips & tricks for perfect black eyed Susan seed harvesting
These simple strategies will help you collect the most viable seeds with minimal effort.
Timing Secret: The 6-8 week wait after flowering is non-negotiable for mature seeds. I’ve learned the hard way—harvesting too soon gives you seeds that won’t sprout. Check seed heads in morning light when they’re dryest; this is when they’ll be most brittle and ready to harvest. If you’re unsure, squeeze gently—if it crumbles easily, it’s ready.
Harvesting Technique: Those 2-3 inches of stem you leave attached serve a crucial purpose—they prevent seeds from scattering while you work. I recommend using clean pruners and working on dry days to avoid moisture that can cause mold. Place seed heads in paper bags immediately—they absorb any residual moisture better than plastic.
Drying Strategy: The 1-2 week drying period in indirect sunlight is where many people rush and get poor results. I’ve found that turning seed heads occasionally ensures even drying. If you’re short on time, you can speed up the process by placing them in a well-ventilated area with a small fan circulating air—but never use direct sunlight, as it can overheat and damage the seeds.
Storage Wisdom: Once you’ve extracted your seeds, store them in a cool, dry place in sealed containers. I’ve had success keeping them viable for up to 3 years, but check them annually—old seeds may need stratification to break dormancy. Label each container clearly with the variety and harvest date to avoid confusion when planting next season.
Pro Tips for Black Eyed Susan Seed Heads
- These simple strategies will help you collect the most viable seeds with minimal effort.
- Timing Secret: The 6-8 week wait after flowering is non-negotiable for mature seeds. I’ve learned the hard way—harves...
- Harvesting Technique: Those 2-3 inches of stem you leave attached serve a crucial purpose—they prevent seeds from sca...
Frequently asked questions
Got questions about harvesting Black Eyed Susan seed heads? You’re not alone! Here are some of the most common concerns—and their simple solutions—to help you get the most out of your seeds.
When is the best time to harvest Black Eyed Susan seed heads?
Harvest seed heads when they’ve turned golden-brown and the papery petals have dried but haven’t yet scattered. This usually happens in late summer to early fall, depending on your climate. Wait until the seed pods are crispy to the touch—no moisture!—to ensure viability.
How do I know if the seeds are still good for planting?
Fresh seeds should be plump, dark, and firm when rubbed between your fingers. If they’re shriveled, discolored, or crumbly, they’ve lost viability. For extra peace of mind, test a few by planting them in a small pot—if sprouts appear in 1–2 weeks, your batch is good to go!
Can I save seeds from Black Eyed Susans grown in containers?
Container-grown plants produce seeds just like their garden counterparts. Just ensure your pots are large enough (at least 12 inches deep) to support the plant’s growth. After flowering, secure a breathable bag over the seed heads to catch any stray seeds that might fall before you’re ready to harvest.
What should I do if my seed heads get rained on before harvesting?
Don’t panic! If seed heads get damp, let them dry indoors on a paper towel or mesh screen in a well-ventilated area (like a garage or shed). Avoid direct sunlight or heat sources, which can cause mold. Once fully dry—usually 3–5 days—they’re ready for storage.
Are there any alternatives if my Black Eyed Susans don’t produce seed heads?
If your plants bolt (send up flower stalks) too early or fail to set seed, try these tricks:
- Deadhead spent blooms to encourage a second round of flowers.
- Ensure they get full sun (6+ hours/day) and well-draining soil.
- Fertilize lightly with low-nitrogen, high-phosphorus food (like 5-10-10) to boost flowering.
- Consider purchasing seeds from a trusted supplier if natural production is unreliable.
Still stumped? Drop your question in the comments—we’re happy to help!
Wrapping up and next steps
Harvesting black-eyed Susan seed heads is a rewarding way to propagate these cheerful blooms or share them with fellow gardeners—without the fuss! With the right timing, tools, and a little patience, you’ll unlock a cost-effective, eco-friendly way to grow more of these sun-loving perennials.
Whether you’re a seasoned gardener or just starting out, these seeds offer a simple path to expanding your garden’s beauty.
Ready to take the next step? Grab your pruners, mark your calendar for late summer, and start collecting those dried seed heads. Your future garden—and maybe a neighbor’s—will thank you! 🌻