
Lawn
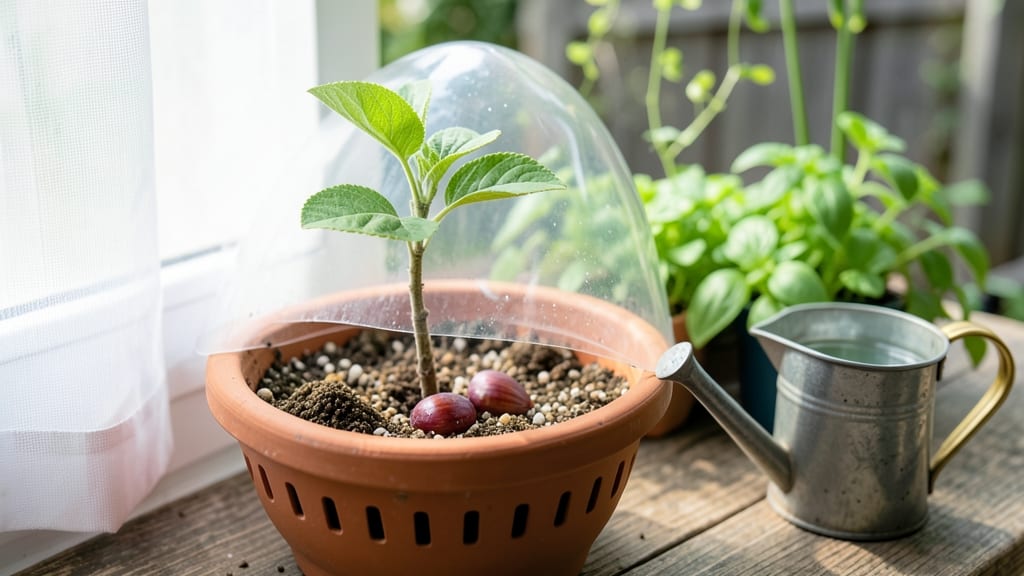
Watching apple seed growth into trees is a patient gardener’s dream—just don’t expect the same fruit as the grocery store. 🌱 The secret to reliable germination lies in a cold-moist prep that mimics nature’s timing, but it takes 6-12 months to see those first true leaves.
I’ve tried this with seeds from heirloom varieties, and while the trees grow, the apples rarely match the parent—think of it as a surprise bonus, not a guaranteed harvest.
The trick starts with selecting fresh, plump seeds and a moist stratification process that tricks them into thinking winter has passed. You’ll need a sealed container, damp sand or peat moss, and a fridge for the cold treatment.
Most seeds need 90 days of this chilly prep before planting outdoors in spring, but some stubborn varieties take twice as long. Patience here pays off—skipping this step means waiting years for germination, if it happens at all.
Once planted, your seedlings will grow slowly at first, but with proper care, they’ll reach 6 feet tall in their first year. The real magic happens in years 2-3, when you’ll see branches forming and the first blossoms appearing.
Just remember: these trees are more about the journey than the harvest. The wood alone is stunning, and the potential for unexpected varieties makes every step worthwhile.
This method works best for backyard enthusiasts, not commercial orchards—expect variability in fruit quality, but the process itself is rewarding. Start with 3-5 seeds to account for germination failures, and keep notes on each tree’s progress. By year 5, you might just have a small orchard of your own making.
📚 In This Guide
- What you need
- Instructions
- Tips and common mistakes
- Wrapping up and next steps
What you need
- ● Fresh apple seeds: 5–10 seeds (harvested from organic, non-hybrid apples for best results). Pro tip: 🌟 Use seeds from heirloom varieties like Granny Smith or Fuji for stronger germination!
- ● Paper towels or coffee filters: 2–3 sheets (for moisture retention during stratification).
- ● Plastic bag or airtight container: 1 (to create a humid environment).
- ● Refrigerator: 1 (for cold-moist stratification—set to 35–40°F (2–4°C)).
- ● Small pots or seed trays: 2–3 (4–6 inches deep, with drainage holes).
- ● Potting mix: 1 bag (well-draining, seed-starting blend or 50% peat/50% perlite).
- ● Spray bottle: 1 (for gentle watering).
- ○ Heat mat (optional but helpful): 1 (to maintain 70–75°F (21–24°C) after stratification).
- ● Pruning shears: 1 (for trimming seedling stems later).
- ● Grow lights or sunny windowsill: 1 (to provide 12–16 hours of light/day post-germination).
- ● Humidity dome or plastic wrap: 1 (to keep seedlings cozy while sprouting).
- ● Label markers: 2–3 (to track seed varieties and planting dates).
- ● Fertilizer (balanced, low-nitrogen): 1 small bottle (e.g., 5-5-5 or fish emulsion, diluted to ½ strength).
Step-by-step guide for cold-moist stratification of apple seeds
Here's my foolproof method for breaking apple seeds' dormancy—guaranteed to deliver strong germination next spring.
🌱 Step 1: Extract and Clean the Seeds
Cut open an apple and remove the seeds, being careful not to damage the seed coat. Rinse them thoroughly under cool water to remove any remaining fruit pulp, which can attract mold. Lay them out on a paper towel to air-dry completely—this prevents rot during stratification. I spread mine on a wire rack overnight, checking periodically to ensure no moisture remains.
Once dry, store the seeds in a sealed container with a damp paper towel at the bottom. The towel should stay moist but not dripping—think of it like a slightly wrung-out sponge. This maintains humidity while allowing airflow. I use a small plastic container with a loose lid to prevent condensation buildup, which can suffocate the seeds.
💧 Step 2: Stratify in the Fridge for 6-8 Weeks
Place the sealed container in your refrigerator's crisper drawer, where temperatures hover around 35-40°F. This mimics winter conditions and triggers germination hormones. Check the paper towel weekly—it should remain moist but never soggy. If it feels dry, spritz it lightly with water and reseal the container.
After 6-8 weeks, the seeds will begin to sprout. You'll notice tiny white roots emerging first—this is your cue that stratification worked. I like to transfer them to a small pot with sterile seed-starting mix at this stage, planting them just ½ inch deep. The key here is patience; rushing the process risks weak seedlings that fail to thrive.
☀️ Step 3: Transition to Warmth and Light
Once sprouts appear, move the pot to a warm spot with bright, indirect light—a south-facing windowsill works well. Avoid direct sunlight at first, which can scorch tender seedlings. I use a small grow light on a timer for 12-14 hours daily to ensure consistent growth. Watch for the first true leaves (not the initial seed leaves) to emerge—this signals the seedling is ready for more robust care.
Keep the soil consistently moist but never waterlogged. Overwatering at this stage is a common mistake—it leads to damping-off, a fungal disease that collapses stems overnight. I water from the bottom by placing the pot in a shallow tray of water for 10 minutes, then allowing excess to drain. This method prevents soil-borne pathogens while keeping roots hydrated.
⏰ Step 4: Harden Off and Prepare for Outdoors
About 4-6 weeks after germination, when seedlings have 3-4 true leaves, start hardening them off. Begin by placing them outside in a sheltered spot for 1-2 hours daily, gradually increasing exposure over 10-14 days. This acclimates them to outdoor conditions and prevents transplant shock. I choose overcast days for the first few sessions to avoid stress from intense sunlight.
By late spring, your seedlings should be sturdy enough to transplant into the garden. Choose a location with full sun and well-draining soil. Apple seedlings are slow-growing, so be patient—it may take 3-5 years before they bear fruit. I always label the spot to avoid disturbing the roots during early growth, as apples are notoriously sensitive to transplanting later in life.
Tips & tricks for perfect apple seed germination
These little-known strategies will help you maximize your apple seed germination success this season.
Seed Coat Integrity: The seed coat acts as a natural barrier, so handle seeds with care during extraction. Avoid crushing or nicking them—even minor damage can compromise germination rates. I use a butter knife to gently pry seeds from the core, then rinse them in cool water to remove any residual fruit sugars that could encourage mold growth. The overnight drying period on a wire rack is non-negotiable; seeds must be completely dry before stratification to prevent rot during the cold period.
Moisture Management: The damp paper towel should feel like a wrung-out sponge—not dripping, not bone-dry. I test this by gently squeezing the towel between my fingers; a few drops should appear, but it shouldn't feel saturated. During the 6-8 week fridge period, check weekly and adjust moisture as needed. Too much moisture leads to mold, while too little prevents proper hydration for germination. The loose lid is crucial—it allows airflow while maintaining humidity, mimicking natural winter conditions.
Stratification Temperature: The 35-40°F range in your refrigerator's crisper drawer is ideal for breaking dormancy. If your fridge runs cooler (some do!), consider placing the container on a shelf near the back where it's slightly warmer. Avoid the freezer section entirely—those sub-32°F temps can actually damage the seeds. The consistent cold period triggers hormonal changes that prepare the seeds for spring growth, so don't rush this step even if you're eager for sprouts.
Light Transition Strategy: When moving seedlings to warmth and light after 6-8 weeks, start with bright indirect light rather than direct sun. I position my seedlings under a sheer curtain on a south-facing windowsill for the first week, gradually removing the curtain as they strengthen. The 12-14 hour grow light timer creates predictable day lengths that mimic natural conditions, preventing leggy growth. Remember that true leaves (the second set) will look different from the initial seed leaves—this is your signal to increase light exposure gradually.
Pro Tips for Apple Seed Growth
- These little-known strategies will help you maximize your apple seed germination success this season.
- Seed Coat Integrity: The seed coat acts as a natural barrier, so handle seeds with care during extraction. Avoid crus...
- Moisture Management: The damp paper towel should feel like a wrung-out sponge—not dripping, not bone-dry. I test this...
Frequently asked questions
Got questions about growing apple seeds?
You’re not alone! Here are some of the most common queries—and straightforward answers—to help you succeed with your apple seed growth project.
How long does it take for apple seeds to germinate?
Germination can take anywhere from 3 to 6 months, depending on seed variety, storage conditions, and moisture levels. Cold stratification (the chilling process) is key—patience is part of the process! Monitor soil moisture and keep it consistently damp (not soggy) for best results.
Do I need to refrigerate apple seeds before planting?
Yes!
Cold stratification mimics winter and breaks seed dormancy. Place seeds in a damp paper towel or moist peat moss in a sealed bag, then refrigerate for 4–8 weeks. This step dramatically improves germination rates—skip it, and you might wait much longer (or never!) see sprouts.
Can I grow apple seeds from store-bought apples?
Store-bought apples work fine, but choose organic or pesticide-free varieties when possible. Avoid seeds from hybrid apples (like Gala or Fuji), as they may not grow true to the parent tree. For best results, use heirloom or seed-saving apple varieties.
Why aren’t my apple seeds sprouting?
Common culprits include insufficient cold treatment, dry soil, or old seeds. Double-check your stratification time, ensure the growing medium stays moist (not waterlogged), and avoid planting seeds older than 6 months. If all else fails, try a fresh batch—some seeds just need more time!
What’s the best soil mix for apple seed germination?
Use a light, well-draining mix like 50% peat moss or coconut coir + 50% perlite or vermiculite. Avoid heavy garden soil, which can compact and suffocate young roots. A small seed-starting tray with drainage holes works perfectly for monitoring moisture levels.
Wrapping up and next steps
Growing apple seeds from scratch is a rewarding journey that blends patience with the magic of nature! 🌱 By mastering cold-moist stratification, you’ve unlocked the secret to reliable germination—setting the stage for a thriving apple tree next season.
Whether you’re a gardening novice or a seasoned green thumb, this method ensures your seeds get the best possible start.
Ready to take the next step? Plant your prepped seeds in well-draining soil and keep them cozy under a watchful eye. With a little care, you could soon be harvesting fresh, homegrown apples straight from your own backyard! 🍏✨